Drill drivers are great to have in your toolbox. They’re compact, lightweight, and powerful enough to get the job done with ease. However, if you don’t use them properly or safely there’s a good chance that they can cause damage to your home or even injure you. That’s why I’ve put together this list of 6 tips for using your drill driver safely and effectively!
Table of Contents
- 1. Wear Safety Gear
- 2. Read the Manual
- 3. Secure Your Work
- 4. Choose the Right Bit
- 5. Set the Right Speed
- 6. Use the Right Clutch Setting
- Final words (Tips for Using Your Drill Driver Safely and Effectively) …
1. Wear Safety Gear
Wearing the right safety gear is an essential part of using your drill driver safely. A variety of tools, including saws, drills, and sanders, are used during woodworking, and they can all pose serious risks to your health and safety if not used properly. Wearing safety gear when using a drill driver is important for several reasons:
Eye protection – When drilling, bits can break, and flying debris can potentially cause eye injuries. Wearing safety glasses or a face shield can protect your eyes from flying debris.
Hearing protection – Drill drivers make a loud noise, so you should wear earplugs or muffs to reduce the risk of hearing damage.
Hand protection – Drill drivers can get hot with extended use, and the heat can potentially cause burns. Wearing gloves can help protect your hands from getting burnt.
Respiratory protection – Drilling can produce wood or metal dust, which can be harmful to inhale. Wearing a dust mask or respirator can help protect your respiratory system.
Clothing protection – Loose clothing or jewelry can get caught in the drill bit or the drill driver itself, causing injuries. Wearing fitted clothing and removing jewelry can help prevent this type of accident.
Foot and toe protection – When using a drill driver, it’s important to wear appropriate footwear to protect your feet and toes. Closed-toe shoes with non-slip soles are necessary to protect your feet from falling objects and sharp tools. Steel-toed boots are a common choice for workers in industrial settings, but they may not be necessary for woodworking. It’s important to choose shoes that fit properly and allow for freedom of movement. Avoid wearing sandals, flip-flops, or any other open-toe footwear, as they do not provide adequate protection.
Safety gear summary
Wearing the right safety gear is crucial when using a drill driver. Different tools, including saws, drills, and sanders, can pose serious risks to your health and safety when not used properly.
Protecting yourself from potential hazards by wearing appropriate safety gear is vital to ensure a safe and successful woodworking experience.

2. Read the Manual
If you’re new to using a drill driver, the manual will be your best friend. The first step is reading it thoroughly—don’t just skim over important details! If there are any parts of the manual that seem unclear or confusing, reach out to customer service for help.
The importance of reading the manual
Reading the manual when using a drill driver is crucial as it provides important information about how to correctly and safely operate the tool. The manual will often include details about the tool’s capabilities, how to properly set it up, and how to use it safely. By carefully reading the manual before using the tool, you will learn about the tool’s features and how to use them effectively. This will help you to avoid accidents and injuries that could result from improper use. Additionally, the manual may include important maintenance instructions, which will help you to keep your drill driver in good working condition and extend its lifespan. Overall, reading the manual before using a drill driver is an essential step to ensure that you use the tool safely and effectively.
Tips for understanding the manual
Understanding the manual for a drill driver is crucial to ensure safe and effective use of the tool. Here are some tips that can help you to understand the manual better:
Read it carefully – Read the manual from cover to cover, taking your time to understand the instructions and information.
Pay attention to the diagrams – Many manuals include diagrams and illustrations that can help you to understand how the tool works and how to use it correctly.
Use online resources – Many manufacturers offer online resources, such as videos and forums, that can help you to better understand the tool and how to use it.
Look for safety information – Pay close attention to any safety information included in the manual, as this will help you to avoid accidents and injuries while using the tool.
Take notes – If you are having trouble understanding a particular section of the manual, take notes and try to break it down into simpler terms.
By following these tips, you can better understand the manual for your drill driver and use the tool safely and effectively.
Links to resources about manuals
Finding manuals for drill drivers is important, so that users know how to properly operate and maintain their tools. Luckily, there are several online resources available—in this section we will explore some of the most helpful ones:
All-Guides – This website offers a catalog of various brands and devices. It is especially helpful for those who have lost the physical manual that came with their drill driver or for those who prefer to have an electronic copy for easy access.
Manuals Plus – Manuals Plus is a website that provides a collection of user manuals, instruction guides, and related information. Users can search for their tool using the search function at the bottom of the page.
Tool Service Net – This is the official site for parts and service of well-known tool brands, including DEWALT, Craftsman, Black + Decker, Bostitch, and Porter Cable. You can also access schematics and manuals here as well as locate service centers.
In conclusion, there are various websites available that provide user manuals. However, it’s also worth noting that you can often find manuals on the manufacturer’s websites themselves. All you need to do is a simple Google search with the product name and the words “user manual” or “instruction guide”, and you should be able to find the relevant manuals easily.

3. Secure Your Work
Securing your work when using a drill driver is crucial for safety and accuracy. If workpieces are not properly secured while drilling, they can spin or move causing injury.
By using clamps, a vise, or a workbench, you can ensure that your workpiece stays in place while you’re drilling. This allows you to be more accurate and reduces the risk of accidents.
Additionally, securing your workpiece allows you to focus on controlling the drill driver, rather than worrying about keeping the workpiece steady. Overall, securing your workpiece is an essential step in using a drill driver safely and effectively.
Tips on how to secure your work
Ensuring the safety of yourself and your workspace is vital when working on a woodworking or DIY project. To achieve this, it’s essential to secure your workpiece before using a drill driver or any other power tool. Fortunately, there are multiple methods available to ensure your workpiece stays in place while you work on it. By following these tips, you can confidently and safely work, knowing that your workpiece is stable and secure:
Use clamps – Clamps are versatile tools for securing workpieces, and they come in a variety of sizes and shapes. They can be used to hold your workpiece in place while you drill or drive screws into wood, metal, or plastic. When choosing your clamps, make sure that they are appropriate for the size and shape of your workpiece.
Use a vise – A vise is another great tool for holding your workpiece securely in place. It’s particularly useful for smaller workpieces that can’t be clamped effectively. Make sure to adjust the jaws of the vise so that it grips the workpiece firmly without damaging it.
Use a workbench – If you don’t have a vise, you can use a workbench to hold your workpiece in place. Make sure the bench is sturdy and level, and use clamps to secure the workpiece to the bench.
By following these tips, you can ensure that your workpiece is properly secured and that you can drill safely and effectively. Always remember to prioritize safety when working with power tools and take the time to properly secure your workpiece to prevent accidents.
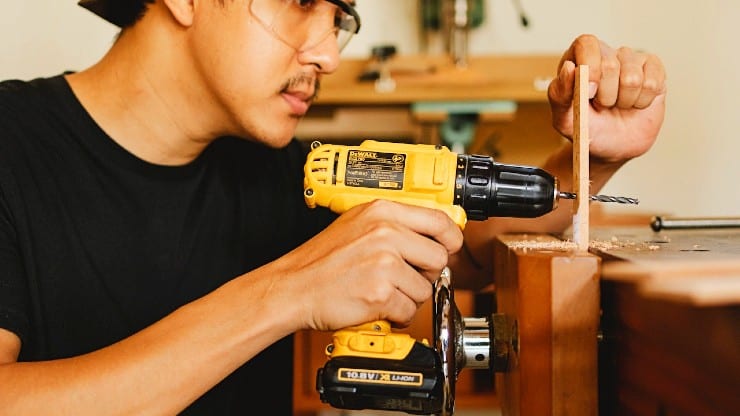
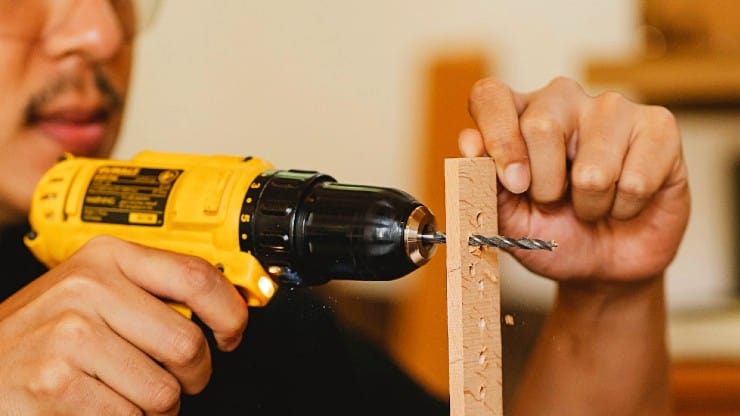
4. Choose the Right Bit
Choosing the right bit for a drill driver is essential for a successful project. When selecting a bit, several factors need to be considered, such as the type of material being drilled, the size and shape of the hole needed, and the goal of the project. Choosing the wrong bit can result in damage to the workpiece, the bit, or the drill driver itself, and can also create safety hazards.
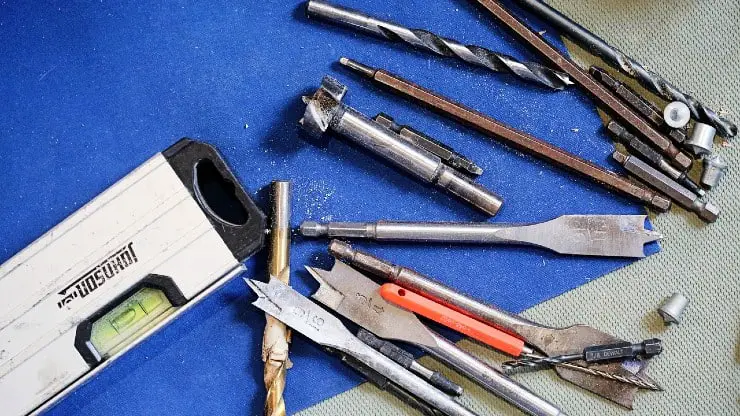
Different types of bits for the drill driver
There are many different types of bits for a drill driver, each designed for specific materials and drilling tasks. Here are some common types of bits and their uses:
Twist bits – These are the most common type of bits and are used for drilling into wood, plastic, and metal. They have sharp tips and flutes that help remove chips and debris from the hole.
Brad-point bits – These are similar to twist bits but have sharper, more precise points. They are used for drilling into wood and other materials where clean, accurate holes are needed.
Spade bits – These bits have flat, paddle-shaped tips and are used for drilling large holes.
Forstner bits – These bits are used for drilling flat-bottomed holes in wood and are ideal for fine woodworking.
Masonry bits – These bits are designed for drilling into concrete, brick, and other masonry materials. They have carbide tips that can withstand hard materials.
Hole saws – A hole saw is a type of cylindrical cutting tool that can be attached to a drill driver to create holes in materials such as wood, plastic, metal, and more.
Screwdriver bits – These are used for driving screws and come in many different shapes and sizes to fit different types of screws.
Tips for choosing the right bit for a drill driver
Choosing the right bit for a drill driver is essential for the success of any drilling project. Here are some tips for choosing the right bit:
#1. Determine the hole size –The size of the hole you are drilling will determine the size of the bit that is best suited to your needs.
#2. Choose the right type of bit – There are many different types of bits, each designed for specific tasks. Make sure to choose the right type of bit for the job. For example, a spade bit is ideal for drilling large holes in wood, while a Forstner bit is better for drilling flat-bottomed holes.
#3. Consider the depth of the hole – If you need to drill a deep hole, you may need a bit with a longer shaft to reach the desired depth.
#4. Check the drill driver specifications – Make sure to choose a bit that is compatible with the drill driver you’ll be using. Check the specifications of the drill driver to ensure that the bit you choose is the right size and type for the tool.
#5. Choose a high-quality bit – Investing in a high-quality bit can save you time and money in the long run. High-quality bits are less likely to break or wear out quickly, which can save you from having to replace them frequently.
By following these tips, you can choose the right bit for your drill driver and ensure a successful drilling project.
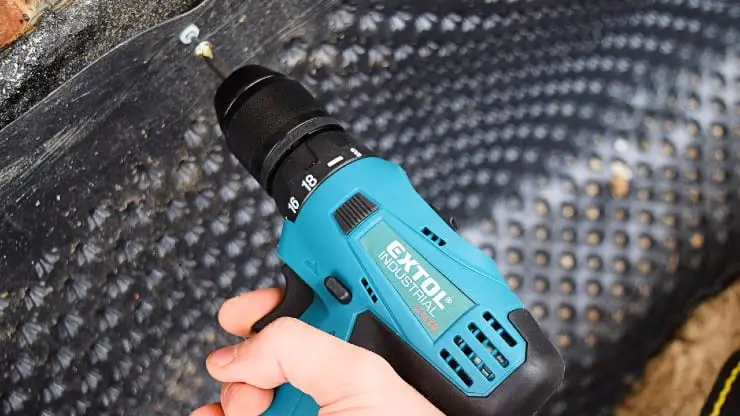
5. Set the Right Speed
If you’re new to woodworking or DIY projects, it’s important that you know how to set a drill driver at the correct speed. Doing so will prevent overheating of the bit and ensure quality holes in your workpieces.
Thankfully, many drill drivers come with different speed settings, enabling you to adjust the speed to suit the material and task at hand. You may even find some drill drivers that offer a variable speed feature, which provides even greater control.
Tips for setting the right speed for your drill driver
Here are some tips on choosing the right speed for your project:
#1. Consider the material – Different materials require different speeds. Harder materials like metals require slower speeds, while softer materials like wood can be drilled at higher speeds.
#2. Check the drill bit – The manufacturer of the drill bit will often provide a recommended speed range. Make sure to check the bit specifications and set the speed accordingly.
#3. Determine the hole size – The size of the hole you plan to drill can affect the speed you should use. Smaller holes require higher speeds, while larger holes require slower speeds.
#4. Check the drill driver specifications – Different drill drivers have different speed settings. Make sure to check the specifications of your drill driver and set the speed accordingly.
#5. Start slow – When starting a drilling project, it’s always best to start at a slower speed and gradually increase the speed as needed.
#6. Use a variable-speed drill driver –If you plan to drill a variety of materials, consider using a variable-speed drill driver. This type of tool allows you to adjust the speed based on the material and drilling task at hand—providing more precise control over your projects
By choosing the right speed for your project, you can ensure a successful and safe drilling experience.
6. Use the Right Clutch Setting
The clutch on a drill driver is a mechanism that controls the amount of torque that the drill applies when driving a screw or fastener. It is important to set the clutch properly to avoid overdriving the screw and damaging the material or the screw itself. Here’s how to set the clutch on your drill driver:
Step #1 – Determine the screw size: The first step is to determine the size of the screw you will be using. This information is usually printed on the packaging.
Step #2 – Set the clutch: Look for the clutch ring located behind the chuck on your drill driver. The clutch ring has numbers or symbols that indicate the torque settings. Turn the clutch ring to the appropriate setting for the screw size. For example, if you are using a small screw, set the clutch to a lower number, while larger screws require a higher number.
Step #3 – Test the clutch: Once you have set the clutch, test it by driving the screw into a scrap piece of material. If the clutch is set correctly, the drill driver will stop turning once the screw is fully seated. If the clutch is set too high, the drill will continue to turn, overdriving the screw. If the clutch is set too low, the drill may not be able to drive the screw all the way in.
Step #4 – Adjust the clutch: If the clutch is not set correctly, adjust it accordingly and test it again until you achieve the desired result.
If you set the clutch on your drill driver correctly, you can avoid damaging screws and materials—as well as avoiding damage to the drill itself.
Tips for setting the clutch of a drill driver
Here are some tips for setting the clutch of a drill driver:
Tip #1 – Understand the clutch setting: The clutch setting determines the torque output of the drill driver. It is important to understand how the clutch works and how to use it properly to avoid damaging materials or overdriving screws.
Tip #2 – Start with a lower setting: When adjusting the clutch, start with a lower setting and slowly increase the torque until you reach the desired level. This will help ensure that you don’t overdrive the screw or damage the material.
Tip #3 – Test the clutch setting: Once you have set the clutch, test it by driving a screw into a scrap piece of material. If the clutch is set correctly, the drill driver will stop turning once the screw is fully seated. If the clutch is set too high, the drill will continue to turn, potentially stripping the screw or damaging the material. If the clutch is set too low, the drill may not be able to drive the screw all the way in.
Tip #4 – Adjust the clutch as needed: If the clutch is not set correctly, adjust it accordingly and test it again until you achieve the desired result.
Tip #5 – Set the clutch in the middle: If your drill driver has multiple clutch settings, it is often best to set it in the middle range. This will give you a good starting point, and you can adjust it up or down as needed.
By following these tips, you can set the clutch of your drill driver properly and avoid damaging materials or overdriving screws.
Final words (Tips for Using Your Drill Driver Safely and Effectively) …
Overall, the drill driver is a great tool that can help you get things done quickly and efficiently. But it’s also important to use your drill driver safely and effectively so that you don’t hurt yourself or damage your work surface.
If this guide has been helpful in teaching you how to use your drill driver safely and effectively, please share it with others who may benefit from its information!
Did you enjoy reading this article? If so, you might be interested in visiting my Pinterest profile. It contains pins related to DIY & Crafts, Woodworking, Tools, Projects, Hardware, and related topics.
You can also learn more about how drill drivers work by reading some other blog posts on this site:
