
Interested in a woodworking project such as a wooden bookcase? Would you like to learn more about all types of power and hand tools? Have you been thinking about refinishing a room, attic, or basement? Join me here to explore woodworking, tools, and related topics.
So, why am I writing this? Actually, it’s because of a longstanding interest I have in woodworking as a hobby. I’ve been putting things together and working on projects since I was a young child. I hope to share some of the enthusiasm I have for this with you, the reader.
What is Woodworking Street ?
If I can help others to avoid some of the many mistakes I have made, I feel that this work will be a great success. This blog covers many areas, such as wood selection, cutting, measurement, finishing, etc. So, I use it to share tips, tricks, and information related to woodworking.
Why is it called “Woodworking Street” ?
You may be asking, Why the name “Woodworking Street” ? Actually, I’m not sure. It does seem to have something to do with “spreading woodworking information”. That particular domain name was unused, so I opted to buy it. As far as drawbacks, it’s long and takes up a lot of space in a logo or heading. As far as positive factors, it’s a “catchy” name and definitely tells the reader that the site has to do with woodworking.
What projects have you made?
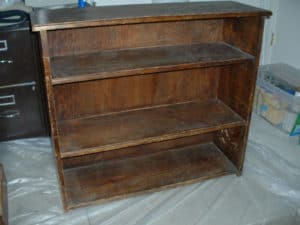
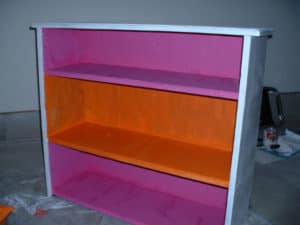
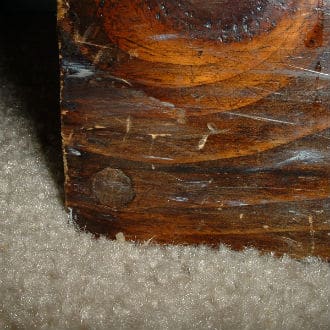
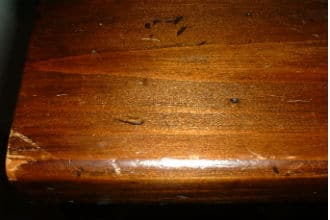
One of my first projects was a simple wooden bookcase. This was made when I was a young teenager. It had a plywood back to add rigidity. Also, the front sides of the shelves were routed. In addition, I used white glue and screws to attach the pieces. The screws were countersunk and I used mahogany dowels to plug up the screw holes. The dowels were cut down with a fine hand saw and then sanded flush to the surface of the wood. Below are some pictures of the wooden bookcase. The initial finish for the wooden bookcase was a brown stain. Later, it was painted and is still in use today.
Another project I completed as a teenager was a cabinet unit. This used wooden planks that were glued together. These were then put through a wood surfacer / planer so that the wood was flat and uniform. At the front was a molding piece made by routing a board. It was attached to the cabinet with wood screws. Again, the screws were countersunk with plug covers on the holes.
One thing I recall is this: I had to be very careful with the wood glue I was putting in the screw holes. It had a tendency to spill out when the plugs were inserted. You then had to wipe the excess glue off with water. When the glue was dry, you needed to sand the wood down so that no trace of the glue remained. If you didn’t do this, the stain wouldn’t be absorbed because of the glue on the wood surface.
Another problem was oversanding. I finished sanding with 500 grit sandpaper (Super Fine). This was done since it made the wood smoother than I could get with 220 Grit (Fine). However, the stain was not absorbed by the wood fully. Even though the absorption was reduced, the finish was still acceptable.
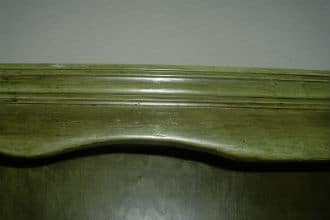
As a child assisted in the construction of a bookcase
As a child, I assisted in the construction of another wooden bookcase. The top molding of the bookcase had a curved cut made by a jigsaw. Also, it had a green glazed finish.
Also, I helped to refinish the attic when I was younger. In addition, I helped construct storage shelving for the garage. By working with these things, I learned a great deal about woodworking, cutting wood, measurement, and other important items. Knowledge gained at that point has helped me as I looked at other projects.
How did I choose the pictures for the website?
There are many pictures on these pages. Some say, A picture is worth 1000 words. However, are there stories behind the pictures used on this website? Here’s some information:
One of my more popular posts is: How To Clean Pallet Wood For Indoor Use. In it, I describe that you need to be careful of the chemicals used to treat pallet wood. Also, the wood can be infested with insects, larvae, etc. Yuck!
Looking for pictures to illustrate the article, I found the perfect one on the pixabay.com free image site! It shows a man in a HAZMAT suit washing down pallets. I’ll show the image below:

Most of the images on pixabay.com are free for commercial use and no attribution is required. So, it’s a popular source of images for websites.
Another good one
The Can I Buy Exotic Woods Online? post has a spectacular picture of the sun rising over the Earth in space. I was also able to get that one from pixabay.com free for commercial use with no attribution.
I’ve always been interested in space, and have been following the space program since I was a child. So, it was a natural choice for the article. It seemed to go along with subject matter: “Far out” Exotic Wood!

Here’s another interesting one
This one is from the Can I use a T-Shank Blade in a U-Shank Jigsaw post. As you may know, older Jigsaws used U shank blades with a set screw to lock the blade in place.
The picture seems like something out of King Arthur and Medieval times, It shows the top of an ornate sword. The blade and handle forms a “T” shape. This was a natural choice for an article about T-Shank blades!

One More!
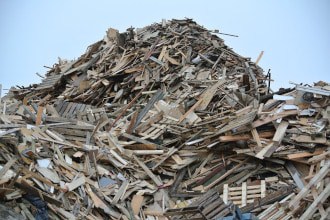
Another image that fits the article well can be found in the Is Wood Recyclable or Garbage post. Once again, I obtained this from pixabay.com free for commercial use with no attribution required. It shows a mound of broken pallets, much like what you would expect to see at a junkyard!
DIY Furniture Renovation
Some of my more recent projects involve restoration of pieces obtained from the thrift store. For example, the How To Restore A Freestanding Coat Rack post shows the steps I followed to fix up this home decor item .
It was surprising to see how many wooden pieces I could find in the thrift store!. With this coat rack project, the final painted finish was similar in color to the original finish.
This is a practical wooden piece that can be used to hold coats and contribute to a room’s appearance.
Conclusion
I guess you can say that I’ve always liked to build things, put things together. Perhaps, that’s why I created this website!
See my boards on Pinterest.