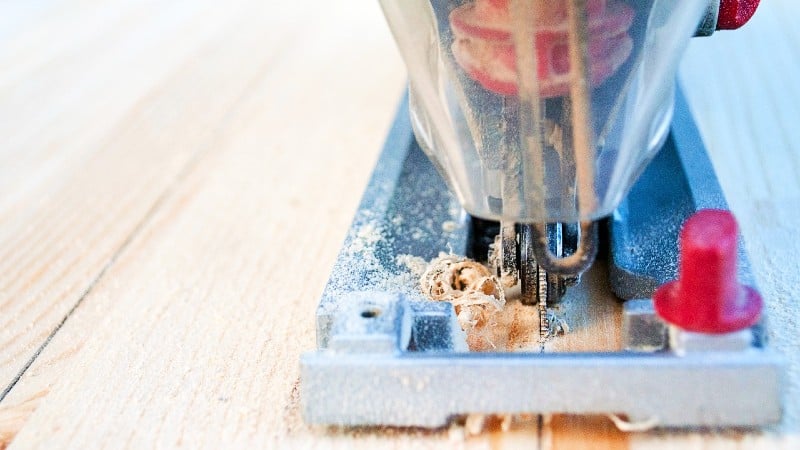
If you have a jigsaw and you need to cut a curve in wood, you’re in luck. Jigsaws are one of the most versatile power tools you can own. That’s because they can cut curves, circles, and irregular shapes in thin wood, thick wood, and even metal.
Not sure how to use a jigsaw? No problem! In this post, we’ll take you through the basics of using a jigsaw to get the job done.
Do you want to find out more? I wrote another article called: What is a Jigsaw?
Step 1: Mark the curve (How To Cut A Curve In Wood With A Jigsaw)
When you’re using a jigsaw to cut a curve in wood, it’s important to mark the curve first. You can use a pencil, chalk, or some other implement to mark the curve on your wood. Make sure that your mark is as accurate as possible so that you’re cutting along the right line!. If you want to be precise, use a template or French Curve.

Step 2: Clamp your workpiece securely
There are a few steps to cut a curve with a jigsaw, and the first is to secure your workpiece so it won’t move during cutting.
To do this, you can use clamps or a vise—just make sure that the clamps aren’t placed directly over the cut line. The last thing you want to do is interfere with the jigsaw blade!
On top of having good clamps in place, it’s also important to make sure that your surface is very stable. You won’t be able to make an accurate curved cut with a jigsaw on an unstable workspace, so find a sturdy table or bench before starting your project.
Step 3: Start your cut with the blade on the waste side of your cut line
The “waste side” of your cut line is the non-essential, extra wood that will be discarded once you have finished making the cut. You should aim to position the blade just before the edge of your workpiece on the waste side of the cut line.
If you start your cut with the blade on the waste side of your cut line, you’ll be less likely to accidentally veer into the section that you want to keep. Remember: You can always adjust to correct for a small mistake, but it’s much harder to fix something if you accidentally cut off a whole section of what you want to keep.
When using a jigsaw, it’s important to remember that you’re dealing with a blade that can make very small, detailed cuts, but also has the ability to make wide, sweeping curves. It’s versatile and, when used properly, can cut just about anything you need it to.
Step 4: Cut slowly and steadily, following your cutline.
Turn your saw on and wait for it to reach full speed before proceeding. When you’re ready, start making your cut. Be sure to go slow and steady; do not force or rush through the process. As you’re working, keep an eye on how well the blade is following your cut line. If it starts to wander off course, don’t panic! You can simply turn off your jigsaw, back up a little bit, and start again.
Throughout this step, keep the jigsaw level with your work surface so that it doesn’t tilt upwards or downwards as you cut into your work material; this can cause kickback. I wrote another article about Dangerous Woodworking Tools. Finally, don’t allow your workpiece to bow up against (or even become caught by) the blade! This can also result in kickback.
If you’re making multiple cuts along the same line, like when you’re cutting out a square or rectangle, it can be helpful to take your time to make sure all of your pieces will fit together perfectly. You can also use sandpaper after each cut to smooth out rough edges and clean up any imperfections.

Step 5: Let the blade do its job.
We know, we know—this one sounds obvious, but sometimes, when you’re concentrating on getting that perfect cut, it can be easy to forget. So remember: let the blade do its job.
You don’t need to hold the jigsaw so tightly that you lose feeling in your hands—just make sure you have enough pressure on it to keep it steady and within your control, but don’t push too hard! It’s like when people who are learning to drive are taught not to press down too hard on the gas pedal: if you do, the car will go faster than you want it to, and then what? You don’t want that jigsaw blade slicing through anything except your carefully-plotted line!
Another important thing to remember is that your cut will not be perfect. That’s okay—that’s where sandpaper comes in! Use a fine-grit sandpaper to smooth out your curve and get everything looking great!
Tips for cutting curves in wood with a jigsaw
Whether you’re making your own furniture, or just trying to get a leg up on your next art project, cutting a curve in wood can be pretty intimidating.
But it doesn’t have to be!
I’ve assembled some helpful tips that will make it so that you can cut a curve in wood with a jigsaw. You’ll be amazed at how easy it is:
Tip 1: Use a sharp blade.
The key to cutting a curve in wood with a jigsaw is using a sharp blade.
You can’t just grab any old blade you have lying around, though—you need to use the right kind of blade for the type of cut you’re making. You might be tempted to try and use whatever you can find or to buy the cheapest blades possible, but this will only lead to frustration when your cuts don’t turn out right!
I’m glad there are so many different types of blades available today (and they’re all relatively inexpensive), so you can get just what you need. Just make sure the blade is sharp enough for your project’s needs before starting up your saw—it’ll make all the difference in how your cut turns out! For more information, see my article about the TPI of Jigsaw blades.
Tip 2: Safety First!
When it comes to power tools, there are always plenty of safety precautions to keep in mind. And a jigsaw is no exception:
Wear goggles or eye protection – No matter what you’re doing, your eye protection is a priority—but it’s especially important when you’re using a jigsaw. Even if you’re just making a few small cuts in a piece of wood, there’s no telling when a chipped piece of wood or splinter will fly off and hit you in the eye.
So before you get started with your jigsaw, make sure you have a pair of goggles that fit snugly over your face, and that they have side shields to keep any debris from hitting you from the side.
Wear ear protection – The sound of a jigsaw can get really loud, so it’s important to protect your ears while you’re using it. You could either wear earmuffs or earplugs, depending on your preference—just make sure that you’ve got something on!
Wear a face mask or respirator so that you don’t breathe in sawdust – Before you take your jigsaw to the wood, you have to make sure you’re wearing a face mask or respirator so that you don’t breathe in sawdust. This can cause respiratory issues and irritation, and can even be more dangerous if you have an allergy to certain types of wood.
Avoid wearing loose clothes – It is important to wear clothing that isn’t at risk of getting caught in the saw.

Clothes should be long enough to cover the skin – When you’re cutting a curve in wood with a jigsaw, it’s important to make sure your clothes are long enough to cover any skin that may be exposed.
This is because when you cut curves in wood with a jigsaw, sometimes the sawdust flies up and gets into your clothes. If your clothes don’t cover your skin, it can sometimes cause irritation.
In addition to wearing long clothes, you should also wear gloves. This will help protect your hands from getting scraped or cut by the sharp blade of the jigsaw.
Avoid wearing jewelry – Before you begin, make sure you remove all jewelry that could get caught in the saw or pulled off by the wood. This includes watches, rings, and bracelets.
Avoid long hair – Make sure that your hair is tied back to keep it out of harm’s way. This means long facial hair or beards should be kept under control.
Use non-slip shoes – If you’re planning on using your jigsaw, chances are you’ll be working in the garage or the woodshop, and the floors in those places can get pretty slick. The last thing you want is to accidentally step on some sawdust and fall flat on your face. So before you start your project, make sure to put on some non-slip shoes so you don’t end up slipping and sliding around while trying to work!
Use steel-toed shoes – If you’re working with wood and power tools, there’s always a chance that something could go wrong—and something big could come down on your foot. Steel-toed shoes will protect your feet from falling objects, so even if something does go awry during your project, at least one part of your body will be safe!
Make sure your workspace is safe and well-lit – Whether you’re using a jigsaw or a band saw, cutting into wood can be dangerous. To make sure you’re operating in the safest possible space, make sure you have sufficient lighting in your work area and that you have cleared out any obstacles (including children and pets). That way, you’ll be able to focus on the task at hand, rather than worrying about whether your kids are going to trip over a power cord.
Tip 3: Practice making cuts with the jigsaw using scrap wood
Before you dive right in and start attacking those cabinet doors and desks, it’s a good idea to practice on some scrap wood. This will help you get a feel for how the jigsaw works so that when you do get around to cutting into the real thing, you’ll be confident in your ability to make even the most tricky of cuts.
Make sure you have plenty of scrap wood on hand before getting started—you’ll want to use as much as you can for practicing, and then a bit more for good measure.
Start out by drawing a few curves of various sizes on some scrap wood. Practice your cuts on these curves by trying different speeds, as well as different blade sizes and types. Once you feel confident in your ability to maneuver around even some of the trickier angles and shapes, it’s time to cut into that real wood!
Tip 4: Turn off the orbital setting when cutting sharp curves
What does orbital action mean? In regular jigsaws, the blade moves up and down. But in jigsaws with an orbital setting, the blade also moves side to side as it cuts. This helps you cut through wood faster. However, the cut can be rougher than you’d like.
Always leave orbital OFF (the blade will move straight up and down) when cutting sharp curves cuts in wood.
Tip 5: Choose the proper blade speed
When you need to cut a curve in wood with a jigsaw, you’ll want to choose the proper blade speed. Your blade should move at high speeds when cutting through softwoods, such as pine. If you are cutting harder woods, you will want to use a medium-speed setting. For materials such as plastics or metal, you should use a low-speed setting. For more information, see another article I wrote about Jigsaw Blades.

Final Words: How To Cut A Curve In Wood With A Jigsaw …
Learning how to use a jigsaw is one of those things that is easy to do but hard to perfect.
While the jigsaw does have some limitations, one of the great uses for this tool is cutting curves.
Jigsaws are also known as saber or scroll saws, and they’re great tools for making curved cuts in wood and other materials. In particular, you can cut circles with a jigsaw.
Using a jigsaw is one of the fastest and easiest ways to cut curves and other shapes in wood. It’s also one of the least expensive. Making a template for a complex shape will give you the most bang for your buck, as it’ll speed up future projects when you can just lay down the template and start cutting. Once you know how to use your jigsaw in this way, there won’t be many things you can’t cut in wood.
Did you enjoy this article? If so, you might also enjoy my Pinterest profile. It contains pin images about Woodworking, Tools, Projects, DIY & Craft, and many other topics!


