Are you a DIYer? Or are you new to woodworking and need a few essential tools for your woodworking projects? This post will help to steer you in the right direction. Making the right tool choices can make your DIY projects more enjoyable and less frustrating.
DIYers and those new to woodworking are often overwhelmed by the sheer number of tools they have to choose from. However, if you’re looking for a way to make your projects easier and more enjoyable, these tools will help you get started:
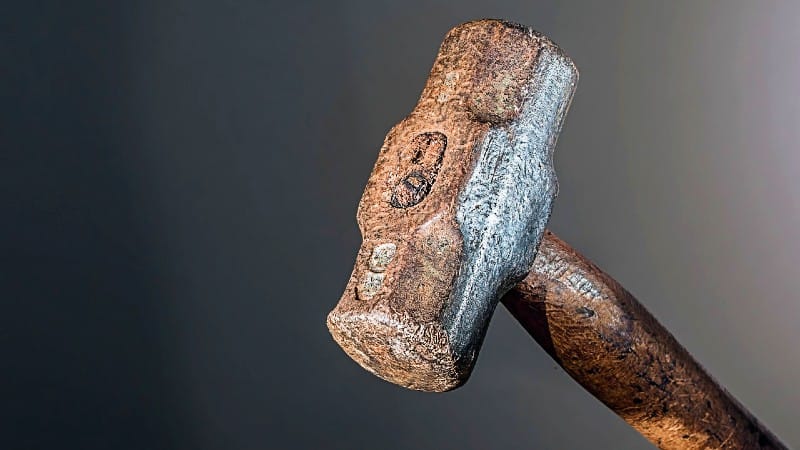
Hammer
When you need to drive a nail, remove one, break something, or bend something, you’ll need a hammer.
There are many different types of hammers to use when you’re DIYing around the house. The kind of hammer that’s right for your project will depend on the type of wood you’re working with and the size of the nails or screws you want to pound in. Here are some options:
Claw hammer – A claw hammer is a mainstay of every toolkit, and it’s easy to see why. The curved head is designed to make it easier to remove nails from your workpiece, and the flat face of the head helps with pounding in nails. When you’re starting out with DIY projects, the hammer you’ll use most often will be a claw hammer.
Tack hammer – This hammer is specially designed to drive tacks into wood. Tacks are small nails used to hold pieces of furniture or upholstery together.
Ball-pein hammer – This hammer has a flat face and a rounded end. The hammer’s rounded face is used for shaping metal, but its flattened end can be employed to drive nails into wood.
Sledgehammer – The sledgehammer is generally used to break up concrete, but it can also be used for other purposes. If you’re looking for a tool that will help you demolish walls or floors, then a sledgehammer is the right choice for you.
Framing Hammer – Framing hammers are useful for many things: driving nails into hardwood floors or walls, removing stubborn nails that might be stuck in place—and much more. Some large framing hammers can weigh over 2 pounds!
Hammers are made from many different materials, including wood and metal. The most common material for a hammer’s head is steel, which is strong enough to withstand repeated blows without breaking. The handles can be made out of wood (usually hickory), fiberglass-reinforced plastic (FRP), or a metal such as steel.
So there you have it! The hammer. A tool that’s been around for centuries, and will surely continue to be used for many more. It may seem like a simple tool, but there are so many uses for this versatile little guy. I wrote another article about the tools needed for a workbench.
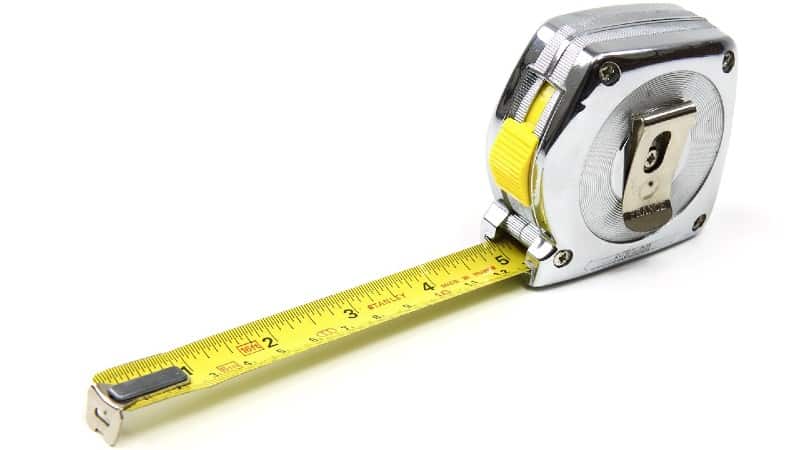
Tape measure
The tape measure is one of the most essential tools in a DIYer’s toolkit, and it’s one that many people don’t realize can be used for so many different things. A good tape measure will last you a long time, so it’s worth investing in one that is durable and well-built.
A tape measure is an instrument used by carpenters and builders to measure length. Generally speaking, they are made up of two parts: a metal casing with a retractable blade inside. The casing houses the blade when not in use; when pulled out of its case horizontally (like a sword), it becomes rigid enough for measuring purposes (you should never try pulling out your tape measure vertically!).
Tape measures aren’t just a tool for measuring the length of your pants. You can use them to measure, well, pretty much anything. As an example, you can use it to measure the length of wood pieces so you know how many boards you need to purchase at the lumber yard.
If you’re going to be doing a lot of DIY projects, it’s worth having a quality tape measure in your tool kit. They come in all shapes and sizes.
A good tape measure will have a strong locking mechanism that holds its position when released, so you don’t have to worry about it retracting on its own mid-measurement. It should also have an easy-to-read scale so you aren’t squinting or holding it at an awkward angle as you try to determine how long something is. In addition, make sure it’s durable enough for the conditions where you’ll be working: some tapes are better suited for wet conditions than others.
The tape measure is one of the most basic tools in any toolkit, but it’s also one of the most important. It’s used to take measurements and mark out your cuts before you start cutting with any other tool. It comes in many different sizes (and even colors!) so make sure you get one that works best for your needs.
Finally, you’ll want a tape measure that’s long enough to reach all the way from one end of your project to another—but not so large or bulky as to be difficult for you carry around and store in your toolbox when not in use.
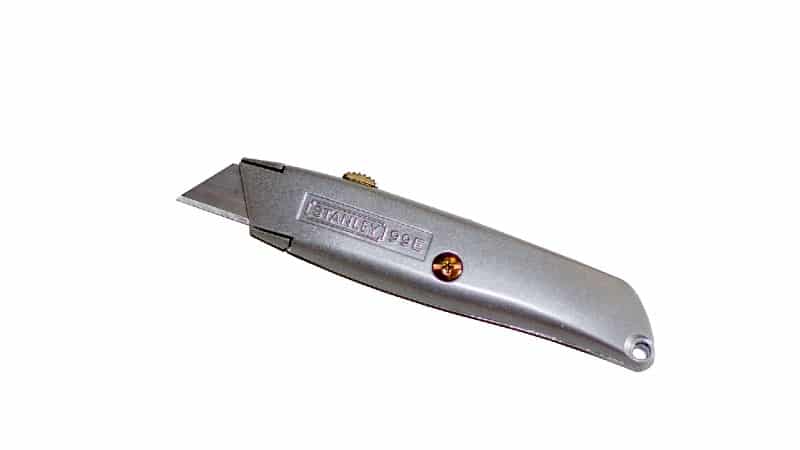
Utility knife and blades
The utility knife is one of the most versatile tools you can have in your toolkit, and it’s great for so many different DIY projects. It’s also incredibly cheap, which means there’s no excuse not to pick up a utility knife today!
A utility knife is a versatile tool that can be used for a variety of tasks, from cutting carpeting to trimming wood. If you’re new to DIY and woodworking, it’s important to know what features to look for in a utility knife and how to use it safely.
So what are the things you should look for when purchasing a utility knife? Well, first of all: durability! You don’t want something that’s going to break after just a few uses. Next: comfort! A good utility knife should feel comfortable in your hand—you’ll be using it often enough that if it’s uncomfortable, it’s going to start feeling like an annoyance. Thirdly: safety! It goes without saying that safety should be a priority whenever you’re working with dangerous tools. Finally: sharpness! We don’t want any dull blades here!
Here are some tips on using a utility knife:
1) Hold the handle with your dominant hand and angle the blade between 30 and 45 degrees
2) Place your free hand out of the path of the blade and away from the blade as you cut.
3) Cut into the material then pull back towards yourself
When you’re planning a DIY project, make sure you have the right tools for the job—a utility knife is one of those essential items.
Level
A level is a tool that’s essential for any DIY wood project. Whether you’re just starting out or you’re a seasoned pro, you’ll want to make sure that your pieces are all even with each other. A level is one of the most important tools in woodworking because it allows you to check whether your piece is flat or if it’s leaning in one direction or another.
Levels come in many different shapes and sizes, but the older ones work in basically the same way—they have a bubble inside that moves around as you tilt them in different directions. If the bubble stays centered in the middle of the tube, then you know your piece is perfectly level!
But the most modern and effective way to do this is by using a laser level: A laser level is a tool that uses a laser beam to project a line onto surfaces. The line is highly accurate and it is easier to use than an old-fashioned carpenter’s level.
The main advantage of using a laser level over an ordinary carpenter’s level is that it allows you to create horizontal and vertical lines on walls or other surfaces without needing to hold the carpenter’s level in place for long periods of time. This makes it much easier to mark off measurements when building things like shelves or cabinets.
Another key feature of a laser level is its self-leveling feature, which means it automatically adjusts itself if it’s not sitting flat on the surface you’re trying to mark off. This makes it easier to use than an ordinary carpenter’s level, which requires manual adjustments every time it needs to be used on an uneven surface or in an area where there are objects blocking its path (such as furniture).
A laser level is an essential tool for any DIYer or woodworker, but it can be used for so much more than just leveling a shelf or floor. Here are some other uses:
Mark off the locations for pictures on a wall – This will ensure that each picture is straight and even. It will also save you time in the long run because you won’t have to worry about hanging them crookedly!
Ensure that studs are plumb – Laser levels can be used for ensuring that studs are plumb and even on a wall or ceiling. Whether you’re hanging pictures or installing crown molding, this will make your life so much easier!
Ensure that outlet boxes are all at the same height – You don’t want one outlet higher than another! That can make later stages of wall construction more difficult. Use your laser level to mark off where each outlet should go and make sure they’re all at the same height before installing them into place.

Screwdriver set
Screwdrivers are one of the most common tools in any DIYer’s tool kit. They have a variety of uses, including driving screws into materials such as wood, plastic, and metal.
Screwdrivers come in a wide range of sizes and shapes. The most common types include:
- Flathead drivers – These have a flat tip to easily fit into screw heads so you can turn them to tighten or loosen the screw.
- Phillips drivers – These have cross-shaped tips that fit easily over Phillips-head screws to help you turn them to tighten or loosen the screw.
- Torx drivers – If you’re going to be doing a lot of DIY projects around the house, you’ll want to make sure you have a good set of screwdrivers. A Torx driver is one of the most important tools you can have in your toolbox. It’s used for tightening or loosening screws with a six-pointed star-shaped head.
Here is a list of must-have features to help you find the best one for your needs:
Materials – The first thing you’ll want to look for in a screwdriver set is whether or not they are made of durable materials. You don’t want your screwdrivers falling apart on you while you’re working on your project, so make sure they’ll be able to withstand the wear and tear that comes with DIY projects.
Handles – Look for handles that are comfortable and easy to grip. You’ll be using these tools for a long time, so make sure they feel good in your hand!
It’s easy to overlook this, because it seems like such an obvious thing: you pick up a screwdriver and hold it, right? But not all drivers are made equal! You need to find one that not only works well with your project and other tools you might use, but also feels comfortable.
Magnetic tips – These will make it easier to drive screws and also help you to pick up ones that have dropped. The last thing you want to worry about is missing a screw. With that in mind, look for a screwdriver set with magnetic tips.
The set should come with a lifetime warranty – If there’s no warranty, then chances are you’re getting lower-quality tools that won’t last very long and won’t do the job well.
In summary, you can never have too many screwdrivers in your toolbox. Screwdrivers are great for small jobs, like fixing a loose hinge or tightening a loose screw. And when you’re working on a larger project, like building that new deck you’ve been dreaming of, screwdrivers can be lifesavers.
Rather than get a cheap set from an infomercial, you should spend more money on something durable. I wrote another article about DIY tools starting with P.

Drill/driver and Bits
Drill/drivers are the ultimate power tool for DIYers. They can be used for drilling holes, driving screws, and other fastening tasks.
Drill/drivers are commonly used by DIYers because they are compact, lightweight, and powerful enough to handle a wide range of applications. Drill/drivers also come with different features that make them more versatile than other electric drills on the market today.
Drill/Drivers typically include the following features:
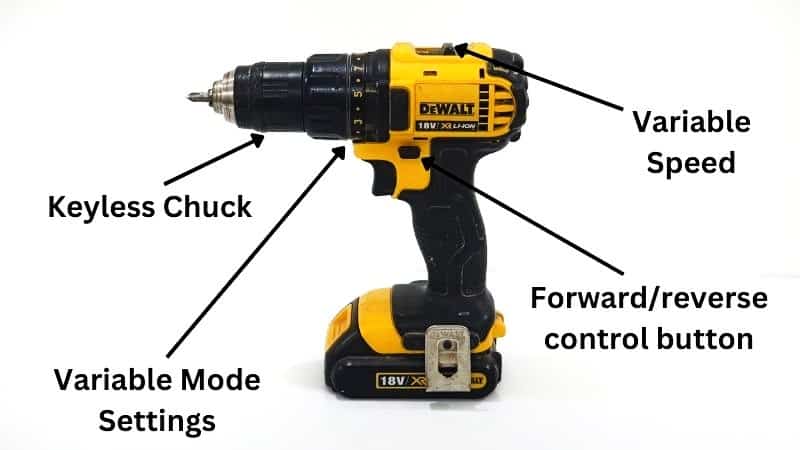
Variable speed – There is probably a switch allowing you to select a speed. One position is for lower speed (However, the torque or rotational force of the drill will be greater). The other position will allow you to choose a greater speed (However, the torque or rotational force will be lower). The variable speed trigger on the Drill/Driver allows for minute adjustment of the speed.
Different projects will require different speeds of rotation, and if you don’t have this feature built into your tool then you may not be able to complete the project as easily or efficiently as possible.
Variable mode settings – The drill mode allows the Drill/driver to use bits to drill holes. The numbered positions vary from lower torque to greater torque. They are meant for situations where you need to drive a screw or other fastener. You do not want to use more torque than needed so that you do not end up driving the screw too far into a softwood, or breaking the material holding the screw. Generally, longer screws require more torque whereas shorter screws require less.
Forward/reverse control button – This allows you to switch from clockwise rotation to counterclockwise.
Keyless chuck – The chuck is the part of a drill that holds the bit. Keyless chucks do not require an external tool to tighten or remove bits, so they are much faster and easier to use than standard chucks.
Whether you’re a DIYer or a newbie, a Drill/driver and bits are essential to any woodworking project. Here are the basic types of bits you’ll need to get started:
Twist drill bits – These are the ordinary bits used to drill holes. They have spiral grooves in order to cut through the wood as the bit is rotated by the drill.
Brad point drill bits – These have sharp points at the end of the bits that enable them to be positioned with accuracy and precision. As a result, there is less “skating” away from the intended location of the hole. They are used with softer materials such as wood or plastic.
Pilot hole bits – These are used to produce holes for pieces of hardware such as screws or other fasteners.
Spade bits – These look like “paddles” with central points. They’re used for drilling large-diameter holes in wood.
Forstner Bits – These bits cut very clean, precise holes and are often used in work such as cabinetry.
Holesaw bits – These cut large diameter holes. The cutting edge has teeth like a conventional saw.
Screwdriver bits – These bits are used for driving screws.
Nutdriver bits – These bits are used for driving nuts and similar hardware.
The Drill/driver and bits are the most important tools for DIY wood projects. Some of the things you can do with Drill/drivers include drilling holes and driving screws. You can use Drill/drivers to make holes in walls, floors, and ceilings for hanging pictures, shelves, or fixtures. Drills/drivers can be used to tighten screws on furniture and cabinets in addition to other projects. In another article, I described how an electric drill can be used as a sander.
Square
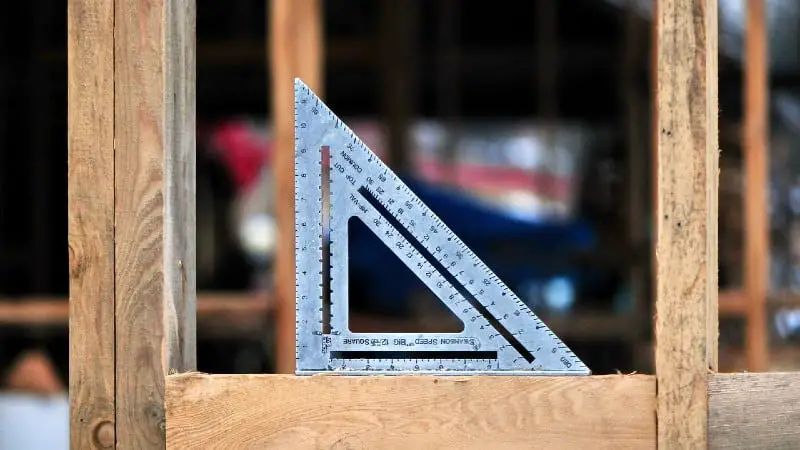
A square is a tool that you can use to make sure your measurements are accurate and your cuts are precise. This is useful if you’re trying to put together something like a bookshelf or cabinets, where everything needs to line up just right in order for the project to look good.
A square is also useful when you have a project that requires 90-degree angles because it will help you make sure those angles are perfect! If all of your corners aren’t at 90 degrees, then the final product won’t be able to stand up straight or lie flat on its own—and it will look sloppy.
If you want to make sure the pieces of your project are in exactly the right position, it’s a good idea to have a square. You can find them at any hardware store or home improvement store and they’re not too expensive.
You can also then try one of the many brands that have incorporated laser technology into their product.
Pliers and wrenches
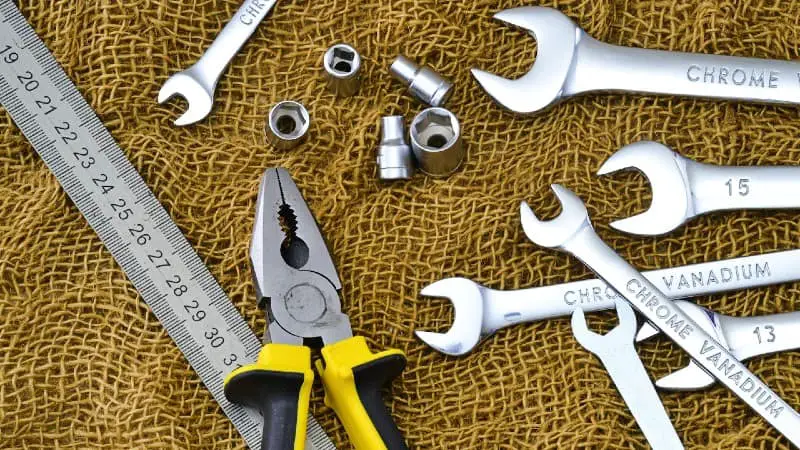
Plier and wrench sets are essential tools for DIY projects. They give you extra leverage to tighten and loosen nuts, bolts, and screws. Pliers are designed for gripping, holding, bending, and twisting small objects like nails and fasteners.
Pliers are important tools for your wood project. They are used in many DIY projects, so if you have just started taking up woodworking as a hobby, these tools should be purchased first. This is a list of some plier types:
Flat nose pliers – Flat-nosed pliers are one of the most useful tools in your toolbox. They’re great for holding small pieces in place while you work, and they can help you get a better grip on things like wire and other small objects.
Needle nose pliers – Needle nose pliers are ideal for working with small things like jewelry or electronics. They’re also perfect for grabbing things that are hard to reach with other tools!
Slip joint pliers – These pliers have slots for adjusting the width of their jaws. This makes it easy to grip objects that vary in size.
Pliers and wrenches are a must for any DIYer or woodworker. They are used for tightening and loosening screws, nails, and other delicate parts of your project. It is important to have a good selection of pliers and wrenches on hand, as they will be used in almost every project you do. I wrote another article showing 14 ways drill accessories can inprove your productivity.
There are many tools you can use for your DIY project
There are many tools you can use for your DIY project. It’s important to know what the different tools are, and how they work. The right tools can make your DIY project easier to complete and less frustrating. An incomplete tool set may also delay the completion of your project.
There are many tools you can use for your DIY project. We’ve mentioned some of them above, but there are other tools you can use as well!
If you’re looking to do more than just a small repair job on a piece of furniture, then you might want to consider investing in a circular saw. This tool can make cutting through thick pieces of wood much easier than trying to do it with a handsaw or other hand-powered tool.
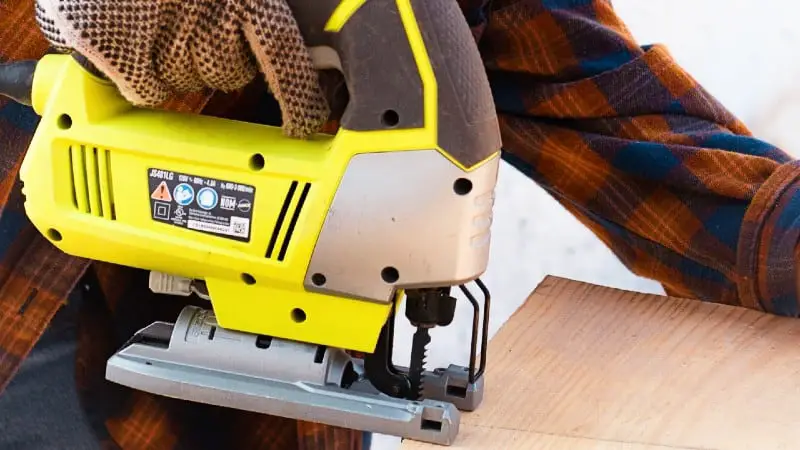
If you’re looking for something more portable, then consider getting a jigsaw instead. This is great for when you need to cut through smaller pieces of wood or metal, and it has the added benefit that it won’t take up much space when you’re storing it away after use.
Conclusion: Tools For DIY Wood Projects
I hope this article has helped you learn more about some of the most important tools for a DIY project. If you are still unsure of what to get, then I would recommend starting off with a small tool kit and building up your collection as time goes on.
Did you enjoy reading this article? If so, you might want to visit my Pinterest profile. It contains pins about DIY & Crafts, Woodworking, Tools, Projects, Hardware, and other topics!
