This article shows how to support a wooden shelf. There are really many ways to do this. It’s a good idea to consider how this will be done in the early stages of your project.
You should consider things like:
- What’s the purpose of the shelf? – Are you using it to hold heavy objects, or just display lighter ones?
- Is the shelf decorative in nature? – If so, you’ll be concerned with the appearance of the wood project. You might want to sand the shelf and also hide screw holes through countersinking and wood plugs.
- Where are the studs in the wall? – You’ll want to locate the wall studs because you’ll be screwing into them for support. This can affect your choice of the distance between the shelf support pieces.
- How much weight will you need to support? – This will often affect the number of supports you’ll need and also the type of mounting hardware you’ll use.
There are really many ways to support a shelf. Some of them are listed below:
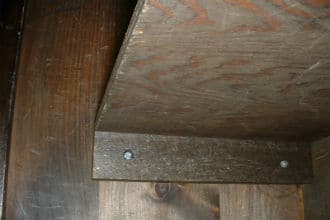
1. Simple Block Of Wood
To do this, attach wood to the side support pieces of a bookcase, cabinet, or similar furniture item. Glue or screw the side pieces into place. If the screw holes are in a visible area, you might consider countersinking them and using plugs.
Another option is to just use nails and glue. You can use a nail set to recess the screw holes. However, nails can come loose with stress on the wood. Because of that screws are often a better choice.
So, what sort of wood should you use for the shelf?
- Plywood – This type of shelf will bow or curve. This is not a problem if the shelf supports light items. For example, small decorations are OK.
- Wood Planks – These are less flexible. They may be heavier than thinner plywood pieces. These pieces are also more solid. Possibly, they might look better when stained.
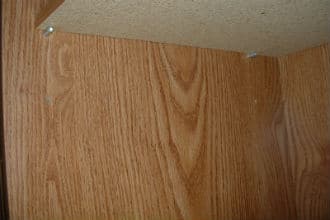
2. Shelf Support Peg
Many pieces of hardware can be used to support shelves. These include shelf support pegs.
How To Support A Wooden Shelf: What Are Shelf Support Pegs?
These pegs do just that: They support the shelves. First, drill holes along the side pieces. The holes on the other side piece must match. You can then adjust the shelf height. The end part of the peg goes into the hole, the remainder extends outward and serves to hold the shelf up.
Actually, you find this approach used often with furniture from Target or Ikea. That is because the pegs make assembly easy, and are relatively inexpensive. Also, you can easily adjust the shelf position to agree with the size of the objects you need to store.
Are There Problems With This Approach?
- The shelf itself is not very stable – Often a heavy weight near a corner can actually cause the whole shelf to tip and fall out of position. If this happens, all the items stored on the shelf can fall and break!
- The pegs cannot support too much weight – These pegs only travel into the wood 5/16 of an inch or so. Also, the part supporting the shelf is about that size. As a result, the support can fail if there’s too much weight on the pegs (e.g too many books, or heavy garage items). This is a problem with cheap plastic pegs.
- You need side pieces – Cabinets or bookcases often use side pieces. If there are no side pieces, you might not want to support shelves in this way.
- Issue With “L” peg – With this type of peg, the end is round and fits into the hole as before. The end supports the shelf. The “L” peg takes up space along the end of the shelf. Instead of the shelf reaching all the way to the wooden support piece, it can only go as far as the edge of the “L” peg. This is the case for both sides of the shelf. To make this type of bracket work, you need to decrease the size of the shelf by twice the thickness of the “L” peg or make other modifications to take this factor into account.
3. Shelf Support Bracket
It is often convenient to support shelves with brackets. These brackets fit into metal strips, placed vertically on the wall. The metal strips are screwed into the wall studs. This is a very simple approach and it’s easy to put up shelves like these. However, there are a few things to consider:
- The strength of the shelves – You want the strips and also the brackets to be strong enough for the weight you plan on supporting. For example, a large number of books can be quite heavy. Shelf support brackets might not be strong enough.
- How to fasten – You need to attach the strips to the wall securely. You can use a bubble level to make sure they’re in the right position.
- Use wall studs – It’s best to screw them directly into wall studs. These can be located with a stud finder sensor. You pass it along the wall and it signals when the density changes. When this happens, you’ve located the stud. The studs are usually about 16 or 24 inches apart. However, you should check with the stud finder and make sure that there’s a stud at the expected point. Once you know where the studs are, you can determine where to place the shelf. You want to keep the supports toward the ends or middle of the shelf. However, you also want them to be at stud positions.
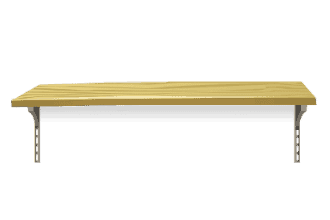
4. Angle Bracket
These often allow for very secure shelves that can hold significant weights, even some heavy garage items. As with the case above, it’s very important that the brackets be attached to wall studs.
How To Support A Wooden Shelf: More Than One Type Of Angle Bracket
Generally, the holes in these brackets come in two types:
With the first, there’s no chamfer angle taper to accommodate flat head wood screws. However, roundheaded screws will stick out of the brackets. This sort of situation is alright on a garage shelf. However, if the brackets are in a room with fine furniture, you might want the heads to be flush with the surface.
The second type of bracket has holes with a chamfer angle taper for flat head wood screws. If you use this type, you can screw directly into the hole.
Problems With Angle Brackets
However, there’s an issue with this: If you just position the screw by hand, it will inevitably be off-center. It will stick out of the bracket. Since the screw is traveling at an angle, it might break through the wood at the wrong point. Also, you can push the bracket to the side and change the position by tightening the screw. Just a small change in measured position can have a great effect since you’re also trying to make the shelves level. Since the head is not entirely flat and sticks out of the bracket, things can get caught on it.
So, is there anything you can do about this? How can you take care of this problem? Actually, a very inexpensive tool can help. This is the self-aligning center punch. With it, you can make sure that the screw is positioned at the exact center of the screw hole. Then, when you tighten it, the head will be flush. This really works!
The self-aligning center punch consists of a cylindrical piece of metal, much like an ordinary nail set. The end has a chamfer angle taper to match that of a wood screw head. When you rest it in the bracket hole, it will automatically be positioned so that the center of the punch is at the exact center of the hole.
The punch has a spring-loaded core along the central axis of the cylinder. You can tap it with a hammer in order to leave a mark at the hole center. Place the screw tip at that mark. When tightened, the screw will be positioned perfectly.
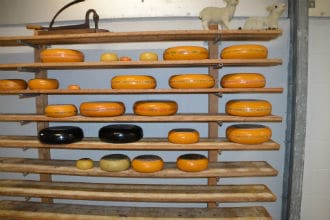
5. Angle Iron Support
These wooden shelves are supported by metal angle irons. If the angle irons are pre-drilled, you can use the holes for mounting. Otherwise, you’ll have to drill your own holes. This can be done with a drill bit for metal. Make sure to wear eye protection (Goggles). This is important because sharp metal splinters can be thrown off when drilling through metal.
The metal pieces are often “pointy” and sharp. Angle Irons might be better for a garage or storeroom.
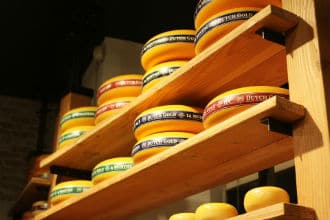
6. Metal Pipe Shelf Brackets
This is another picture of cheese on shelves. Horizontal metal pipes support the shelves. Many pipe-type supports are available. Some of them screw into plates. In turn, the plates screw directly into wall studs.
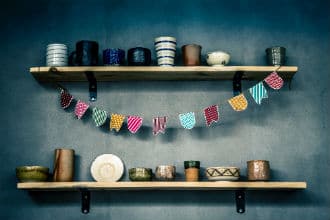
7. Shelf Of Boxes

A shelf can also be made of boxes or crates. These can be stacked on other crates, located below. This can be done in a decorative way, as shown in the picture. An advantage of this approach is that the crates can easily be moved to another place.
You don’t screw boxes into the studs. So, this approach doesn’t leave any marks on the wall. You can move things around without having to cover up old screw holes.
How To Support A Wooden Shelf: Conclusion
In this article, we showed how to support wooden shelves. Several different ways of doing this were discussed. You can see that the approach you should take depends on the actual situation, and many other factors.
So, now it’s your turn. Can you come up with more ways to support a shelf? Do you have other things to add? Please feel free to make additions or comments below.
Don’t forget to follow my boards on Pinterest. Did you enjoy this post? If so, please share.

Thanks for pointing out that it’s important to make sure that the strips of the shelf brackets ate going to be attached to the wall securely. My mom is thinking of installing wooden shelves in the living room. She wants to be able to display small photo frames decoratively. I will share this with her since she’s planning to shop for support brackets.
You really make it appear so easy along with your presentation however I find this topic to be actually something that I believe I might never understand. It seems too complex and extremely wide for me. I’m taking a look ahead on your next submit, I¦ll attempt to get the hold of it!