If you’re a DIYer or someone who’s new to woodworking, one of the first things you might want to do is make a pallet garden. But what if you don’t know how to treat your pallets for garden use? I’ll explore this topic in more detail below:
Do garden projects differ from other pallet DIYs?: How To Treat Pallets For Garden Use
Sure they do! We’ve all seen the pictures of pallets being used in many ways: coffee tables, window seats, headboards … you name it. But when you’re doing something like building a garden bed out of pallets, there are some things to keep in mind:
1. Gardens tend to be damp places – It’s important from the outset that your pallet wood has been treated with a water-repellent chemical. Water can seep into untreated wood and cause rot if not dealt with first – and then you’ve got another problem on top of everything else! So make sure any wood is sealed before adding plants to your garden.
2. Direct Sunlight – If you are planning to use your pallets in a sunny area, or one that gets a lot of direct sunlight, then they will need more protection than if they were being used in an area that is mostly shaded. Exposure to sunlight can damage wood and cause it to deteriorate.
3. Some pallets have been treated with toxic pesticides – Using a contaminated pallet in your garden can contaminate the soil and plants. This will harm both them and you if you later eat any food that grows on them.
4. Finishing products and sealers can also contaminate plants – In general, you should avoid using products that contain chemicals that can be toxic to plants. If you’re unsure about the safety of a stain or sealer, look for ones that are eco-friendly and natural.
5. Want insect-resistant wood – Insects can damage gardens, so you might want to use insect-resistant wood if your project is going to be outside. Cedar is a good choice because it’s naturally resistant to insects and rot. However, most U.S. pallets are made of Oak and Pine – not Cedar. Given this information, you may want to consider a different source of wood for your garden project!
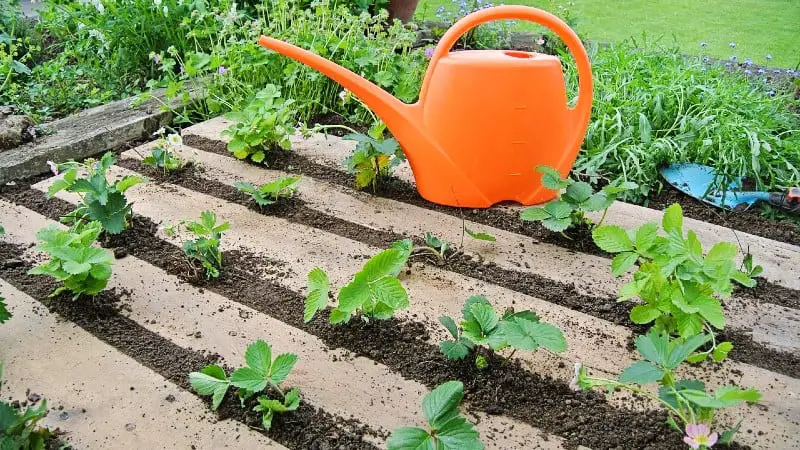
Table of Contents
- Do garden projects differ from other pallet DIYs?: How To Treat Pallets For Garden Use
- Finding pallets for garden use
- Making sure the pallet is safe
- Preparing the pallet for garden use
- Treating the wood for the garden
- Step #1 – Find some safe pallets
- Step #2 – Prepare the pallets
- Step #3 – Assemble your raised garden bed, planter box, etc.
- Step #4 – Choose the wood sealer
- Step #5 – Apply Outdoor Defense oil liberally
- Step #6 – Allow the oil to be absorbed into the wood
- Step #7 – Repeat step #5 and step #6
- Step #8 – Remove the excess oil with a rag
- Step #9 – Repeat steps #5 – #8 for each additional coat you want the project to have
- Step #10 – Wait for the sealer to cure
- Step #11 – Add Soil
- Step #12 – Add your plants
- Conclusion: How To Treat Pallets For Garden Use
Finding pallets for garden use
If you’re a DIYer or a woodworker who wants to make their garden look great, this section is for you! You’ve heard that pallets are good for making your garden beautiful—but where can you find them?
First, here are some tips to help you when searching for pallets:
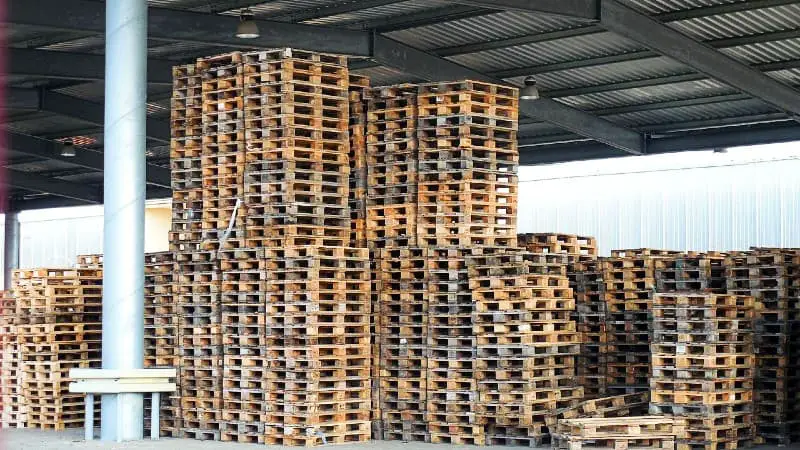
1. Make sure they’re in good condition – you don’t want to work with used pallets that might have bugs or mold on them. The best place to find pallets is a local store or business that has just recently used them in their shipping process.
2. Look for ones with no major damage – If the pallet has holes or cracks, you may have trouble using it for your garden project.
3. Check for splinters – You don’t want to be hurt by splinters or sharp edges.
4. Choose ones that haven’t been treated with chemicals or paint – many pallet manufacturers treat their products with chemicals or paint before sending them out into the world, so make sure yours aren’t treated with anything that could be harmful to your garden.
5. Check the nails – Are they rusty? If so, they could damage your tools or even hurt you when you’re working with them.
If you’re new to woodworking and looking to find pallets for garden use, there are many places you can go.
First, check out Craig’s list. You may be able to find a local business owner who is willing to give them away for free!
Appliance stores often have pallets that they’ll give away if you ask. If they don’t want them, they’ll usually let you take them for free or at a low cost.
Furniture stores are another great place to look. You may be able to find some really nice pallets there because they’re used for shipping furniture.
In summary, pallets are a great resource for gardeners. You can use them to build raised beds, planters, and even compost bins! They’re very versatile and will last a long time if you take care of them.
Making sure the pallet is safe
If you’re new to garden building, it’s important to know if the pallets are safe before using them.
The first step is to make sure that your pallets are in good condition. If you have an old, weathered pallet that’s been sitting outside, it may be unsafe. The best thing to do is find a new one – or at least a pallet that has been protected from the elements.
It’s important to consider the type of pallet when determining if it’s safe. There are two types – national and international:
National
These are used for transport within the United States. Some have been treated with chemicals such as fungicides to reduce mold growth.
International
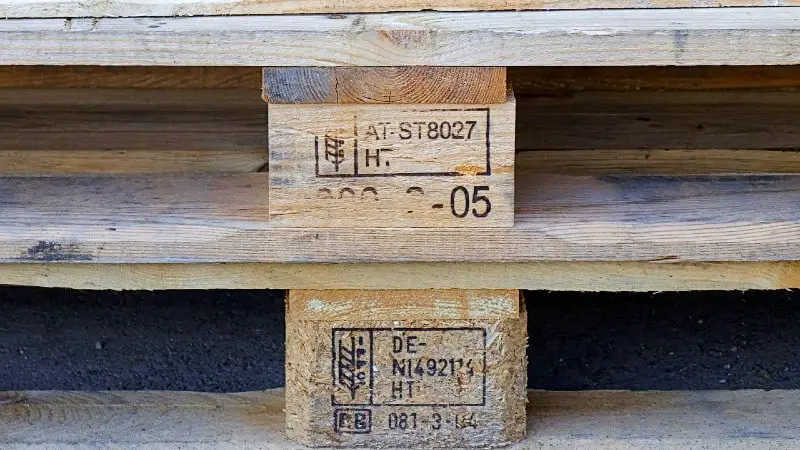
These are used for the transport of goods from one country to another. International pallets are required to bear stamps indicating the type of treatment their wood has received, in accordance with the International Standards for Phytosanitary Measures Number 15 (ISPM 15). Here are some typical stamps and their meanings:
HT
This code stands for Heat Treatment. The pallet wood has been heated to a temperature of at least 56 degrees Celsius for at least 30 minutes. The core as well as the surface of the wood must be heated to this temperature. This kills most insects, larvae, eggs, etc.
DH
This code stands for Dielectric Heating. Microwaves or radio waves are used to heat the pallet wood to a temperature of at least 60 degrees for 1 minute. The core and the surface must be heated to this temperature in order for most insects, larvae, eggs – and other pests – to be killed.
MB
This code stands for Methyl Bromide. The pallet wood has been fumigated with this chemical in order to protect it from pests, mold, rodents, nematodes, etc. This chemical is highly toxic and can harm the nervous system, respiratory system, eyes, lungs, and skin (source). If your pallet has been treated with methyl bromide, you should dispose of it properly – don’t use it in your garden!
SF
This code stands for fumigation with sulphuryl fluoride. This is a toxic chemical used to kill powder post beetles, rats, mice, bedbugs, moths, cockroaches, and other pests. It has been listed as a Restricted Use Pesticide by the EPA – I wouldn’t put it anywhere near my garden!
In summary, this is how you make sure the pallets are safe for use in your garden:
1) Before using pallets, check to make sure that they have not been chemically treated. Some national pallets have been treated with fungicides and other chemicals—so you might want to avoid using them unless you know exactly where they’ve come from.
2) You should be able to use international pallets with either HT or DH stamps that have not been exposed to chemicals or mold.
3) Don’t use international pallets with either MB or SF stamps.
Once you have found a pallet that’s safe for use in a garden, you must not expose it to a finish that’s unsafe and will let toxins leach into the soil. Some usable alternatives are as follows:
Raw linseed oil – In its pure form, this natural oil can be used to seal the wood and protect it from moisture. It can be applied with either a brush or a rag. This article contains information about linseed oil.
Raw tung oil – Tung oil is also known as China wood oil and comes from the Tung Tree (Vernicia fordii). It’s a slow-drying oil that offers some protection against moisture. This article contains information about tung oil.
Eco-friendly plant-safe sealers – Eco-friendly plant-safe sealers are a great option for garden use. These sealers may contain synthetic chemicals, but can still be safe for garden use. Natural oil finishes can take a long time to dry, making them less desirable for gardens.
Eco-friendly sealers are often easier to apply and can penetrate deep into the wood They can also offer some UV protection for outdoor gardens.
I wrote another article about cleaning pallet wood.
Preparing the pallet for garden use
If you’re planning to use a pallet to build a garden planter, box, or another item, there are some things you’ll want to do before you begin.
First, carefully remove boards from the pallet. You can use a tool such as a pallet buster to facilitate this process. Be sure to try not to break the pieces as they may need to be used in other projects down the line.
Next, make sure all nails have been removed by tapping them with a hammer. This will help prevent any injuries while you are working in your garden box or planter.
Then, sand down all sides of each board until they are smooth and ready for use in your garden project. You can use an electric sander such as a random orbital sander for this step in order to make it easier on yourself! Start with coarse grit and move on to medium grit before finishing off with fine grit. Remove debris with something like a tack cloth or vacuum before changing grits.

Treating the wood for the garden
When you’re using pallets to make a garden, you need to treat the wood to reduce rot and fading due to the outdoor environment. But what kind of treatment? And how do you do it?
We’ll give you a step-by-step guide on how to treat your pallet wood for your garden:
Step #1 – Find some safe pallets
This was covered in the section above. In summary, you want international pallets with either HT or DH stamps. These have not been fumigated with pesticides before use.
You also want to make sure that they did not get infected with mold after the heat treatment. Mold can grow on wood if it gets wet. You may also see chemical stains on your pallets. These could indicate that potentially toxic chemicals spilled on the pallet during use. In either of these cases, it would be a good idea to look for other pallets for your garden.
Step #2 – Prepare the pallets
In the earlier section, we described how to prepare pallets. In general, we extracted the boards with a Pallet Buster tool, removed the sharp nails, and sanded the wooden pieces.
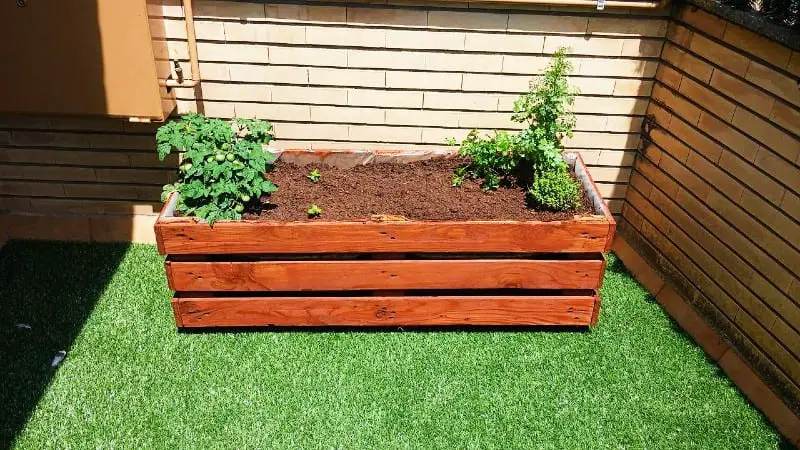
Step #3 – Assemble your raised garden bed, planter box, etc.
Pallets can supply the wood for this. Also, you can easily find plans online that will lead you through the process of creating your own customized garden.
Step #4 – Choose the wood sealer
One approach is to use an Eco-friendly sealer, as described in the section above. There are certainly many to choose from. For this example, we will choose Outdoor Defense Oil, made by The Real Milk Paint Company. This product contains tung oil, pine oil, zinc, and other ingredients. The zinc helps to fight mold and mildew. Also, it offers some protection against UV radiation. This is desirable since direct sunlight can fade and degrade wood.
Note: The following steps assume that you are using Outdoor Defense Oil as a sealer. If you’re using another product, the details (such as drying time) may be different—but the basic process is similar. You should always follow the manufacturer’s directions for the best results.
Step #5 – Apply Outdoor Defense oil liberally
Apply a generous amount of Outdoor Defense Oil to the wood with a rag, brush, roller, or similar tool.
Step #6 – Allow the oil to be absorbed into the wood
This process can take up to 40 minutes or so.
Step #7 – Repeat step #5 and step #6
You want to stop at a point where there is so much pooling of the oil that it’s not absorbed after approximately 40 minutes.
Step #8 – Remove the excess oil with a rag
Remove the excess oil that has pooled with a rag. Allow the wood to dry overnight. This completes a coat. Caution! – Rags soaked with oil-based finishes (such as linseed oil, etc. ) can spontaneously combust (burst into flame!), causing a fire. To avoid this, you need to hang rags soaked with oil up outside to dry. To learn more about the precautions to take, see this notice.
Step #9 – Repeat steps #5 – #8 for each additional coat you want the project to have
The wood should have about 3 – 5 coats.
Step #10 – Wait for the sealer to cure
It takes approximately 30 days for Outdoor Defense Oil to cure. Make sure there is proper ventilation and airflow, so the sealer can dry completely. As the sealer is curing, wipe off any excess oil that may seep onto the surface of the wood.
Step #11 – Add Soil
Add soil or compost to the raised garden box, planter, etc.
Step #12 – Add your plants
Enjoy your garden!
In summary, creating a raised garden box is a great way to get started in gardening. It is also a fun project for the whole family. If you are looking for a little more information, check out another article I wrote about pallets.
Conclusion: How To Treat Pallets For Garden Use
I hope this article has helped you to understand how to use pallet wood in your garden. It is a great alternative to buying new wood and is also much more environmentally friendly, as it saves trees from being cut down.
Did you enjoy reading this blog article? If so, you might be interested in visiting my Pinterest profile. It contains pins about pallets, woodworking, tools, hardware, DIY & Crafts, and other topics!