The Ultimate DIY Guide to Flawless Cupboard Painting

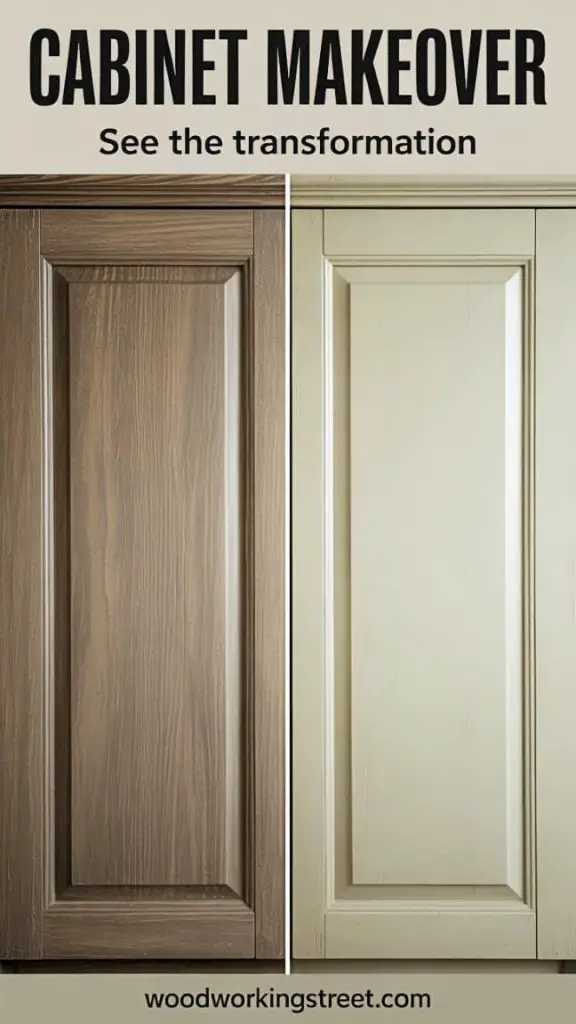
I was at a friend’s house recently, admiring what I thought was their brand-new, custom kitchen. The cupboards were a deep, sophisticated green with a flawless, satin finish that looked like it came straight from a high-end showroom.
I asked them about the renovation, assuming it must have been a huge and expensive project.
Her reply completely changed how I looked at my own kitchen. “These are the same twenty-year-old oak cabinets we’ve always had,” she said with a smile. “We just painted them ourselves.”
That single moment reveals the incredible, transformative power of cupboard painting. It’s the most impactful DIY project for completely renovating the heart of your home without the cost and disruption of a full remodel. It’s a chance to take solid, functional-but-dated cabinets and give them a stunning, modern finish with your own hands.
This guide is designed to show you exactly how to achieve that same professional-quality result. We’ll walk you through the entire journey, from meticulous preparation to the final, rewarding steps, giving you the confidence to create a kitchen you’ll be proud to say you renovated yourself.
Step 1: Planning Your Cupboard Makeover: Cupboard Painting
The secret to a stunning cupboard makeover isn’t just about painting technique—it’s about the thoughtful vision you create before you even pick up a brush. This initial planning phase is the most exciting part; it’s where you become the designer, imagining the future of your space. A well-considered plan for your style, colors, and hardware is what ensures your final result is a true, cohesive transformation you’ll love for years. Taking the time to define that vision now makes every step that follows feel both confident and purposeful.
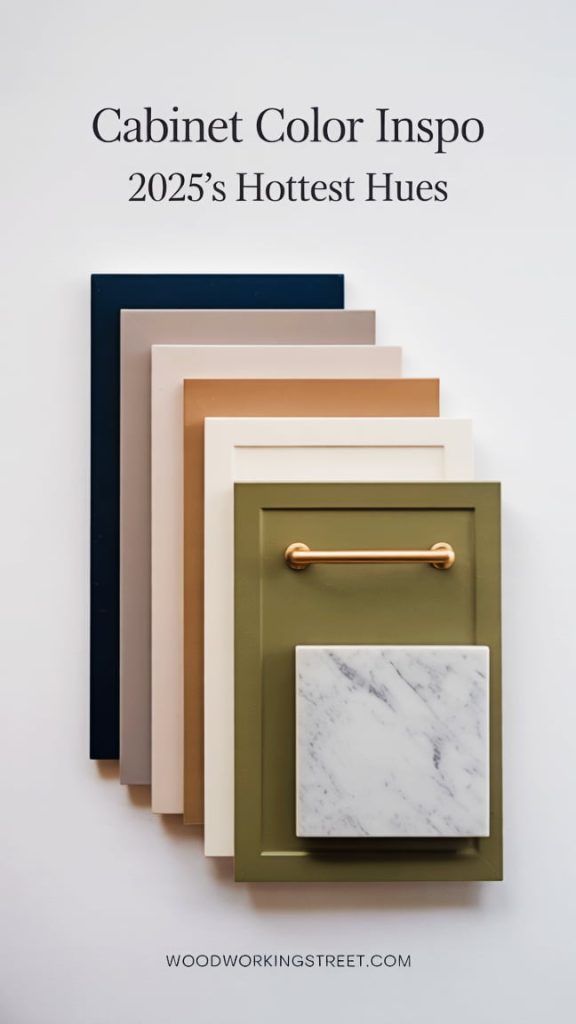
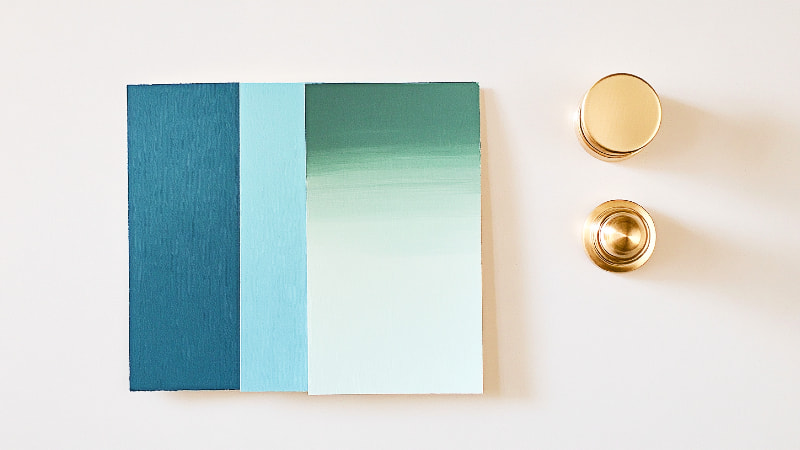
Defining Your Makeover Style: Colors and Vibe
The first creative decision is to choose the overall aesthetic you want to achieve. Are you drawn to the clean, bright look of a modern kitchen, the cozy charm of a farmhouse style, or are you hoping to achieve a unique vintage cabinet makeover with a nostalgic color? Look for inspiration online and in magazines. Do you prefer cool, calming blues and grays, or warm, inviting whites and beiges? Perhaps a bold, dramatic color like deep green or navy is what your space needs.
To help you explore different color palettes, major paint brands like Behr often have online galleries showcasing trending kitchen cabinet colors. Select a few complementary colors and test them in your space to see how they look in your home’s specific lighting throughout the day.
Choosing Hardware to Complete the Transformation
While paint makes the biggest impact, new hardware is the jewelry that completes the outfit. Upgrading your knobs, pulls, and hinges is a relatively small investment that can dramatically elevate the final look of your cupboard doors makeover. Old, dated hardware can detract from even the most beautiful paint job. Consider the style you chose: a modern kitchen might call for sleek, minimalist bar pulls in a matte black or brushed nickel finish, while a vintage or farmhouse look might be better suited to classic round knobs or cup pulls in brass or oil-rubbed bronze. This is a crucial part of the process that truly completes the renovation, turning your painted cupboards into what feels like brand-new cabinetry.
Step 2: The Foundation for a Lasting Renovation

The secret to a durable, professional-looking paint job that withstands the daily rigors of a busy kitchen isn’t in the final coat of paint, but in the meticulous preparation that comes before it. This foundational work is the most time-consuming part of the project, but it’s also the most critical. Rushing these steps is the number one cause of chipping and peeling paint down the road. By approaching this phase with patience, you are guaranteeing a beautiful and lasting finish.
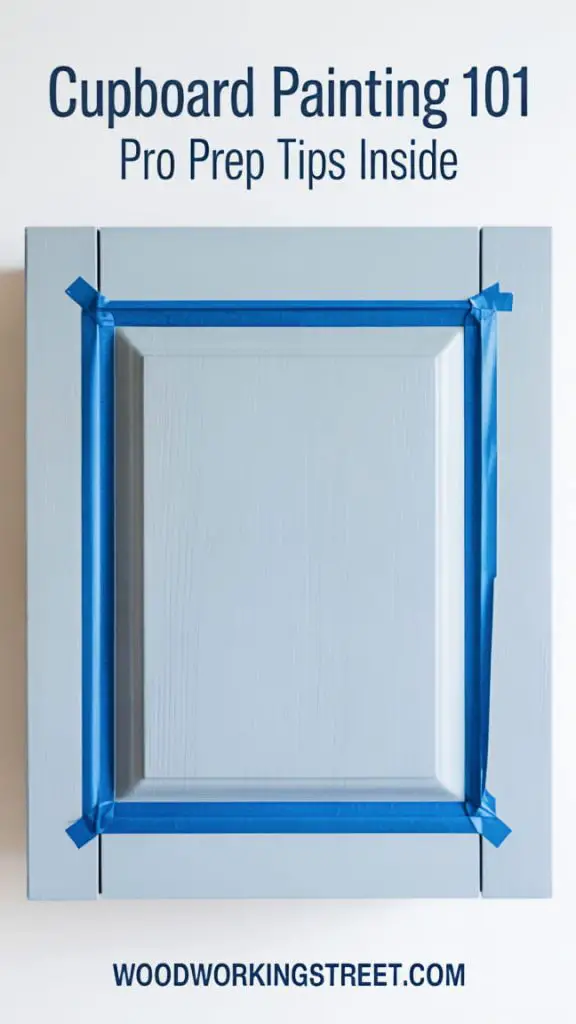
Preparing the Surfaces: Cleaning, Sanding, and Repairs
Your cupboards have likely accumulated years of grease, cooking oils, and grime, even if they look clean. These residues are paint’s worst enemy. The first, non-negotiable step is to thoroughly clean and degrease every surface you plan to paint. Use a good degreasing cleaner and a scrub sponge to wash down all doors, drawers, and cabinet frames. Once dry, you’ll need to lightly sand the surfaces. The goal of sanding isn’t to remove the old finish, but to “scuff it up,” creating a microscopic texture that the primer can grip onto.
For a detailed walkthrough of this crucial step, this guide from This Old House offers expert advice on cabinet preparation. This is also the perfect time to make any necessary repairs, like filling old hardware holes or patching minor dents with wood filler.
Priming: The Non-Negotiable Step for Durability
Most professional painters and paint manufacturers agree that for a project like cabinets, using a dedicated primer is the key to a durable, beautiful finish. While it can be tempting to skip this step, this preparatory coat serves two main functions that are especially important for a successful DIY furniture renovation.
The first, and most critical, function is adhesion. A primer is specifically formulated to bond securely to challenging surfaces—like old varnish or slick laminate—and create a uniform base that your new paint can grip tightly. Without this dedicated bonding layer, your topcoat is far more likely to chip or peel with everyday use.
The second function is stain blocking. For older wood cupboards, natural oils called tannins can often bleed through layers of new paint, causing yellow or brown stains to appear over time. A specialized stain-blocking primer creates a powerful seal that prevents this from happening, ensuring your chosen color stays true.
Step 3: The Transformation: Painting Techniques

With your surfaces prepped and primed, the truly transformative part of the project can begin. This is where you’ll see your vision start to come to life. The key to a beautiful finish is not speed, but technique. Working in thin, even coats and allowing proper drying time between them will yield a much smoother and more professional result than trying to apply one thick, heavy coat of paint.
Choosing Your Painting Tools: Brushes, Rollers, or a Sprayer
You have three main options for applying paint to your cupboards. A high-quality angled brush is essential for cutting in on frames and getting into the details of any decorative molding. For flat surfaces like door panels and cabinet sides, a small, high-density foam roller is excellent for achieving a smooth, streak-free finish. Many DIYers use a combination of these two tools. For the ultimate smooth, factory-like finish, a paint sprayer is the best option, though it has a steeper learning curve and requires more prep work to protect your surroundings from overspray. For a first project, the brush and roller combination is often the most manageable and yields beautiful results.
Techniques for a Flawless, Streak-Free Application
The secret to a flawless paint job is patience and light coats. When using a brush and roller, always start with the detailed areas and inside edges of the cabinet frames first, then use your roller for the large, flat surfaces. Apply light, even pressure. It’s much better to apply three very thin coats than two medium coats. Let each coat dry completely according to the paint can’s instructions before applying the next.
For an ultra-smooth finish, you can lightly sand with very fine-grit sandpaper (220 grit or higher) between coats, wiping away the dust with a tack cloth before applying the next layer of paint. This step takes extra time but is what creates that coveted, professional-looking smooth surface.
Step 4: Finishing Touches and Long-Term Care

The final phase of your project requires the same patience as the preparation. This is where you protect your hard work and bring your renewed space back together. Rushing at the end can lead to nicks, smudges, and fingerprints on your beautiful new finish, so take your time and allow the paint to fully cure before subjecting it to heavy use.
The Curing Process: Why Patience is Key
It’s important to understand the difference between paint that is “dry to the touch” and paint that is fully “cured.” Paint can feel dry within a few hours, but it takes much longer—from several days to even a few weeks, depending on the paint and environment—to fully harden and reach its maximum durability. During this curing period, the paint is still vulnerable to scratches, chips, and dings. Be extra gentle with your newly painted surface.
Reassembly and Maintaining Your New Look
Once the paint is sufficiently cured according to the manufacturer’s directions, the exciting final step is reassembly. Carefully install your new hardware and re-hang your cupboard doors. Adjust the hinges until the doors are perfectly aligned, and then step back and admire your beautiful work.
Keeping your new finish looking its best is simple. For routine upkeep, a soft, damp cloth is often all that is needed. For tougher spots, a drop of mild dish soap in warm water works perfectly. It’s best to steer clear of anything abrasive, like scouring pads, which can create fine scratches and dull the paint’s sheen over time. Likewise, harsh chemical cleaners can compromise the integrity of the finish.
This gentle approach to care is the secret to ensuring your beautifully painted cupboards stay looking fresh for many years to come.
Conclusion: Cupboard Painting
A cupboard painting project is more than just a home improvement task—it’s a chance to completely renew the heart of your home with your own hands. The journey from dated cabinets to a fresh, personalized kitchen is a deeply satisfying one. We hope this guide has provided a clear and encouraging path forward, packed with practical insights for your own makeover endeavor.