
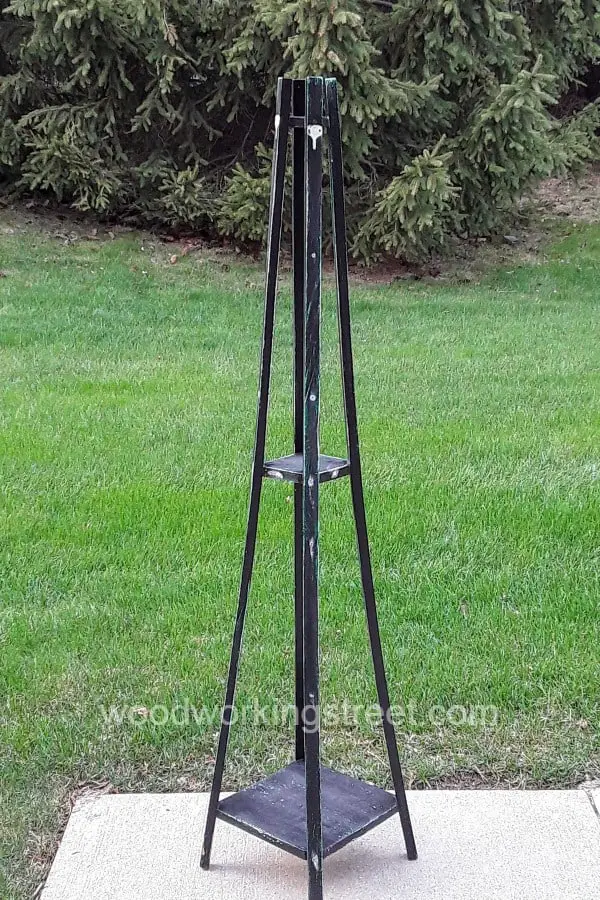
While I was shopping in the thrift store, I came across a freestanding coat rack for a few dollars. This item seemed to have a lot of potential. There were a few things to fix. However, I could use the coat rack in the home.
Coat racks are really valuable pieces of furniture and serve a purpose. There are several types of coat racks: The corner coat rack fits into an available corner. This is a great way to save space. However, you aren’t free to move it around. This can be a real limitation. Another type mounts on a wall. This is very convenient, and you don’t need to worry about it tipping over. However, you must mount it to the wall securely and it can’t be moved easily. This project deals with a freestanding coat rack. You can move this type of rack. Also, it can hold other objects such as a planter.
In this post, I’ll show you how I restored it and describe the steps I took. Also, I’ll break down the dimensions of the project, in case you want to build coat racks like this on your own. It’s really a simple project, and ideal for beginning DIYers.
So, without further words, let’s find out about this project:
Description Of Freestanding Coat Rack
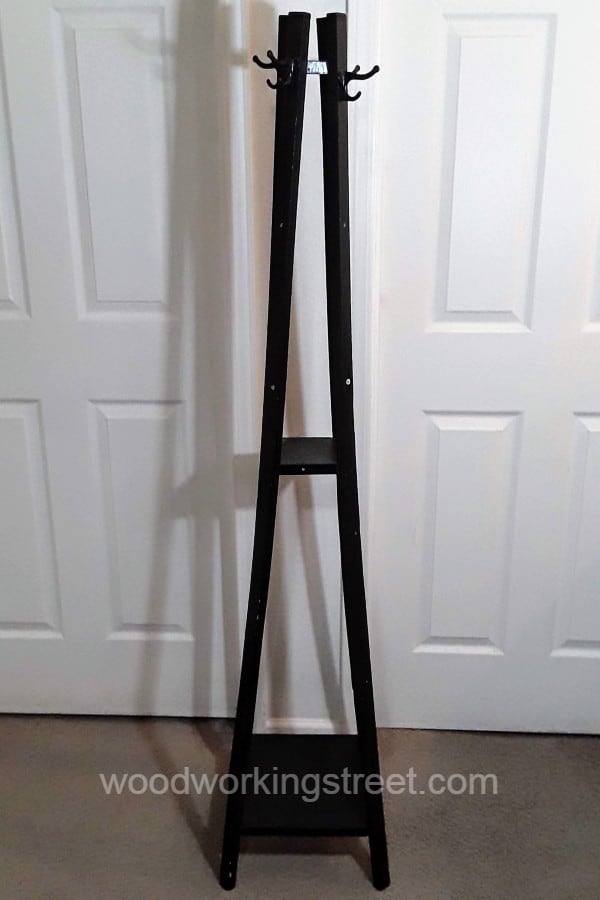
This free standing coat rack was purchased at the thrift store for about $7.50. It was certainly inexpensive, and there are a few things wrong with it. Here are the main problems:
Hooks or other pieces of hardware had been screwed into the wood. They were then removed. However, this left holes and made the wood surface very rough.
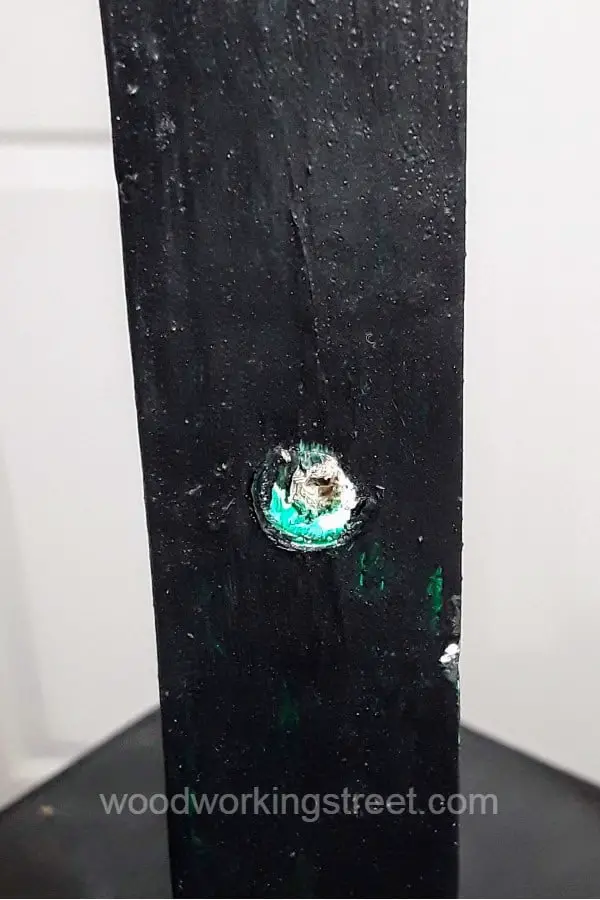
As you can see, the unpainted wood is showing through. This is because they applied the paint after the hardware had been inserted into the wood. As a result, the hardware prevented the paint from covering the wooden surface. This really detracted from the overall appearance of the item as a piece of furniture and home decor. So, we will try to improve this.
Also, there are globs of paint in many areas. In addition, there are drips and runs.
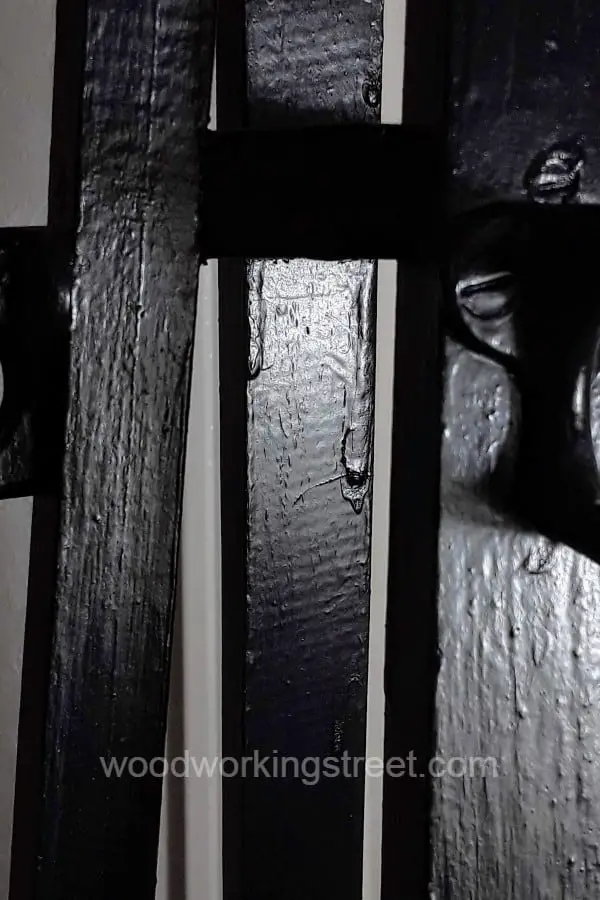
So, I’ll try to make the surface smoother.
In addition, the top coat hooks are coated with paint:
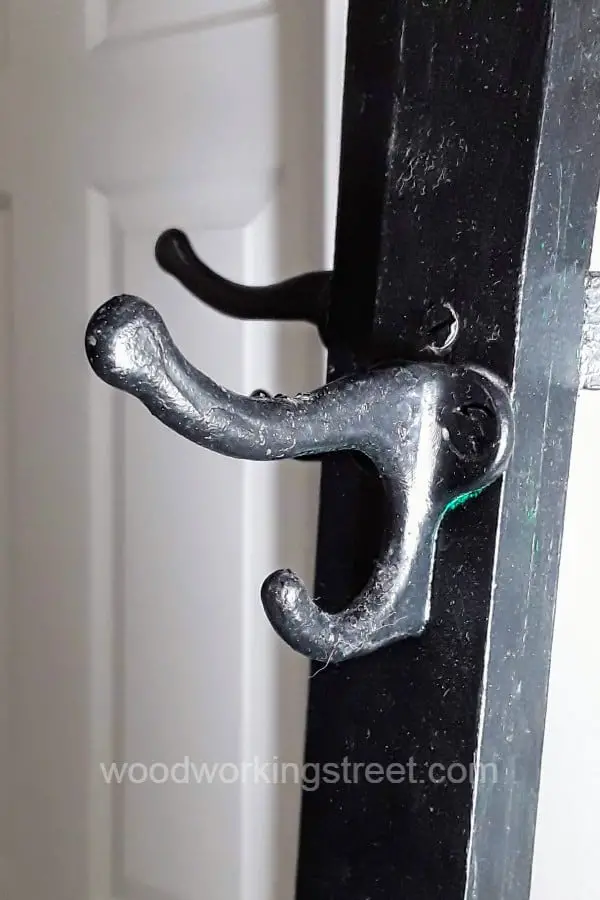
I really didn’t like this, and prefer the natural metal surface of the hardware. So, I’ll remove the paint from the hooks and reinstall the hardware after the finishing is complete.
Finally, the piece is full of dirt and dust:

I’ll clean this material off this and put paint over it in order to beautify the surface. This will make the finish much smoother.
Dimensions of the Free Standing Coat Rack
As mentioned above, the freestanding coat rack was obtained from the thrift store. It’s very simple and seems to be made of only seven pieces of wood. Four of them are vertical and are used to hold the coats up. Also there are three shelf pieces. Below, I have listed the dimensions of a coat rack inspired by this:
4 vertical pieces – 62 ⅞ “ long X 1 ¼ “ wide X 1 “ thick
Bottom shelf – 11 ½” long X 11 ½” wide X 1 “ thick
Middle shelf – 5 ¾” long X 5 ¾” wide X 1” thick
Top shelf – 2 ⅞” long X 2 ⅞” wide X 1” thick
The bottom shelf is placed about 5” from the bottom of the vertical pieces. The middle shelf is at about 34” Also, the top shelf is at about 60”.
It also uses twelve #8 – 1/12 inch screws, or screws with a similar size. These hold the horizontal pieces to the shelves, at the points where they contact each other.
Finally, there are 4 coat rack hooks. These are screwed into the horizontal pieces at about the top shelf.
Tools To Use For Freestanding Coat Rack
Note: Some of the links below can be affiliate links. For more information, see the disclosure page.
The rack was made of Pine. As a result, the freestanding coat rack was light in weight. Also, Pine is available at any lumber yard and in many stores such as Home Depot, Loews, etc. Another choice is a hardwood such as Oak. This would make the unit much more durable, strong, and less prone to scratching.
Each shelf has a 45 degree cut in each corner. You can make this cut by marking 1 ¼ inch from each corner along the length and width. Then, cut along that line. Many tools can do this:
- Table Saw – Use this if you desire accuracy for your cut. It will cut straight and precise lines.
- Circular Saw – You have similar accuracy. This will make straight cuts.
- Power Miter Saw – This makes it easy to cut wood at angles.
- Jigsaw – You can even use a Jigsaw for this. The jigsaw is a relatively inexpensive tool that many DIYers have already acquired. You can use it to cut curves in wood. However, If you’re very careful, you can use it to cut straight lines. Generally, you need clamp a material such as scrap wood or a ruler to help guide the saw in order to make the straight cut. Without a guide, the cut may wander a bit from the cutting line you have drawn. I wrote this article about jigsaw blades.
- Hand Miter Saw – Use a fine-toothed blade to minimize splintering.
- Hand Saw – This allows you to make fast and clean cuts through wood.
Why Use Paint?
In this case, I’m going to restore and clean up this thrift store piece with paint. Another approach would have been to stain the piece, I opted against this for several reasons:
- It already had a painted finish. A new coat of paint would clean it up and make it new-looking. This would be far simpler than staining the wood.
- I wouldn’t need to strip off the old paint. This would be far easier, as well as less expensive (Wood stripper costs a lot!).
- I wouldn’t need to sand the wood very much since I was using paint. However, this is not the case with wood stain: You would need to spend much more time sanding. If the wood is not sanded well, imperfections will be left on the surface. Stain brings out these imperfections and makes them easy to see. These detract from the appearance of the finished project.
Materials
Here are the materials I used to restore the coat rack and other painting supplies:
- Wood Cleaner
- Rubber Gloves
- Wood Filler
- Putty Knives
- Paintbrush
- Paint Roller
- Extra Rollers
- Sanding Sponge
- Tack Cloth
- Cheesecloth
- Primer
- Furniture Paint
I really don’t know much about furniture painting, and am still learning about this subject. If you’d like to find out more, I recommend that you check out the following blog post.
Preparation
First, clean the surface of the wood with a cleaner such as Simple Green. The idea is to remove dirt. dust, and grease from the wood.
Use wood filler to cover any imperfections in the surface, These can be things like screw holes, nail holes, concave depressions (due to tools such as hammers), split or frayed wood, knots, etc. You can use a putty knife to help push the filler into crevices.
You may need to sand down the wood filler to make the surface flat. Also, the existing paint surface may contain globs of paint, pooling, runs, or drips. This was the case with the Freestanding Coat Rack from the thrift store. Try to remove these through sanding. You don’t need to remove the old paint!
Clean the wood surface in order to remove dust. One approach is to use a vacuum cleaner. However, to get even more dust off, you should use a tack cloth. These sticky cloths pick up sawdust residue, Also, they pick up steel wool fragments when finishing wood.
So, this is what the coat rack looks like at this stage:
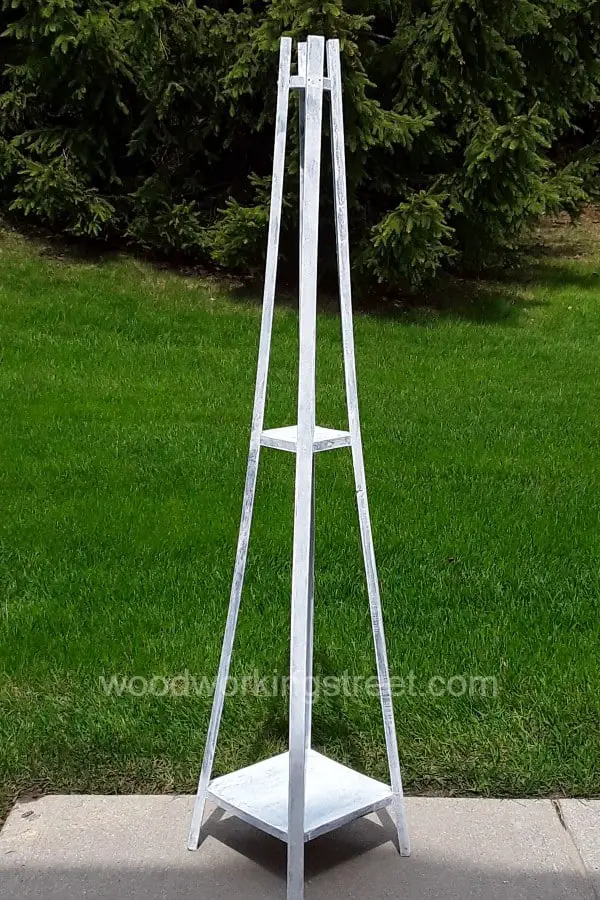
Primer
Using something like a paint roller, apply a thin coat of primer. When it is dry, lightly sand with fine sandpaper or a sanding block. Keep it light so that you don’t remove the primer from the surface.
After this is done, remove the sawdust with a tack cloth, as you did in the section above. Here’s what things look like at this stage:
Paint
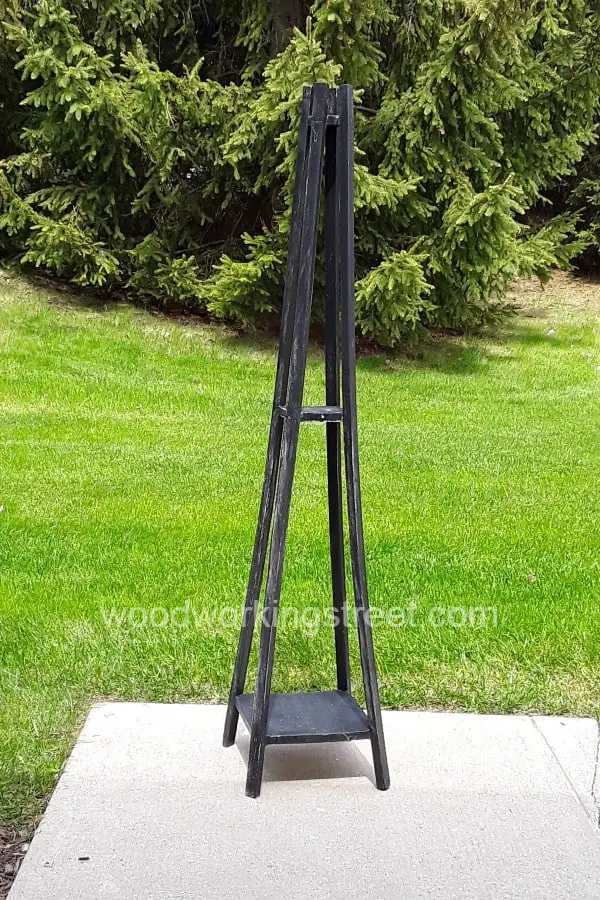
Apply the first coat of paint. For this project, I used Behr Marquee Furniture paint, available at Home Depot. The color was Tricorn Black. This color is similar to the original color of the coat rack.
You’ll probably need to have about two coats of paint after the primer. The number you need depends on how well the paint covers the wood surface.
The initial coat doesn’t need to cover the wood completely. So, you can keep it thin. Try to avoid drips, runs, and pooling.
After it dries, lightly rub sandpaper or the sanding block on it and use the tack cloth, as you did in the section above. This is what it looks like:
Repeat this process with a second coat. If the coverage is adequate and this is the final coat of paint, there is no need to sand it further. Wait for this to dry before proceeding with the next step.
TopCoat
The TopCoat is generally a protective layer for the wood. You can use many different materials for this. Examples are polyurethane and paste wax. For this project, I used paste wax since it doesn’t require a brush (or foam sponge) like Polyurethane.
Apply the paste wax with cheesecloth. Allow it to dry for about 10-15 minutes, Then, buff the project with a clean cloth for a smooth finish. Here’s the finished coat rack:

Conclusion
You can find many things in the thrift store. It’s truly a treasure trove for people interested in furniture restoration. For a small price, you can find pieces to fix up and use in your home. In this case, I found a freestanding coat rack and restored it without much difficulty.
There are several things that could have been better: First, the existing screws were not countersunk beneath the surface of the wood. This made it more difficult to get a smooth painted surface, I was able to deal with this by tightening the screws slightly. Because the wood was soft (Pine), the screw heads were then drawn below the wood surface.
I filled in these areas with wood filler and sanded them flush with the surface. This left a good base for the primer and paint. Actually, a better approach would have been to remove the screws and drill pilot holes to bring the heads below the surface of the wood. You could then cover these holes with wood filler. It would be a good idea to check and make sure that the screws still gripped the wood tightly. If they were loose, you’d need bigger screws.
Also, the vertical pieces were not truly vertical. They travel down to the bottom of the Freestanding Coat Rack at a small angle. In this case, it’s about 5 degrees. The corner shelf cuts should actually have a bevel cut of about 5 degrees because of the slant of the horizontal pieces. However, you can get away without having it for this simple project.
Did you enjoy this post? Be sure to share. Also, don’t forget to follow my boards on Pinterest.
