35 Easy & Cheap DIY Christmas Decorations You Have to Try
There’s a special kind of magic that fills a home decorated with handmade treasures. If you’re looking to create a festive atmosphere that’s both beautiful and deeply personal without breaking the bank, you’ve come to the right place! This collection of 35 easy and cheap DIY Christmas decorations is your guide to crafting a season filled with warmth, creativity, and joy.
From timeless ornaments that capture precious memories to stunning centerpieces that will delight your guests, these ideas will inspire you to make your home feel uniquely merry and bright. So put on some holiday music, gather your supplies, and let’s get crafting!

Table of Contents
- Easy DIY Christmas Ornaments from Scratch
- Rustic Wood Slice Christmas Crafts
- Budget-Friendly Dollar Store Decorations
- Cozy Christmas Crafts Using Fabric and Felt
- Natural Decorations with Pinecones and Greenery
- Charming DIY Paper and Cardstock Creations
- Magical DIY Outdoor Christmas Light Displays
- Handmade Christmas Gifts for Friends and Family
- Vintage-Inspired Holiday Decor Ideas
- Modern & Minimalist Christmas DIY Projects
- Festive DIY Centerpieces for Your Holiday Table
- Conclusion
Easy DIY Christmas Ornaments from Scratch
Nothing says Christmas like a tree full of handmade ornaments. This section is packed with simple yet beautiful ideas that you can create from scratch for a truly personal touch.
1. Salt Dough Handprint Ornaments

Making salt dough handprint ornaments is a fun and easy project for the whole family. Just mix flour, salt, and water, then shape it into handprints and let them dry. Hang them on your tree for a personal touch that captures those little hands forever!
What You’ll Need:
- 1 cup of all-purpose flour
- 1/2 cup of salt
- 1/2 cup of water
- A drinking straw for making a hole
- Twine or ribbon for hanging
Simple Steps:
- Mix the flour, salt, and water to form a smooth dough.
- Roll it out and press a hand into the surface.
- Cut around the handprint and use the straw to poke a hole at the top.
- Bake at 250°F (120°C) for 2-3 hours or until completely dry.
- Once cool, you can paint it and add the year for a timeless keepsake.
2. Clear Plastic Filled Ornaments
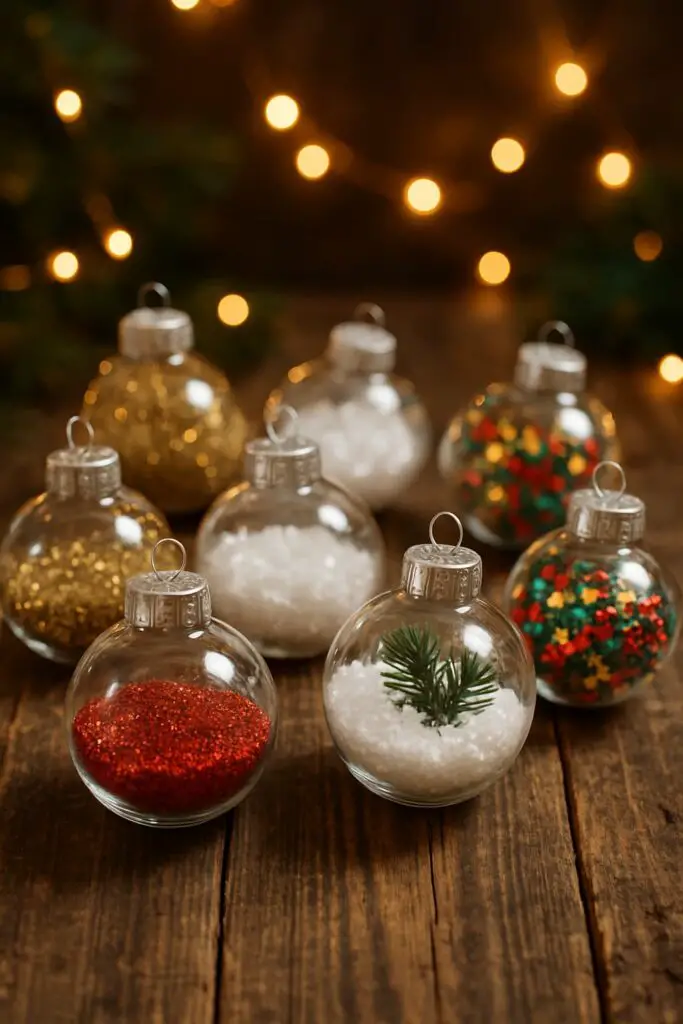
Clear plastic filled ornaments are a fun and easy DIY project for the holidays. You can fill them with glitter, fake snow, or even tiny ornaments to match your theme. This simple decoration adds a personal touch to your Christmas tree without breaking the bank!
What You’ll Need:
- Clear plastic or glass ball ornaments
- Fillers like glitter, faux snow, tiny pom-poms, or jingle bells
- Ribbon for the top
Creative Ideas:
- For a snowy look: Fill with faux snow and a miniature bottle brush tree.
- For a candy theme: Fill with colorful sprinkles and tiny peppermint candies.
- For a rustic vibe: Use small twigs, dried berries, and a sprig of rosemary.
3. Cinnamon Stick Star Ornaments

These cinnamon stick star ornaments are a fun and easy DIY project for the holidays. Just gather some cinnamon sticks, tie them together, and add a cute bow for extra charm. Hang them on your tree or around the house for a lovely festive touch!
What You’ll Need:
- 5 cinnamon sticks per star
- Hot glue gun or craft glue
- Twine for hanging
- Optional: small button or star anise for the center
Simple Steps:
- Arrange five cinnamon sticks in a star shape.
- Use a hot glue gun to secure the points where the sticks overlap.
- Glue a decorative button or star anise in the center to hide the joints.
- Tie a loop of twine to the top point for hanging.
Rustic Wood Slice Christmas Crafts
Bring the cozy charm of a winter cabin into your home with these rustic craft ideas. Using natural wood slices as your canvas, you can create timeless decorations that feel both festive and authentic.
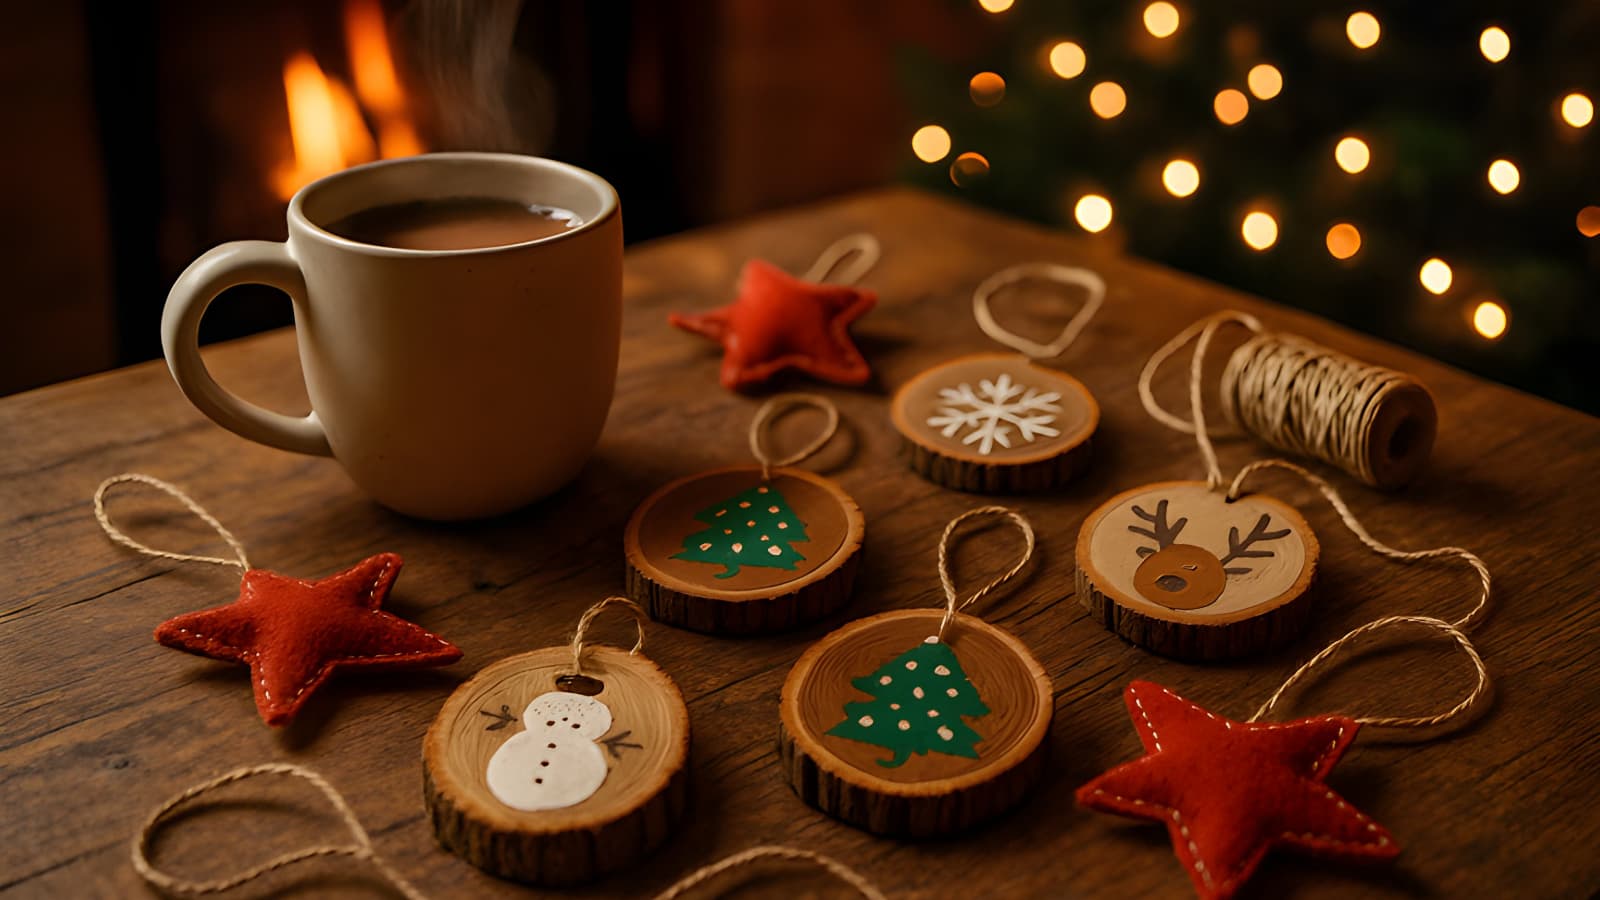
4. Hand-Painted Wood Slice Ornaments
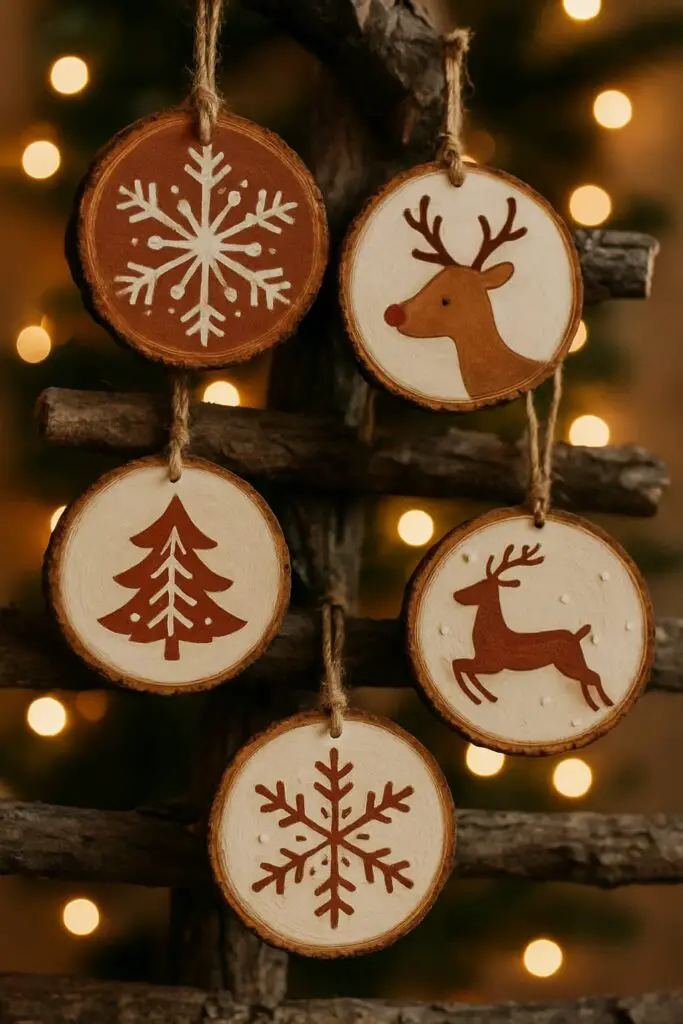
Hand-painted wood slice ornaments are a fun and easy way to add a personal touch to your Christmas tree. Grab some wooden slices and paint festive designs like snowflakes, reindeer, or Christmas trees. These charming decorations are not only budget-friendly but also make great gifts for friends and family!
What You’ll Need:
- Small wood slices (with pre-drilled holes)
- Acrylic craft paint in various colors
- Fine-tipped paint brushes or paint pens
- Twine or ribbon for hanging
Design Inspiration:
- Simple white snowflakes on a natural wood background.
- A cartoonish reindeer face.
- Your family’s initials and the year.
- A simple phrase like “Joy” or “Peace.”
5. Twig and Twine Hanging Stars
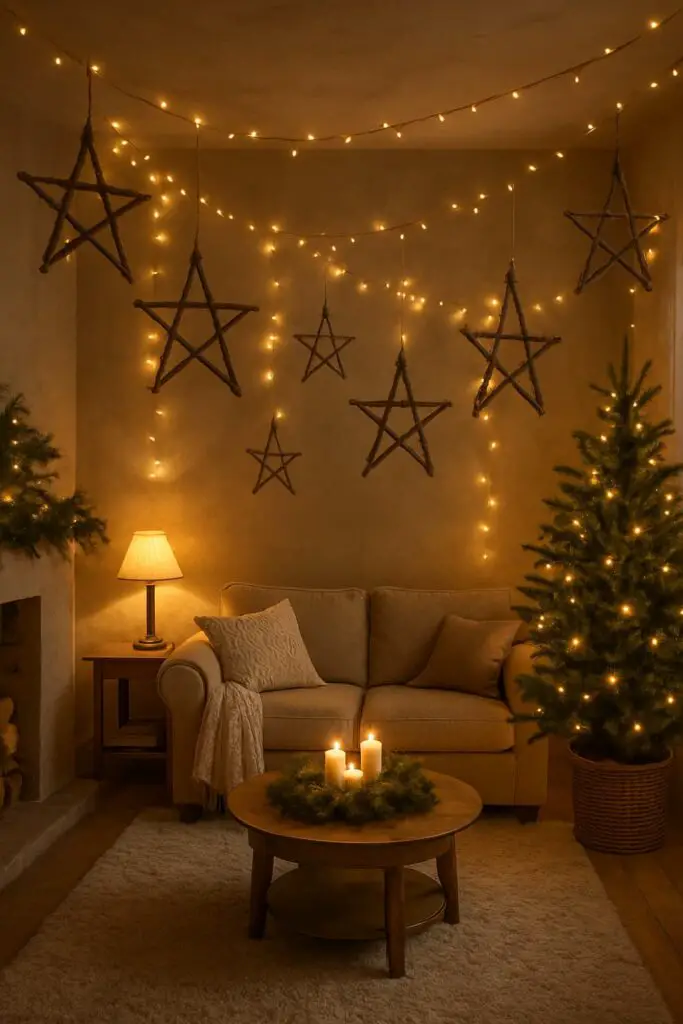
These twig and twine hanging stars are a fun and easy way to add some charm to your holiday decor. Just gather some twigs, shape them into stars, and tie them together with twine. Hang them up for a cozy, rustic touch that will brighten your space!
What You’ll Need:
- 5 straight twigs of similar length per star
- Garden shears to trim twigs
- Jute twine
- Hot glue gun (optional, for extra stability)
Simple Steps:
- Lay out the five twigs to form a star shape.
- Use a long piece of twine to wrap and tie each joint where the twigs intersect.
- Continue wrapping the twine around the star to create a woven pattern.
- Leave a long tail of twine at the top to create a hanging loop.
6. Miniature Birch Log Reindeer

Create a charming touch for your holiday decor with these adorable miniature birch log reindeer. Using simple materials like birch logs and twigs, you can easily craft these cute critters. Add a festive ribbon and some pinecones for a delightful finish!
What You’ll Need:
- One thicker birch log for the body
- One thinner birch log for the head
- Small twigs for legs and antlers
- A drill with a small bit
- Hot glue gun
- Optional: a red pom-pom for the nose
Assembly Guide:
- Drill four angled holes on the underside of the “body” log for the legs.
- Drill two holes on top of the “head” log for the antlers.
- Use hot glue to secure the twig legs and antlers into the holes.
- Glue the head onto the body at a slight upward angle.
- Add a red pom-pom nose for a touch of whimsy!
Budget-Friendly Dollar Store Decorations
You don’t need to spend a fortune to make your home look magical for the holidays. Discover how simple items from the dollar store can be transformed into stunning, high-end-looking Christmas decor.
7. Glass Fishbowl Snow Globes
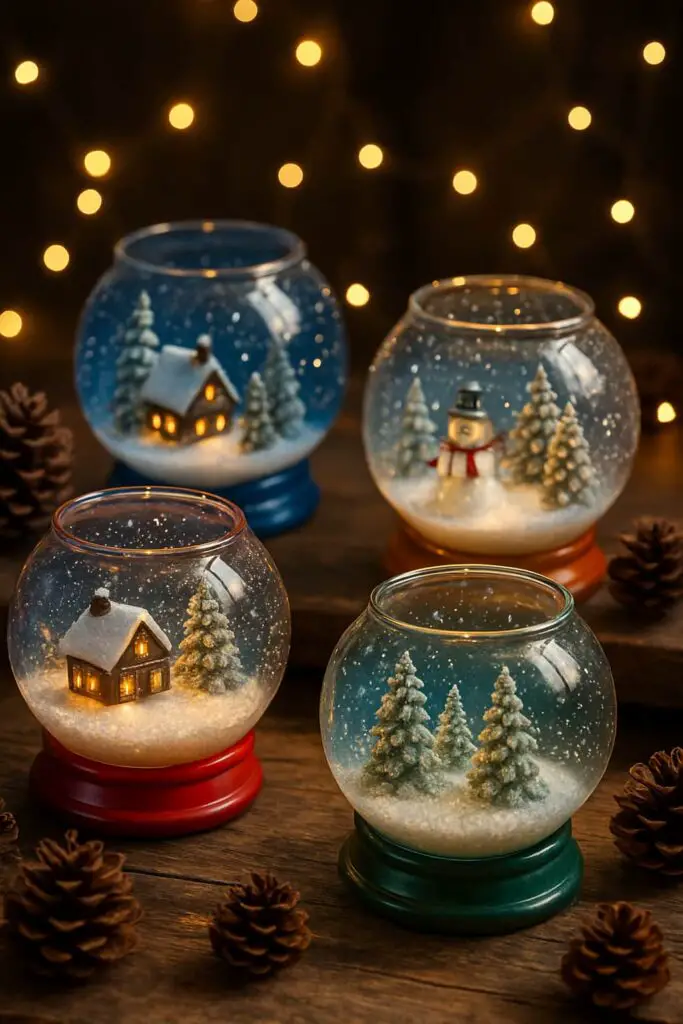
Glass fishbowl snow globes are a fun and easy DIY project for the holidays. You can fill these open globes with tiny winter scenes, like snowmen or little houses, to create enchanting tabletop displays. They make great decorations and even better gifts, capturing the magic of a snowy miniature world!
What You’ll Need:
- Small glass fishbowls or jars from the dollar store
- Miniature figurines (trees, snowmen, deer)
- Faux snow or glitter
- Acrylic Paint Pen for “snow” dots on the glass
Creating Your Scene:
- Glue your figurines to the inside bottom of the fishbowl or lid of the jar.
- Fill with a generous spoonful of faux snow or glitter.
- Arrange the scene and draw “snow” dots on the glass with the Craft Pen.
8. Festive Ornament Wreath

A festive ornament wreath is a fun and colorful way to add cheer to your home this holiday season. You can easily create one using shiny ornaments in various colors and sizes, all held together with a sturdy base. Hang it on your door or wall to spread the holiday spirit to everyone who visits!
What You’ll Need:
- A wire wreath form
- Lots of plastic ball ornaments in various sizes and colors
- Hot glue gun
- Wide ribbon for hanging
Simple Steps:
- Begin by gluing the largest ornaments onto the wire frame to create a base layer.
- Fill in the gaps with medium-sized ornaments, varying the colors.
- Use the smallest ornaments to fill in any remaining small holes.
- Loop a wide ribbon through the top of the wreath to create a sturdy hanger.
9. Beaded Garlands for the Tree

Move beyond simple tinsel and add a touch of handmade elegance to your tree with a beautiful beaded garland. This versatile DIY project can be adapted to any style, but it truly shines when embracing the clean, natural simplicity of Scandinavian design. It’s a wonderful and meditative craft perfect for a quiet winter afternoon.
Styling Your Beaded Garland:
- For a Chic Scandinavian Feel: This look is all about celebrating natural, simple beauty. Use unfinished wood beads in various round or geometric shapes and string them onto jute twine or white cotton string. The minimalist aesthetic, focusing on raw texture and uncluttered lines, is central to Scandinavian holiday design. The result is a rustic yet sophisticated garland that adds warmth and a touch of cozy hygge to your tree without overwhelming it.
- For a Classic & Colorful Look: If you prefer a more vibrant style, alternate bead sizes to create visual interest. You can also create a festive pattern using traditional holiday colors like red, green, and white for a playful and timeless feel.
- For a Touch of Sparkle: To create a more glamorous garland, try mixing in metallic gold or silver beads with faceted glass or crystal beads. This combination will beautifully catch and reflect the twinkling lights on your tree.
10. Tiered Tray Decorations from Glass Jars
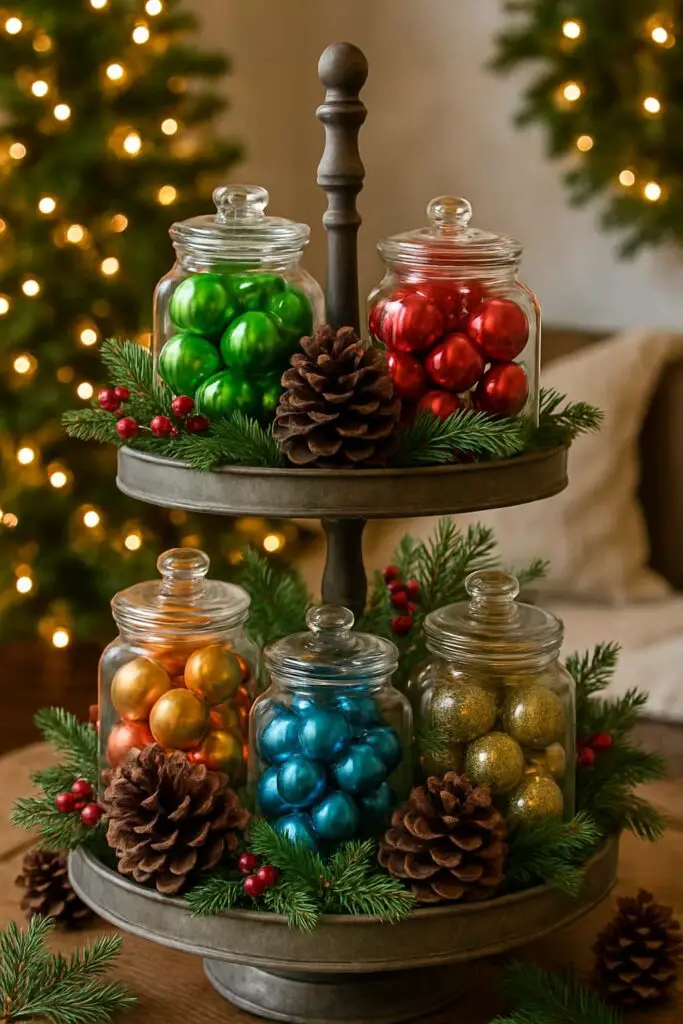
Tiered tray decorations using glass jars are a fun way to bring some holiday cheer into your home. Fill the jars with colorful ornaments, pinecones, and greenery for a festive look. This easy DIY project is not only budget-friendly but also a great way to showcase your creativity this Christmas!
What You’ll Need:
- A two or three-tiered tray
- Glass jars or candle holders from the dollar store
- Various fillers: small ornaments, jingle bells, faux snow, candy canes, battery-operated fairy lights.
Styling Your Tray:
- Place the largest items on the bottom tier.
- Fill your glass jars with different festive items.
- Vary the height and texture of your decorations on each level.
- Weave a string of fairy lights throughout the display for a magical glow.
Cozy Christmas Crafts Using Fabric and Felt
Add a touch of softness and warmth to your holiday decorating with these delightful fabric and felt projects. These crafts are perfect for a cozy afternoon and result in charming keepsakes you’ll use for years.
11. No-Sew Felt Scandinavian Gnomes

These adorable gnomes are a fun and easy project for your holiday decor. Made from colorful felt, they add a cozy touch to any space. Grab some supplies and let your creativity shine with these charming decorations!
What You’ll Need:
- Felt for the hat and body
- Faux fur for the beard
- A small wooden bead for the nose
- Rice or poly-pellets for weight
- Poly-fil for stuffing
- Hot glue gun
Simple Steps:
- Create a cone shape from felt for the body and glue the seam.
- Fill the bottom with rice for weight, then stuff the rest with poly-fil.
- Cut a triangle of faux fur for the beard and glue it to the front of the body.
- Create a taller cone from a different color of felt for the hat.
- Glue the wooden bead just under the brim of the hat to serve as the nose, peeking out over the beard.
12. Fabric Scrap Ribbon Garland
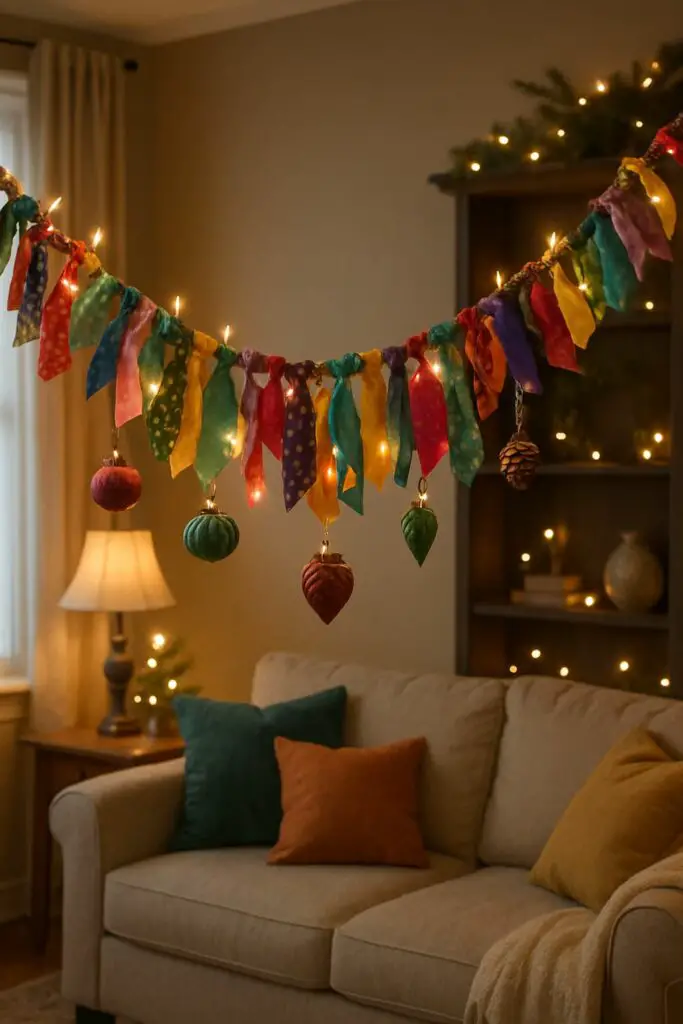
This fabric scrap ribbon garland is a fun and colorful way to brighten up your holiday space. Just gather some leftover fabric, cut it into strips, and tie them onto a string or twine. Hang it up, and watch your room come alive with festive cheer!
What You’ll Need:
- Assorted holiday-themed fabric scraps
- A long piece of jute twine or ribbon
- Scissors (pinking shears create a nice edge)
Easy to Make:
- Cut your fabric into strips, roughly 1-2 inches wide and 6-8 inches long.
- Simply tie the strips onto the twine with a single knot.
- Alternate patterns and colors, pushing the strips close together for a full, fluffy look.
- Leave empty space at both ends of the twine for easy hanging.
13. Miniature Stuffed Felt Christmas Trees

These cute little felt Christmas trees are a fun and easy DIY project. You can make them in various sizes and colors, adding your own buttons and ribbons for a personal touch. They make great decorations for your home or gifts for friends and family!
What You’ll Need:
- Green felt
- Poly-fil stuffing
- Embroidery thread and needle
- Small buttons, beads, or sequins for “ornaments”
- A small wood slice for the base
Simple Steps:
- Cut two identical Christmas tree shapes from the green felt.
- Use embroidery thread to sew the two pieces together around the edges, leaving the bottom open.
- Stuff the tree with poly-fil until it’s plump, then sew the bottom closed.
- Decorate the tree by sewing on buttons and beads.
- Use a hot glue gun to attach the finished tree to the wood slice base.
Natural Decorations with Pinecones and Greenery
Embrace the beauty of the season by bringing the outdoors in. This collection of ideas uses natural elements like pinecones, fresh greenery, and dried fruit to create decorations that are both beautiful and eco-friendly.
14. Scented Pinecones for a Holiday Bowl
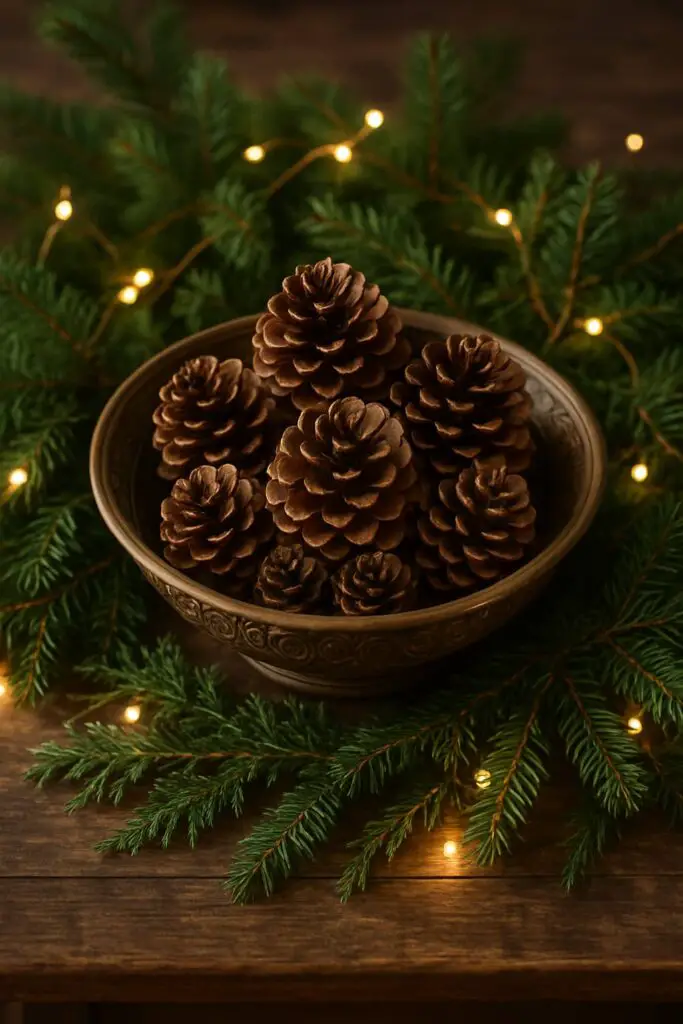
Transform your home into a cozy winter retreat with scented pinecones. Simply gather some pinecones, add your favorite essential oils, and let them dry. Place them in a bowl with greenery and lights for a festive touch that smells amazing!
What You’ll Need:
- Foraged pinecones
- Cinnamon or other holiday-scented essential oils
- A large resealable plastic bag
- A decorative bowl
How to Scent Them:
- First, clean your pinecones by baking them on a foil-lined sheet at 200°F (95°C) for 30 minutes to remove bugs and sap.
- Once cool, place them in the plastic bag and add 15-20 drops of essential oil.
- Seal the bag and shake well. Let it sit for a few days to allow the scent to absorb fully.
15. Dried Orange Slice and Cranberry Garland

Brighten up your holiday decor with a dried orange slice and cranberry garland. This simple DIY project adds a pop of color and a lovely scent to your home. Plus, it’s a fun way to get creative with natural materials!
What You’ll Need:
- 2-3 large oranges
- A bag of fresh cranberries
- Twine
- A large needle
Drying the Oranges:
- Slice the oranges thinly and pat them dry with a paper towel.
- Place the slices on a baking sheet lined with parchment paper.
- Bake at 200°F (95°C) for 3-4 hours, flipping them halfway through, until they are dry and slightly translucent.
- Once cool, use the needle and twine to string the orange slices and fresh cranberries in an alternating pattern.
16. Fresh Evergreen Door Swags
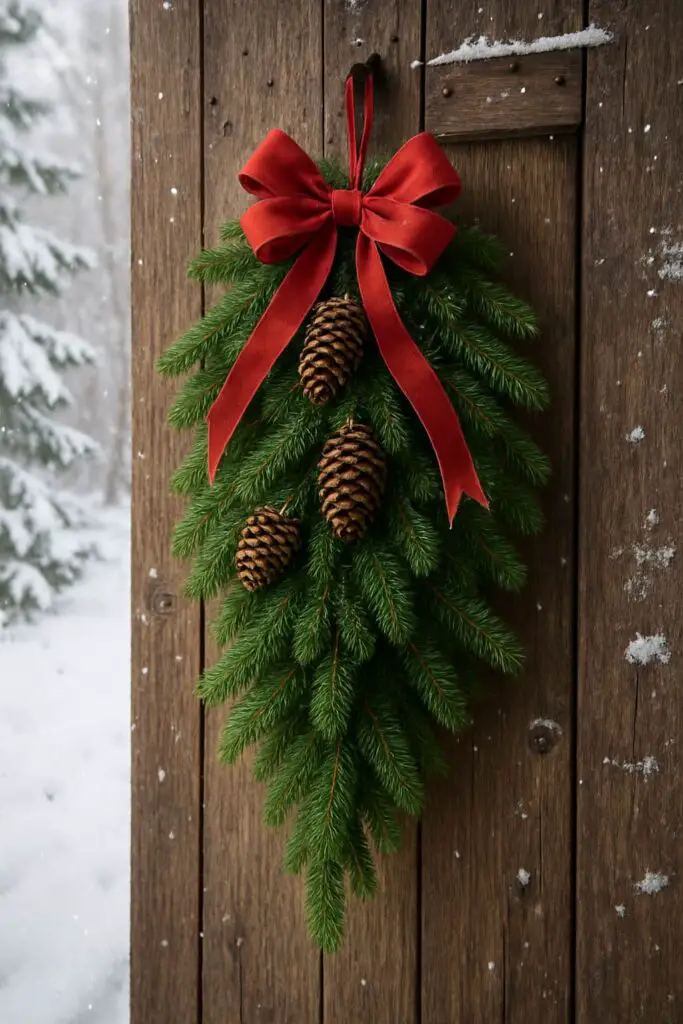
Fresh evergreen door swags are a simple way to bring the holiday spirit to your home. Just gather some pine branches, add a few pine cones, and finish it off with a bright ribbon. Hang it on your door, and you’ll have a festive welcome for all your guests!
What You’ll Need:
- Assorted evergreen clippings (pine, cedar, fir)
- Floral wire
- Wire cutters
- Pinecones or other natural accents
- A large, festive bow
Assembly Steps:
- Arrange your longest evergreen branches to form the base of the swag.
- Layer shorter, different-textured branches on top.
- Use floral wire to tightly bind all the stems together at the top.
- Attach pinecones and other accents using more wire.
- Tie the large bow over the bound stems to finish the look.
17. Pinecone Wax Fire Starters

Pinecone wax fire starters are a fun and easy DIY project for the holidays. Simply dip pinecones in wax and let them dry for a charming and useful decoration. These little beauties not only look great but also make starting your fire a breeze during cozy winter nights.
What You’ll Need:
- Dry pinecones
- Soy wax flakes or old candle remnants
- Cotton wicks
How to Make Them:
- Melt the wax in a double boiler or a can placed in a pot of simmering water.
- Tie a long wick around the top of each pinecone.
- Holding the wick, dip the pinecone into the melted wax several times, allowing it to cool slightly between dips to build up layers.
- Place on wax paper to harden completely. To use, simply place one in the fireplace and light the wick.
Charming DIY Paper and Cardstock Creations
Unleash your creativity with the simple and versatile medium of paper. From intricate snowflakes to whimsical garlands, these papercrafts are an inexpensive way to make a big decorative impact.
18. Giant 3D Paper Snowflakes
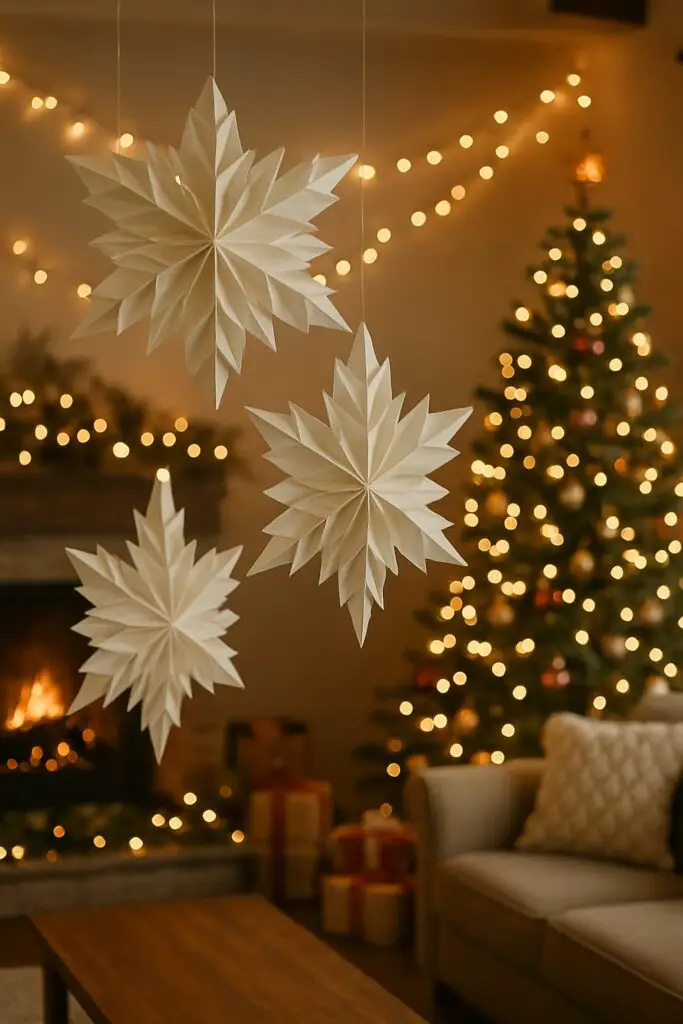
Giant 3D paper snowflakes are a fun and easy way to add some holiday cheer to your home. You can make them in different sizes and hang them from the ceiling or windows for a magical touch. Grab some paper and scissors, and let your creativity shine this Christmas!
What You’ll Need:
- 6 pieces of square paper per snowflake (all the same size)
- Scissors
- A stapler
Simple Steps:
- Fold each piece of square paper in half diagonally to form a triangle.
- Make three parallel cuts from the folded edge toward the center spine, stopping before you cut all the way through.
- Unfold the paper. Roll the innermost cut strips into a tube and staple them.
- Flip the paper over and do the same with the next set of strips.
- Continue flipping and stapling until all strips are connected.
- Once you have six finished “arms,” staple them together at the center to form the snowflake.
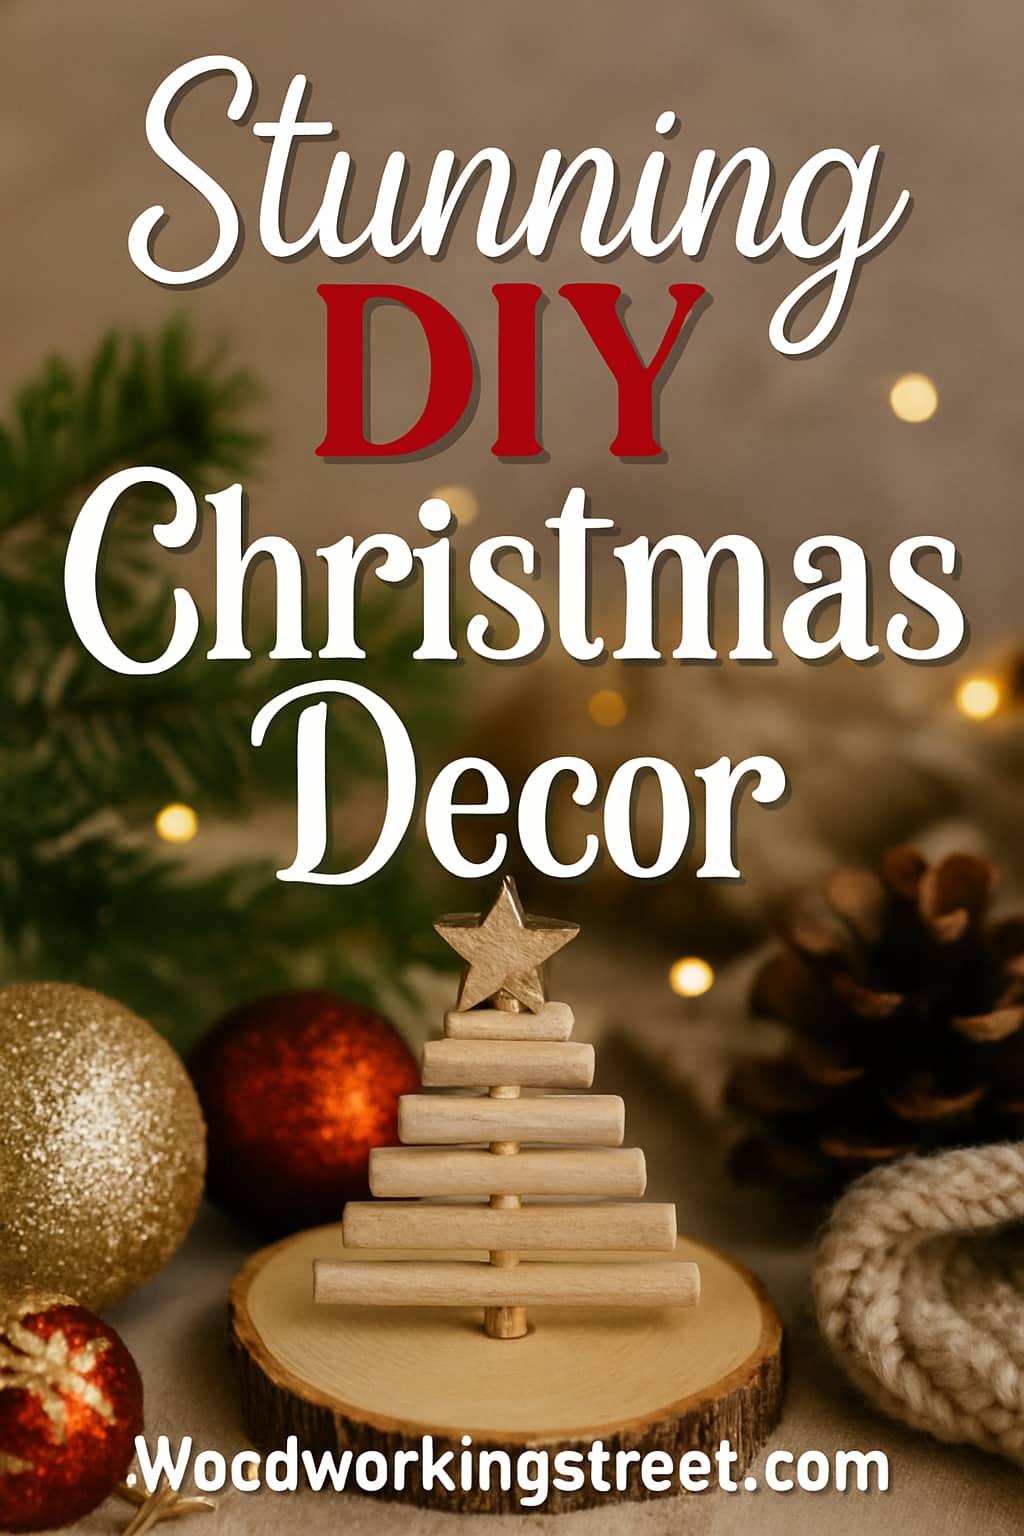
19. Folded Paper Christmas Tree Display

Creating a folded paper Christmas tree is a fun and easy project for everyone. Just grab some colorful paper and fold it into a festive shape, then decorate it with dots or stickers. This cute display adds a cheerful touch to your holiday decor without breaking the bank!
What You’ll Need:
- Green cardstock or scrapbook paper
- A wooden skewer or thin dowel rod
- A small wood slice or cork for the base
- A star-shaped paper punch or sticker for the top
Accordion Fold Method:
- Cut your paper into several strips of decreasing length.
- Fold each strip back and forth like an accordion.
- Poke a hole through the center of each folded strip.
- Drill a hole in your wood slice base and insert the skewer.
- Slide the folded paper strips onto the skewer, starting with the longest at the bottom.
- Fan out the folds and top with a paper star.
20. Twine and Clothespin Holiday Card Garland

This twine and clothespin holiday card garland is a fun and easy way to display your favorite Christmas cards. Just grab some twine, a few clothespins, and hang them up for a festive touch. It’s a simple project that adds charm to your holiday decor!
What You’ll Need:
- Jute twine
- Miniature clothespins
- Holiday cards as they arrive
- Optional: small evergreen clippings or fairy lights
Displaying Your Cards:
- Drape the twine across a mantel, down a staircase railing, or along an empty wall.
- As you receive cards, simply clip them onto the twine.
- For an extra festive touch, clip small sprigs of cedar or pine between the cards, or weave a strand of copper-wire fairy lights along the twine.
Magical DIY Outdoor Christmas Light Displays
Make your home the star of the neighborhood with these incredible DIY outdoor decoration ideas. These projects will help you create a festive and welcoming display for all to enjoy.
21. DIY Wooden Porch Sleigh
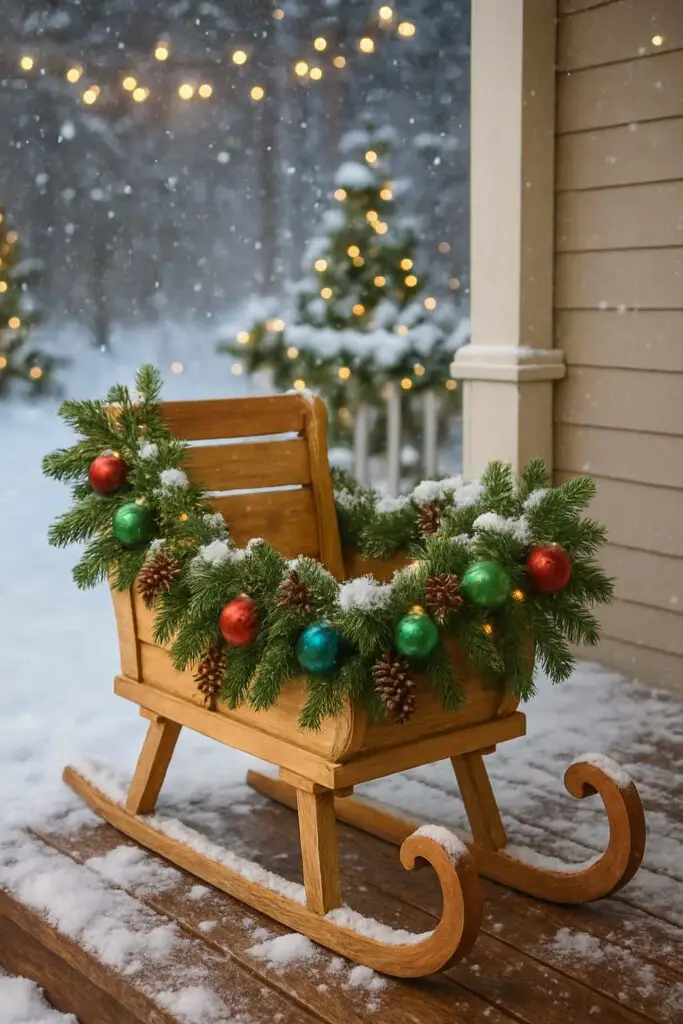
Create a charming wooden porch sleigh to bring festive cheer to your home. This easy project can be made with simple materials and a little creativity. Decorate it with garlands, ornaments, or even lights for a cozy holiday vibe!
What You’ll Need:
- Reclaimed wood or pallet boards
- Jigsaw or hand saw
- Screws and a drill
- Sandpaper
- Paint or stain
Building Your Sleigh:
- Sketch a simple sleigh runner shape onto a board and cut out two identical pieces.
- Cut several smaller planks to form the seat/box of the sleigh.
- Assemble the box on top of the runners using screws.
- Sand all the edges smooth and apply your desired paint or stain color.
- Once dry, fill with pine branches, wrapped gifts, or a cozy blanket.
22. Tomato Cage Christmas Trees with Lights
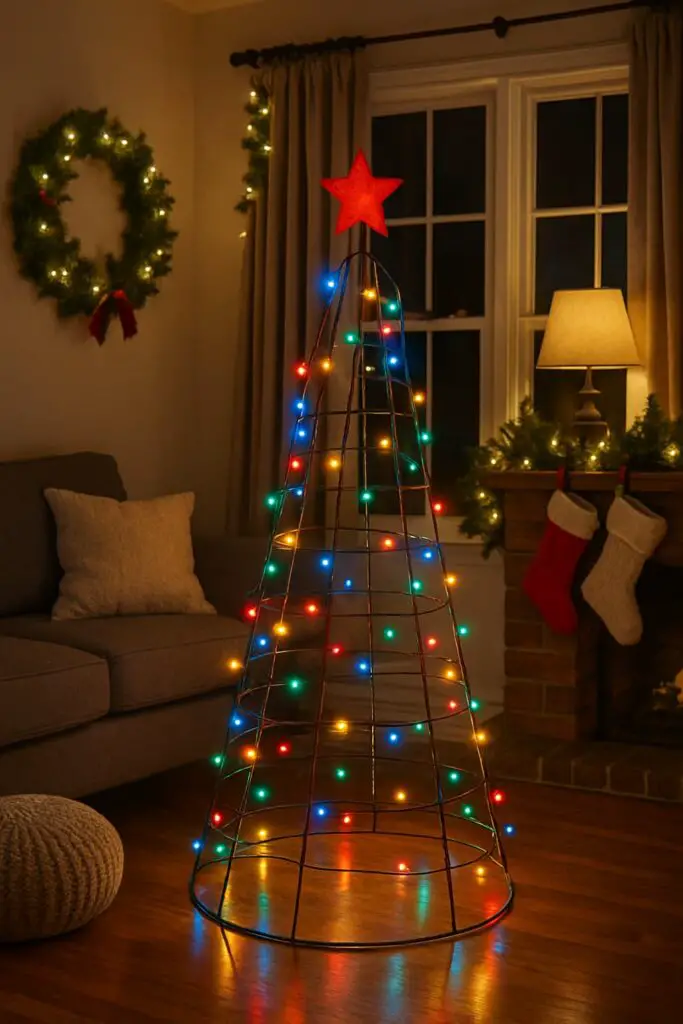
Tomato cage Christmas trees are a fun and budget-friendly way to brighten up your holiday decor. Just wrap colorful lights around a tomato cage and top it off with a festive star for a cheerful touch. This easy DIY project adds a unique flair to your home without breaking the bank!
What You’ll Need:
- A wire tomato cage
- Green garland (or garland that matches your house color)
- A string of outdoor Christmas lights
- A tree topper
Simple Steps:
- Place the tomato cage upside down, so the wide part is on the ground.
- Use zip ties to secure the prongs at the top together to form a point.
- Starting at the bottom, wrap the garland tightly around the cage until it’s fully covered.
- Wrap the string of lights around your new “tree.”
- Place your tree topper on the point at the top.
23. Giant PVC Pipe Candy Canes
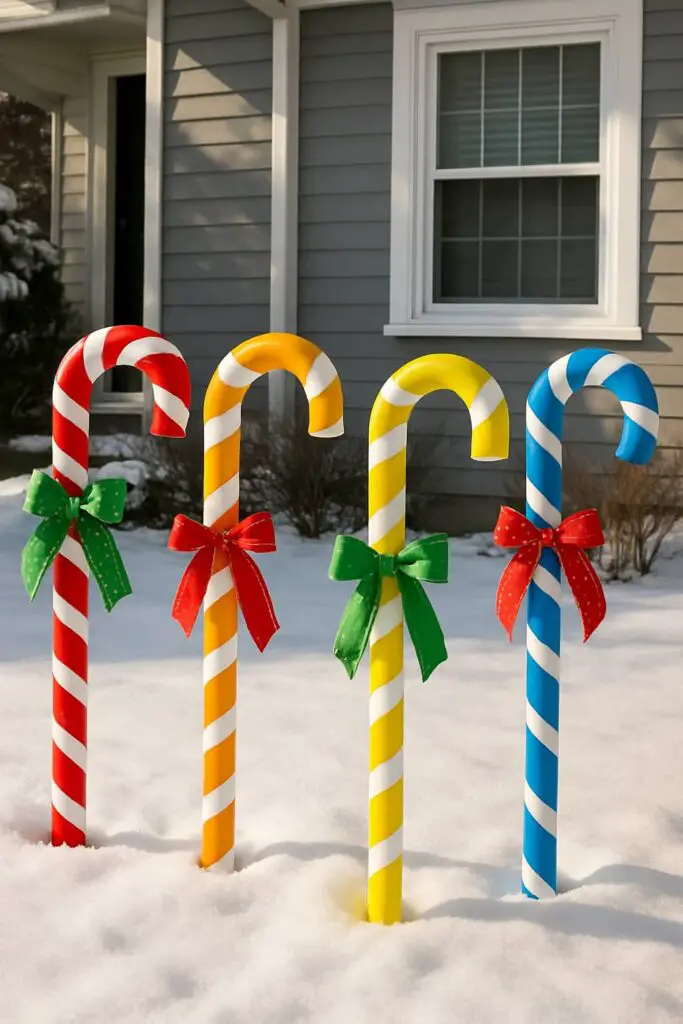
Create a huge impact in your yard with these oversized candy canes made from simple PVC pipes. This project is surprisingly easy and creates a whimsical, North Pole-inspired look.
What You’ll Need:
- White PVC pipe (choose your desired diameter)
- A U-shaped PVC pipe elbow joint for the top curve
- Red electrical tape or spray paint
- A heat gun (optional, for bending)
- A wooden dowel or rebar to stake it into the ground
Simple Steps:
- Cut the PVC pipe to your desired height for the straight part of the candy cane.
- Attach the U-shaped elbow joint to the top.
- Wrap the red tape around the entire pipe in a spiral pattern to create the classic candy cane stripes.
- Hammer a piece of rebar or a wooden stake into the ground.
- Slide the hollow PVC candy cane over the stake to secure it.
24. Festive Evergreen Porch Pots
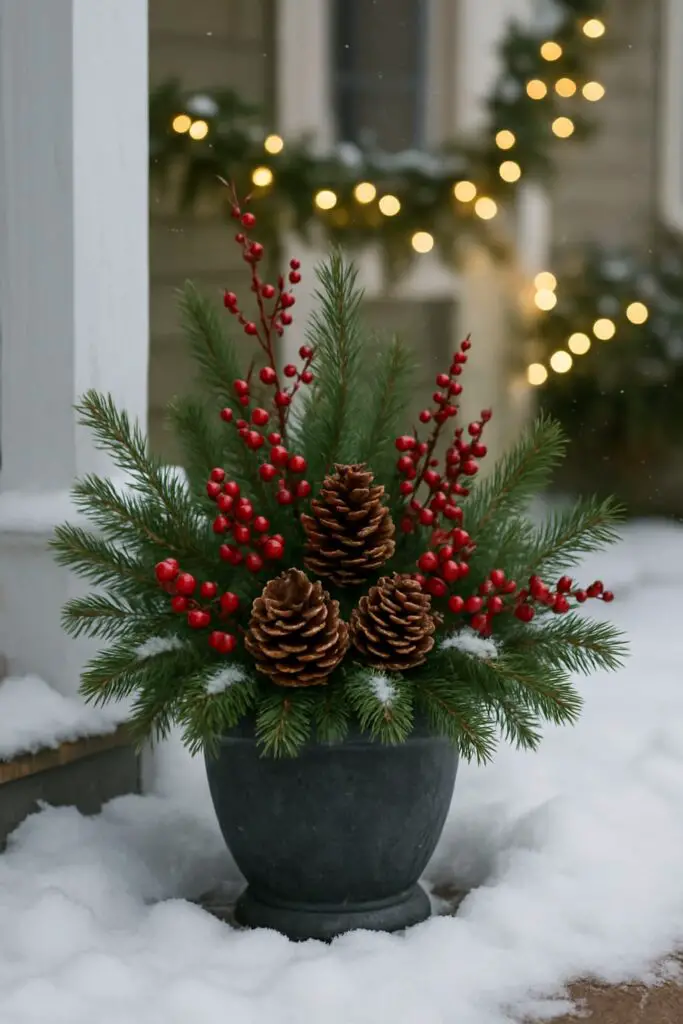
Spruce up your entrance with festive evergreen porch pots! Simply fill a planter with fresh pine branches, pinecones, and some bright red berries for a cheerful touch. These easy decorations add a warm welcome to your home this holiday season.
What You’ll Need:
- An outdoor planter pot
- Soil or floral foam to secure the branches
- A variety of fresh evergreen clippings
- Accent pieces: birch branches, red dogwood twigs, pinecones, faux berries.
Arranging Your Pot:
- Start by inserting your tallest branches (like birch or dogwood) into the center of the pot.
- Fill in around the center with your fullest evergreen branches to create the main shape.
- Use shorter, draping branches (like cedar) around the edges to spill over the sides.
- Tuck in your pinecones and berry sprigs to add color and texture.
Handmade Christmas Gifts for Friends and Family
A handmade gift is a gift from the heart. Here you’ll find thoughtful and easy-to-make gift ideas that your friends, family, and neighbors are sure to love.
25. Layered Mason Jar Hot Cocoa Mix

This layered mason jar hot cocoa mix is a fun and easy project for the holidays. Just stack cocoa powder, chocolate chips, and marshmallows in a jar, and you’ve got a sweet gift or a cozy treat for yourself. Tie it up with a ribbon, and you’re ready to spread some holiday cheer!
What You’ll Need:
- A mason jar with a lid
- Hot cocoa mix
- Chocolate chips (milk, dark, or white)
- Dehydrated mini marshmallows
- A gift tag with instructions
Layering Guide (from bottom to top):
- Start with the hot cocoa mix as the base.
- Carefully add a layer of chocolate chips.
- Top it all off with a thick layer of mini marshmallows.
- Write instructions on the tag: “Pour mix into a mug, add 8oz of hot milk or water, stir, and enjoy!”
26. Hand-Poured Holiday Scented Candles
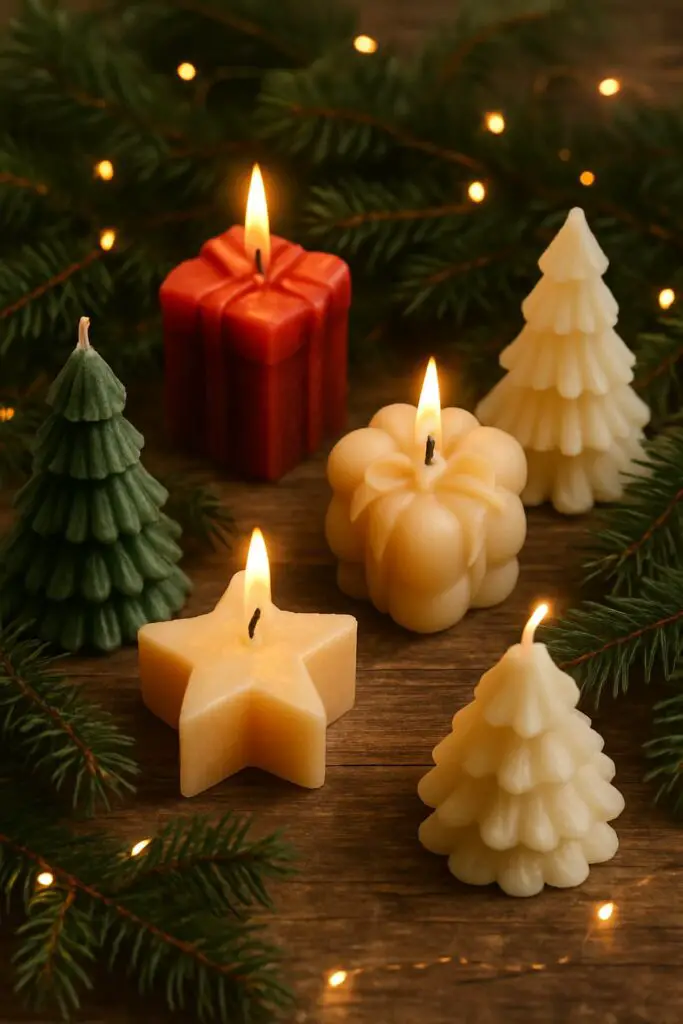
Making your own holiday scented candles is a fun and easy project. You can choose your favorite scents and create unique designs that fit your style. Plus, they make great gifts or cozy decorations for your home during the festive season!
What You’ll Need:
- Soy wax flakes
- Candle wicks with bases
- Holiday-themed fragrance oils (e.g., pine, cranberry, gingerbread)
- Heat-proof containers like glass jars or tins
Simple Steps:
- Melt the soy wax flakes in a double boiler or microwave.
- While the wax melts, use a dab of hot glue or a wick sticker to secure the wick base to the bottom center of your container.
- Once the wax is melted, let it cool slightly before stirring in your fragrance oil.
- Carefully pour the scented wax into your container. Use clothespins laid across the top to keep the wick centered and straight.
- Let the candle cool and harden completely for several hours before trimming the wick.
27. Personalized Mod Podge Photo Coasters
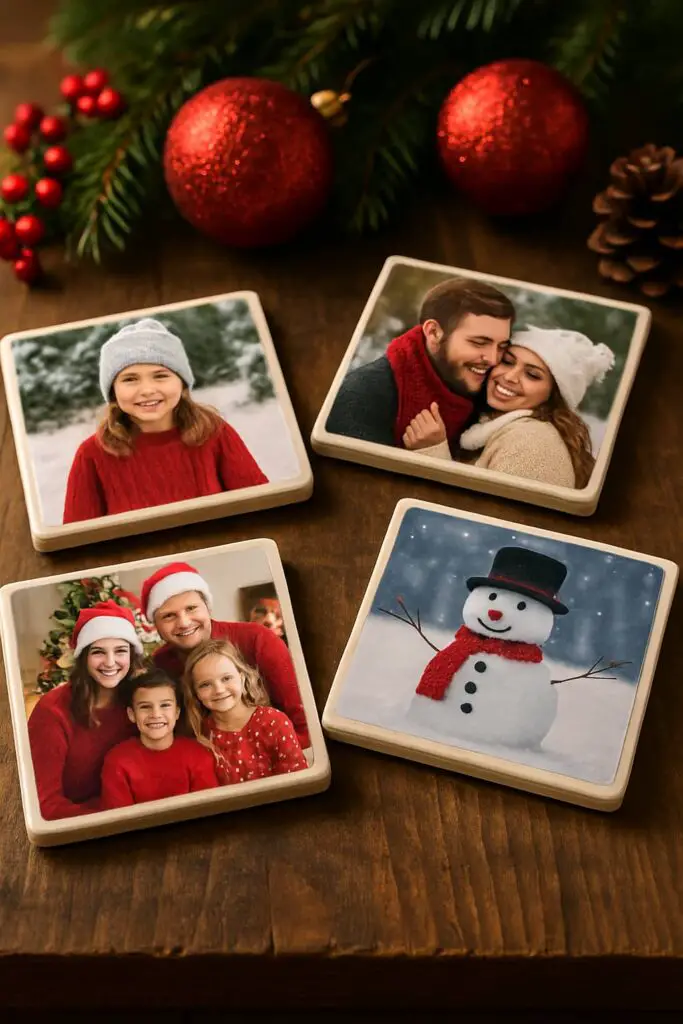
These personalized photo coasters are a fun and easy DIY project for the holidays. Just grab some of your favorite pictures, Mod Podge, and wooden coasters to create unique gifts or decorations. They’re perfect for adding a personal touch to your holiday gatherings!
What You’ll Need:
- Square ceramic tiles or blank wooden coasters
- Photos printed on regular paper, trimmed to size
- Mod Podge (Gloss or Matte finish)
- A foam brush
- Clear acrylic sealer spray
Easy to Make:
- Apply a thin layer of Mod Podge to the back of your photo and the surface of the coaster.
- Carefully place the photo on the coaster and smooth out any air bubbles. Let it dry.
- Apply a thin, even top coat of Mod Podge over the entire photo and coaster. Let it dry completely.
- Apply at least two more top coats, allowing each to dry in between.
- Finish with a coat of clear acrylic sealer to make the coasters waterproof.
Vintage-Inspired Holiday Decor Ideas
There’s something magical about the Christmases of yesteryear. These vintage-inspired projects will help you capture that nostalgic feeling and create a classic, timeless holiday atmosphere in your home.
28. Classic Popcorn and Cranberry Garland

Creating a popcorn and cranberry garland is a fun and easy way to add some holiday cheer to your home. Just string together popcorn and cranberries for a classic look that’s perfect for your tree or mantel. This DIY project is not only budget-friendly, but it also brings a touch of nostalgia to your festive decorations!
What You’ll Need:
- Plain, air-popped popcorn (day-old popcorn is less brittle)
- Fresh, firm cranberries
- A long, sturdy needle
- Strong thread or fishing line
Tips for Success:
- Use a thimble to protect your fingers while pushing the needle through the cranberries.
- Create a pattern, such as three pieces of popcorn followed by two cranberries.
- Make the garland in shorter, manageable sections and then tie them together.
29. Vintage Sheet Music Cone Ornaments

These charming cone ornaments are a fun way to add a musical touch to your tree. Made from vintage sheet music, they bring a unique flair to your holiday decor. Just hang them up with colorful ribbons, and you’re all set for a festive season!
What You’ll Need:
- Photocopies of vintage sheet music
- Scissors and a pencil
- Glue or double-sided tape
- Thin ribbon for hanging
- Optional: glitter glue for embellishment
Simple Steps:
- Draw a semi-circle shape on the back of the sheet music and cut it out.
- Roll the semi-circle into a cone shape and secure the edge with glue.
- Punch a small hole on either side of the cone’s opening and thread a ribbon through for a hanger.
- For extra sparkle, trace the edges of the cone with glitter glue.
30. Retro Tinsel-Covered Styrofoam Cones
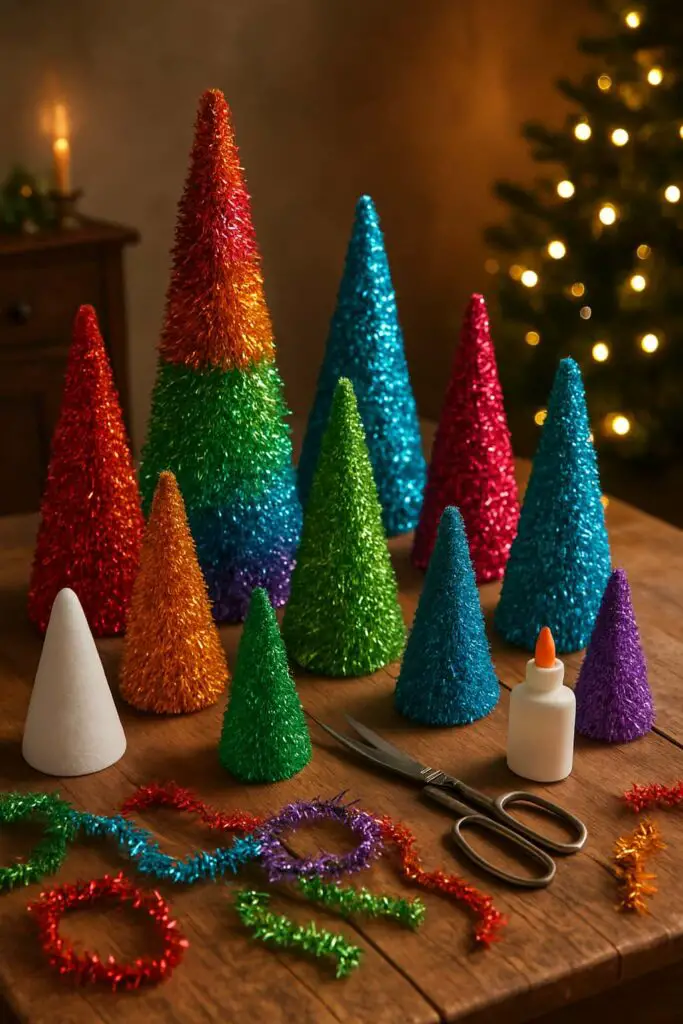
These colorful tinsel-covered cones are a fun and easy way to bring some retro flair to your holiday decor. Just grab some Styrofoam cones, tinsel, and glue, and let your creativity shine! They make great centerpieces or decorations on your mantel, adding a pop of color to your festive space.
What You’ll Need:
- Styrofoam cones in various sizes
- Vintage-style tinsel garland
- Hot glue gun or craft glue
Easy to Make:
- Apply a dab of hot glue to the very bottom edge of a cone.
- Press the end of the tinsel garland into the glue to secure it.
- Begin wrapping the tinsel around the cone, applying a small line of glue every few inches as you go.
- Continue wrapping all the way to the top, then cut the tinsel and secure the end with a final dab of glue.
Modern & Minimalist Christmas DIY Projects
If you prefer clean lines and a “less is more” approach, this section is for you. Explore how simple materials and modern design can create a holiday look that is both understated and incredibly elegant.
31. White Air-Dry Clay Star Garland

This charming white air-dry clay star garland is a simple way to add a festive touch to your home. Just roll out the clay, cut out star shapes, and let them dry before stringing them together. Hang it over your mantel or on your tree for a delightful holiday vibe!
What You’ll Need:
- White air-dry clay
- A rolling pin
- A star-shaped cookie cutter
- A skewer or straw to poke holes
- Twine
Simple Steps:
- Roll out the air-dry clay to about 1/4 inch thickness.
- Use the cookie cutter to cut out as many stars as you need.
- Use the skewer to poke a hole in one or two points of each star for stringing.
- Let the stars dry completely according to the package directions, flipping them over occasionally.
- Once dry, thread them onto a long piece of twine.
32. Minimalist Gold Hoop Wreath
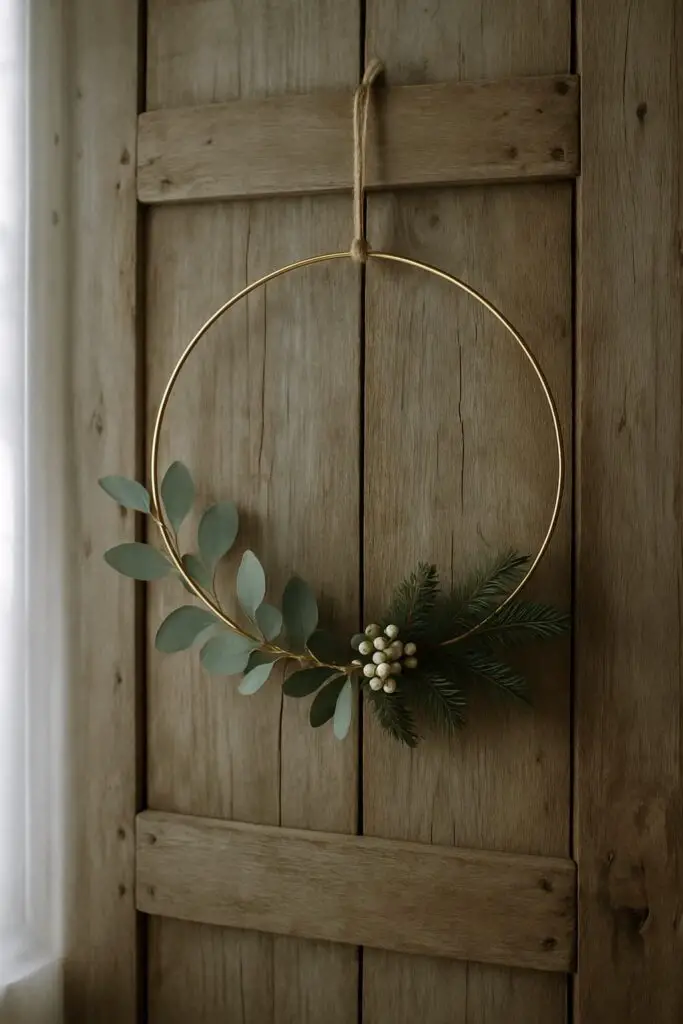
This minimalist gold hoop wreath is a simple yet stunning way to add a touch of elegance to your holiday decor. With just a few greenery sprigs and a gold hoop, you can create a beautiful piece that fits any style. Hang it on your door or wall, and enjoy the festive vibe it brings!
What You’ll Need:
- A metal craft hoop (gold or brass)
- A few sprigs of real or faux eucalyptus and pine
- Green floral wire
- Wire cutters
Assembling Your Wreath:
- Arrange a small bundle of your greenery sprigs.
- Place the bundle against one side of the hoop.
- Use the floral wire to tightly wrap the stems of the greenery onto the hoop.
- Add a second, smaller bundle overlapping the first to create a fuller look.
- Leave the rest of the hoop bare for a modern, asymmetrical design.
33. Geometric Brass Himmeli Ornaments

These geometric brass himmeli ornaments are a fun and stylish way to decorate for Christmas. They add a modern touch to your tree and are surprisingly easy to make at home. Grab some brass straws and string, and you’ll have beautiful decorations in no time!
What You’ll Need:
- Thin brass tubes or paper straws painted gold
- A pipe cutter or sturdy scissors
- Thin wire or strong thread
- A ruler
Creating a Basic Shape:
- Cut your tubes into several pieces of the same length (e.g., twelve 3-inch pieces).
- Thread three tubes onto your wire and tie them into a tight triangle.
- Thread two more tubes onto the wire and form another triangle next to the first one.
- Continue building triangles to create 3D geometric shapes like pyramids or diamonds.
Festive DIY Centerpieces for Your Holiday Table
The holiday table is the heart of the celebration, so it deserves a beautiful centerpiece. These DIY ideas will help you craft a stunning focal point for your festive feasts and family gatherings.
34. Floating Cranberry and Candle Jars
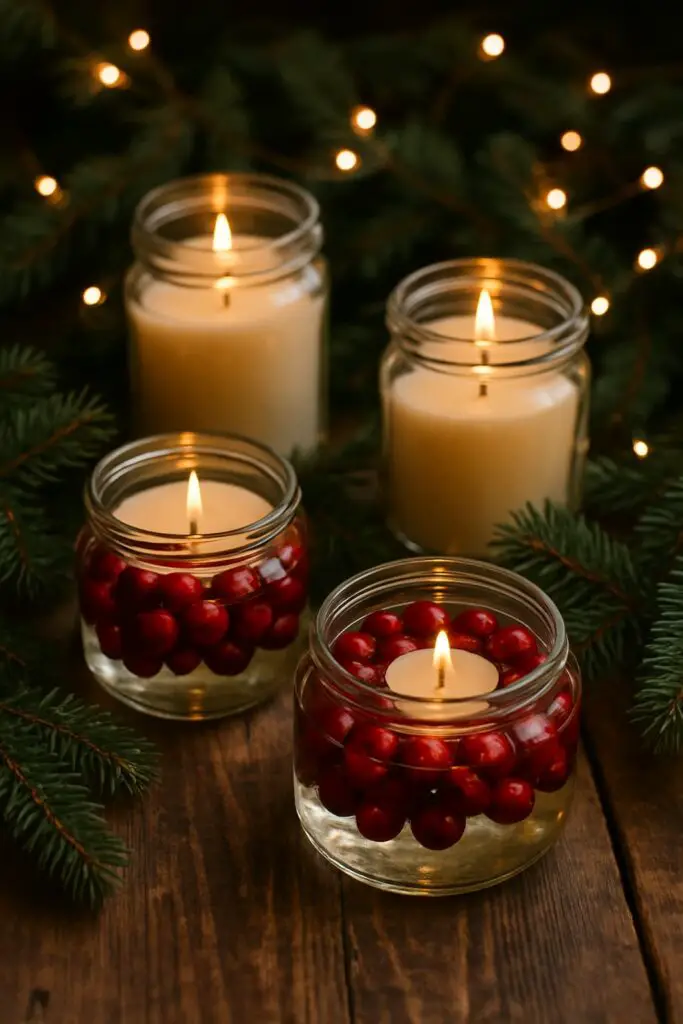
These floating cranberry and candle jars are a simple yet charming way to decorate for the holidays. Just fill clear jars with fresh cranberries and top them with a candle for a cozy touch. Place them on your table or around the house to spread some festive cheer!
What You’ll Need:
- Glass jars or vases in various sizes
- Fresh cranberries
- Floating tea light candles
- Optional: sprigs of fresh rosemary or pine
Simple Steps:
- Fill each jar about halfway with fresh cranberries.
- Add a few sprigs of greenery if desired.
- Fill the jar with water, leaving about an inch of space at the top.
- Gently place a floating tea light on top of the water.
- Arrange the jars in a group on your table or mantel for a beautiful, glowing display.
35. Birch Log and Tea Light Candle Holder

This birch log candle holder is a simple yet charming decoration for your holiday home. Just place some tea lights in the log and surround it with pinecones and greenery for a cozy look. It’s an easy project that adds a warm touch to your Christmas decor without breaking the bank!
What You’ll Need:
- A birch log (about 4-6 inches in diameter)
- A drill with a spade bit or Forstner bit the same size as your tea lights
- Tea light candles (battery-operated are safest)
How to Make It:
- Decide how many candles you want and mark their positions evenly along the top of the log.
- Carefully drill holes at each mark, going just deep enough for the tea light to sit flush with the surface.
- Clean out any sawdust from the holes.
- Place the tea light candles into the holes.
- For extra decoration, arrange fresh greenery and pinecones around the base of the log.
Conclusion
Crafting your own Christmas decorations is more than just a way to save money; it’s an opportunity to slow down, be creative, and fill your home with items that truly have meaning. From ornaments that will become treasured heirlooms to beautiful centerpieces that set the stage for celebration, we hope these 35 ideas have sparked your imagination. Now you have everything you need to make this holiday season your most personal and beautiful one yet.
Happy crafting!
For more festive ideas and creative inspiration, be sure to visit my Pinterest profile at: https://www.pinterest.com/yourprofile/