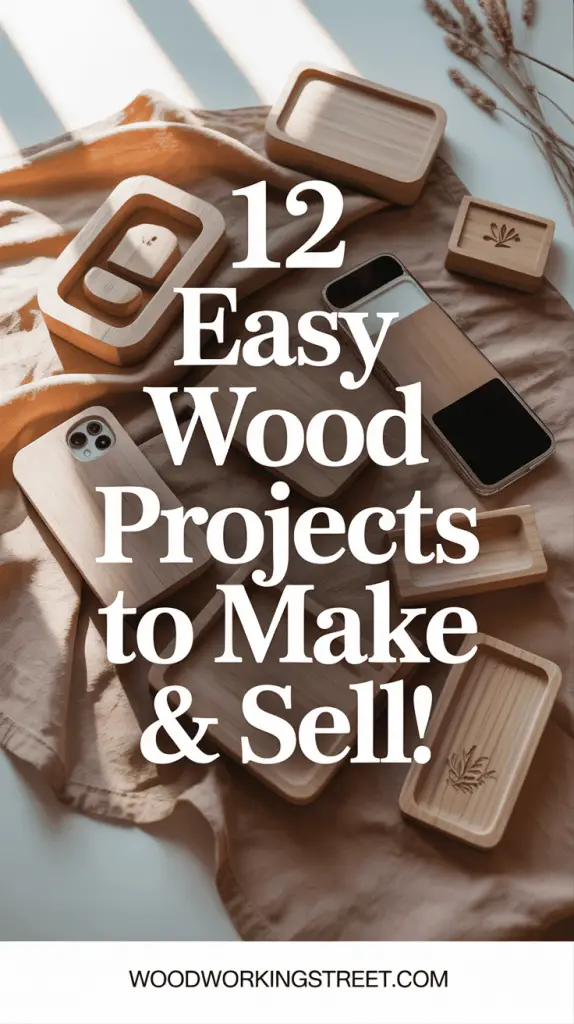
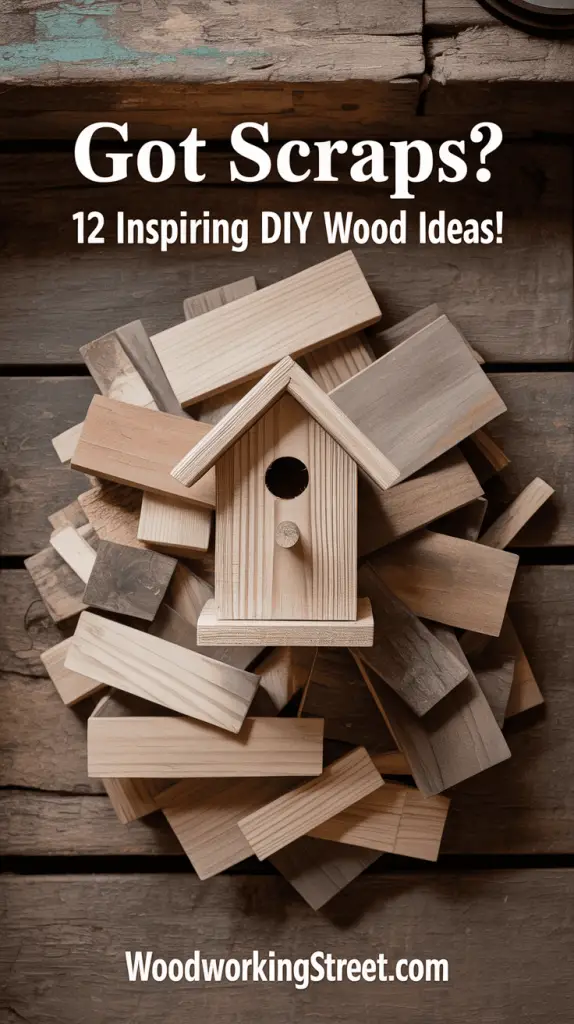
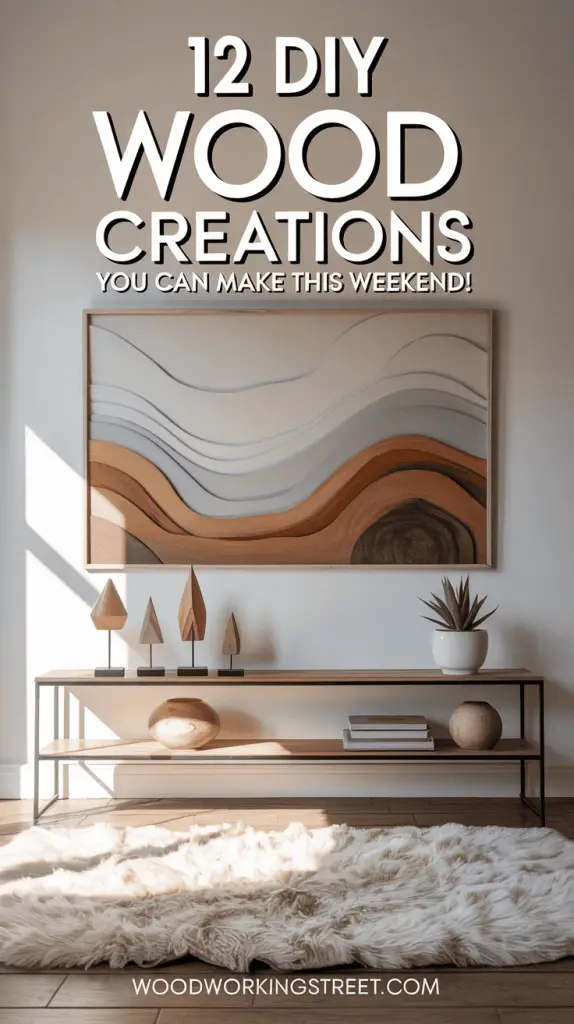
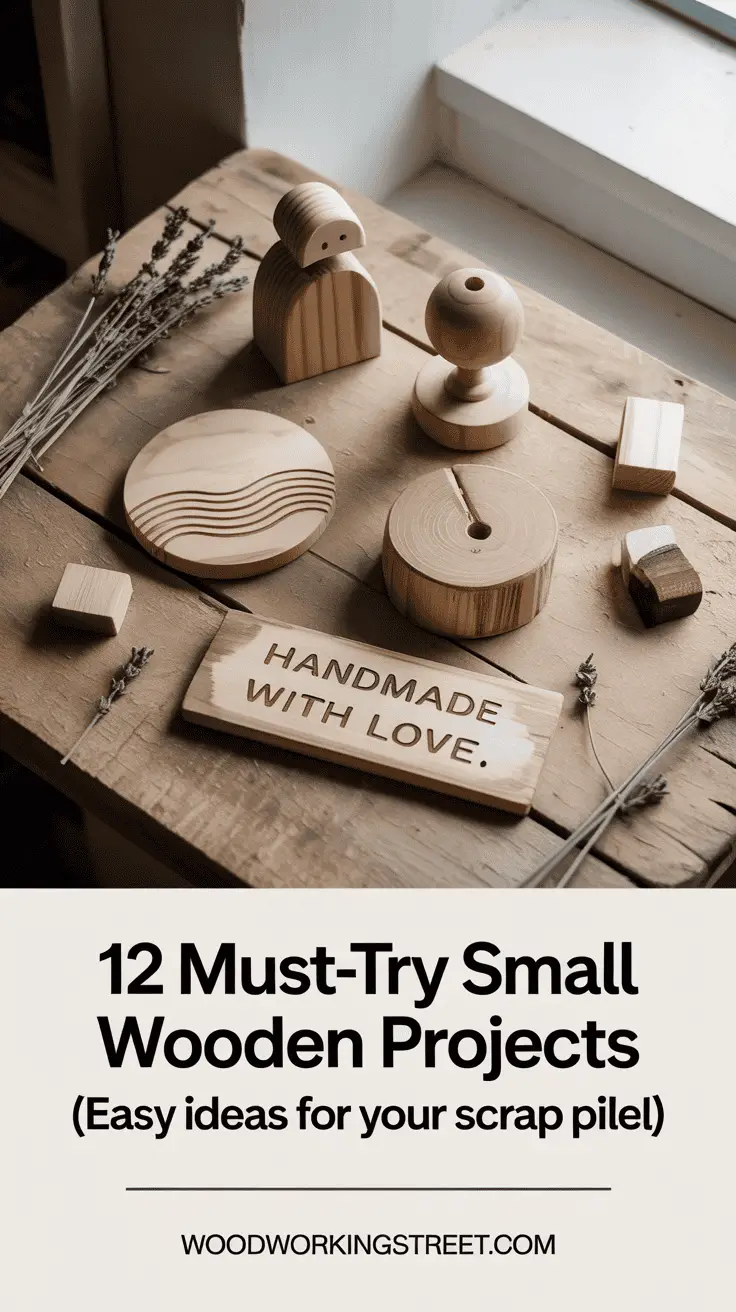
12 Must-Try Small Wooden Projects (Easy Ideas for Your Scrap Pile!)
That collection of wood offcuts in your workshop or garage represents more than just leftover material; it’s an opportunity. Each piece, regardless of its current size or shape, holds the inherent potential to become something useful. This guide is designed to help you explore that potential, providing clear, practical pathways to transform those seemingly humble scraps into 12 distinct items. Through these projects, you can add handmade touches to your home or create thoughtful gifts made by your own hand.
Let’s discover the quiet wonders hidden in your scrap wood pile!
Getting Started: Embracing Your Scrap Wood Stash
Before diving into specific projects, let’s take a moment to appreciate the unique character of your scrap wood stash. This isn’t about perfectly dimensioned lumber from the store; it’s about pieces with history, perhaps offcuts from larger endeavors, each with its own size, grain, and potential. Working with scraps is an exercise in resourcefulness and adaptability. You might find a piece that’s already the perfect width for a coaster, or a longer strip just waiting to become part of a layered art panel.
A few quick thoughts as you approach your scraps:
- Selection: Gently sort through your pieces. Look for wood that is clean, dry, and free from rot or insect damage (especially if bringing it indoors). Don’t worry too much about minor imperfections; sometimes these add to the charm of a handmade item.
- Simple prep: You’ll find that preparing your scraps for these small projects is generally quite straightforward. Often, a quick wipe to remove any dust, along with a light sanding to smooth rough edges or surfaces, is all that’s needed to get them ready.
- Mindset: Embrace the process. The constraints of working with existing pieces can spark surprising creativity. There’s a gentle empowerment in finding a new purpose for something that might otherwise have been discarded.
This thoughtful approach to your materials sets a calm and confident tone for the crafting ahead, paving the way for truly satisfying results.
Simple Woodworking Projects: Charming & Functional Accents (Small Wooden Projects)
These initial projects are wonderfully accessible, perfect for building confidence and creating delightful items that add a personal touch to your home or make lovely handmade gifts. They often require only small amounts of wood and can be completed in a relatively short time.
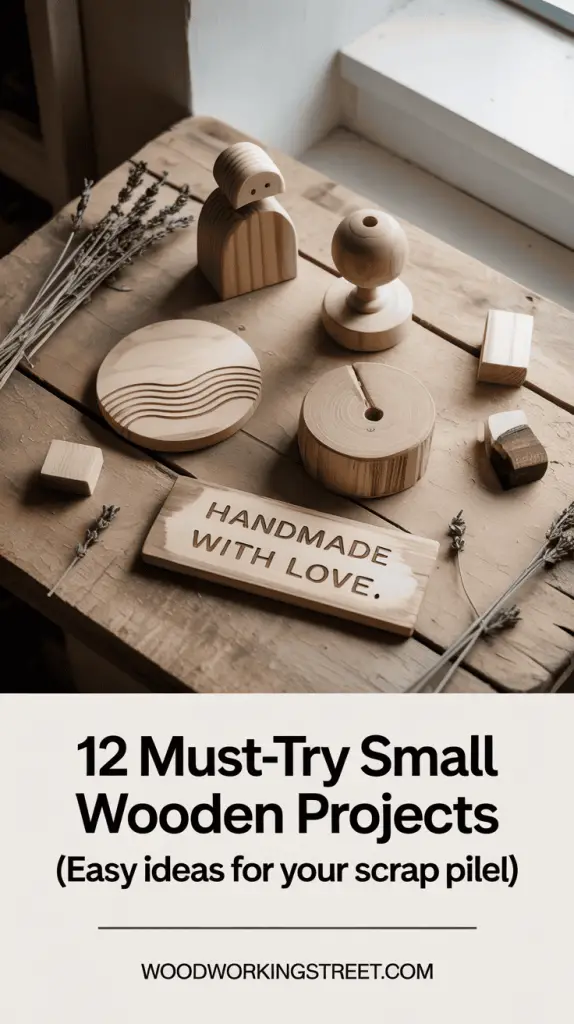
1. Delightful Wooden Coaster Set (Boho Chic & Modern Styles)
We’ll begin with a delightful and practical item: a set of custom coasters. These simple, essential items not only protect your furniture but also provide a perfect small-scale opportunity to try out different styles and finishes using your favorite scrap wood.
- The Scrap: Look for thin plywood (e.g., 1/4 inch or 6mm), offcuts of 1/2 inch boards, or similar thin solid wood scraps. These are often plentiful and perfect for this project.
- The Process & Style: Create a set of four. To achieve a Boho Chic feel, start by cutting your wood into rounded or organic shapes; this can be a wonderfully relaxing part of the process. You can then paint them with food-safe milk paint in earthy tones or with freehand eclectic patterns. Sealing them with a few coats of pure tung oil, buffed to a soft sheen, not only makes them durable and food-safe (remember, hand-wash only) but also results in a finish that feels wonderfully natural to the touch.
For a Modern Geometric set: The process involves careful and precise work. Taking the time to accurately cut crisp hexagons or triangles from your thin wood is a focused activity that results in clean, contemporary coasters with sharp lines. Leave some pieces natural to showcase the wood grain, paint others in a bold matte black or a serene monochrome, and then seal them with a food-safe, water-resistant sealer to create a sophisticated, practical result. - Rustic: A rustic set, perhaps with slight irregularities in square or round shapes cut from your thin wood scraps, can evoke a cozy, grounded feeling.
- Shou Sugi Ban: A very light Shou Sugi Ban (charring) technique on the edges or surface, followed by thorough brushing and sealing with food-safe oil, adds unique character.
- Result: Whichever style you lean towards, the result will be a set of unique, practical coasters, each one a testament to your creative touch and the care taken in its making.
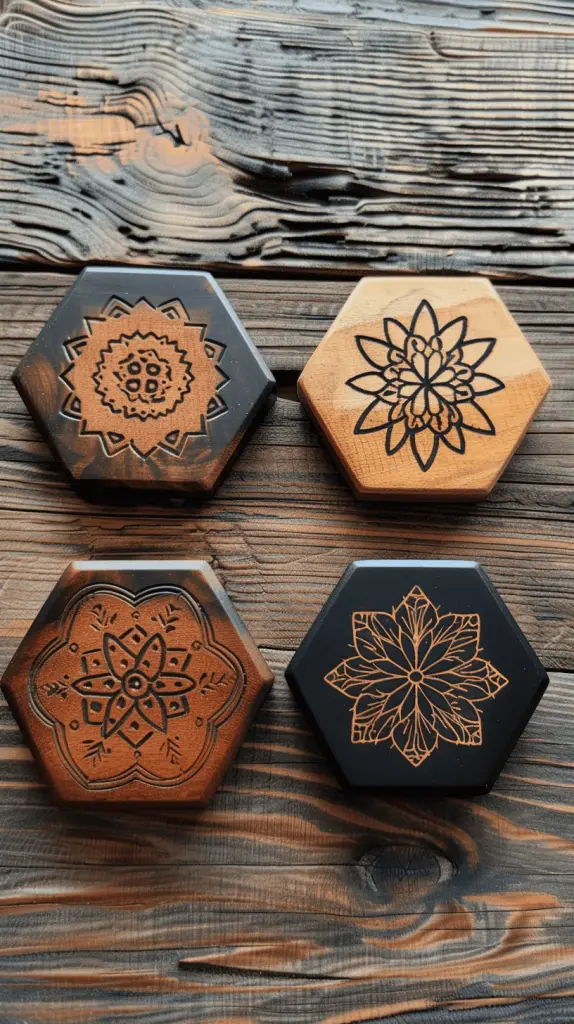
2. Minimalist Phone/Tablet Stand (The Simple Triangle Design)
Creating a dedicated resting place for our devices can bring a surprising sense of order and calm to a workspace. This simple stand is a testament to how functional items can also be quietly beautiful, and this particular design is simple.
- The Scrap: For this practical design, you’ll want a flat base piece (a small rectangular or square offcut works well), a piece of 2×2 or 2×4 scrap from which to cut a triangle-shaped support, and optionally, a thin strip for a lip piece. Hardwood scraps can also be used for a more premium feel.
- The Process & Style: This wonderfully simple and stable approach involves attaching your triangle-shaped support piece to the flat base, using wood glue and perhaps a discreet screw driven from underneath for added strength. Position the triangle so its longest, sloping side becomes the angled backrest for your device. The optional lip piece, a thin strip of wood, can then be glued or nailed to the front of the base to prevent your phone or tablet from sliding. This construction is very direct, requires minimal material, and can be achieved with just a few basic hand tools for cutting and assembly.
- For a Sleek & Modern look: Choose a fine-grained hardwood scrap for all three pieces. The step of thoroughly sanding the components until they are incredibly smooth – so smooth that the grain feels like silk under your fingers – is key. Following this with a finish of clear, natural food-safe oil, such as pure tung oil or hemp oil, will showcase the wood’s inherent beauty. A Rustic stand might use a chunkier piece of wood for the triangle and base, perhaps with a dark stain or a subtle Shou Sugi Ban char on the base piece (before assembly), sealed carefully with oil. The tangible result is a sturdy, elegant, and handmade home for your phone or tablet.
3. Chic Custom Drawer Knobs/Pulls (Set)

Updating hardware is a small change that can bring a significant refresh to furniture, and crafting your own drawer knobs adds a deeply personal touch.
- The Scrap: Small hardwood blocks or round wood discs (which can be cut from dowels).
- The Process & Style: One way to infuse a distinctive Boho charm into your custom knobs is through pyrography (wood burning). You might find the process of carefully burning intricate mandalas, delicate botanical motifs, or simple geometric patterns onto your prepared wooden knob shapes to be deeply engaging. Once your designs are complete, sealing the knobs with a natural beeswax and food-safe oil polish will protect your artwork and give them a wonderfully tactile, safe finish.
- Leather Pulls: You can also achieve a similar Boho effect using food-safe milk paint in earthy or muted jewel tones, adding hand-painted details, and then sealing. For a different yet equally charming Boho feel, consider Leather Pulls; simple loops or tabs cut from scrap leather and attached with a decorative screw offer an understated, textural appeal. These custom pulls now offer more than just utility; they become unique, touchable accents that reflect your personal craftsmanship.
Easy Scrap Wood Art: Express Your Creativity
Your scrap bin isn’t just for utilitarian projects; it’s a palette for artistic expression. These ideas invite you to play with texture, shape, and finish, transforming offcuts into unique visual statements that reflect your personal style.
4. Abstract Layered Wood “Landscape” or “Soundwave” Panel
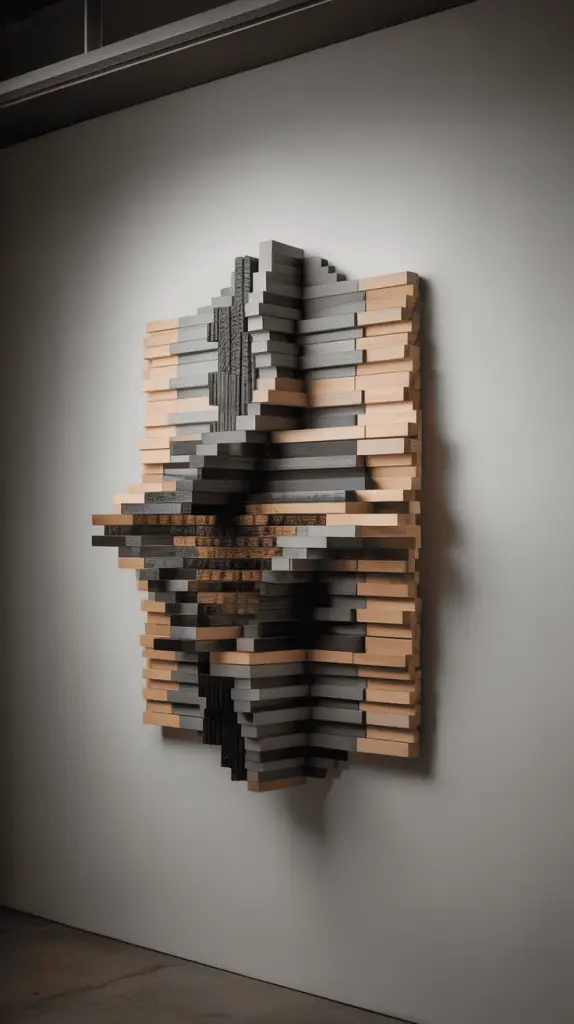
Creating art from scraps can be a deeply engaging process, allowing intuition and a sense of play to guide the arrangement of form and color. This project uses various wood strips to build textured, dimensional pieces that can evoke natural forms or contemporary patterns.
- The Scrap: Gather various lengths and thicknesses of clean scrap wood strips – offcuts from 1x2s, pallet slats (ensure they are clean and safe if used), or even pieces of plywood. The more variety, the more interesting your panel can be.
- The Process & Style: The method involves arranging these strips on a sturdy backer board (like a piece of plywood). By varying the height and the length of these pieces, you can evoke the flowing contours of an abstract landscape, the rhythmic undulations of a seascape, or even the visual pulse of a soundwave. For a Natural/Rustic Landscape, use strips of different wood species to play with their tones and grains. You might stain some pieces in earthy colors – browns, grays, muted greens, or blues – to create depth and represent different elements. A Modern Soundwave might use strips painted in a sleek monochromatic scheme (shades of gray, black, and white) or bold, contrasting colors for a contemporary graphic statement. For dramatic effect, consider applying the Shou Sugi Ban (charring) technique to some selected strips; the deep black and unique texture adds incredible depth and contrast to the natural or painted pieces.
5. Personalized “Words & Shapes” Signage (Farmhouse & Boho Styles)
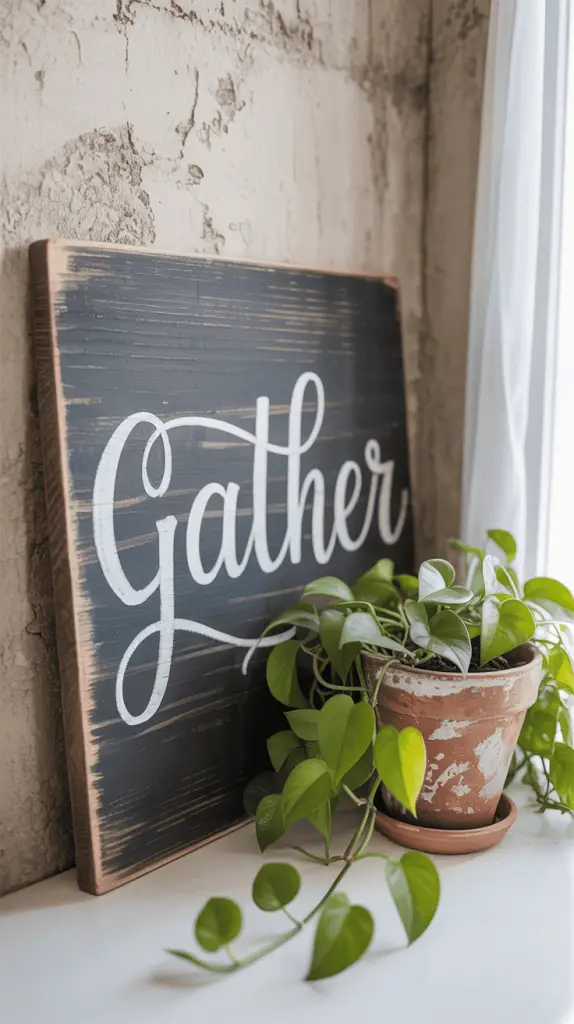
Handmade signs offer a wonderful way to infuse personality, warmth, or your own meaningful messages into your home or garden. Using scrap wood makes them even more unique, each piece telling a part of its own story.
- The Scrap: Look for flat pieces like pallet wood (always ensure it’s cleaned appropriately and safe to use), old fence pickets that have a lovely weathered patina, or larger plywood offcuts.
- The Process & Style: For a Rustic Farmhouse Quote Sign, the charm often lies in the imperfections of the wood. A weathered piece of pallet wood provides the perfect canvas. You can then hand-paint or stencil a favorite quote, family name, or a welcoming message. Distressing the edges of the wood or the paint can further enhance this cozy feel. A Modern House Number sign offers a different aesthetic satisfaction: imagine a smooth piece of scrap wood given a deep Shou Sugi Ban finish to create a dramatic black background, then mounting sleek, contrasting painted wooden numbers or contemporary metal numbers on top. For a touch of Boho whimsy, consider a Moon Phase Wall Hanging. This can be crafted by cutting circles and crescent moon shapes from thin plywood or luan scraps, then painting them in moody blues, blacks, and whites, or using a wood-burning tool to add subtle crater details before stringing them vertically from a small dowel or a found branch. Each sign then becomes a distinct personal statement, a tangible result of your creative effort and careful work.
6. Miniature Wooden Sculptures or “Shelf Sitters” (Playful Forms)
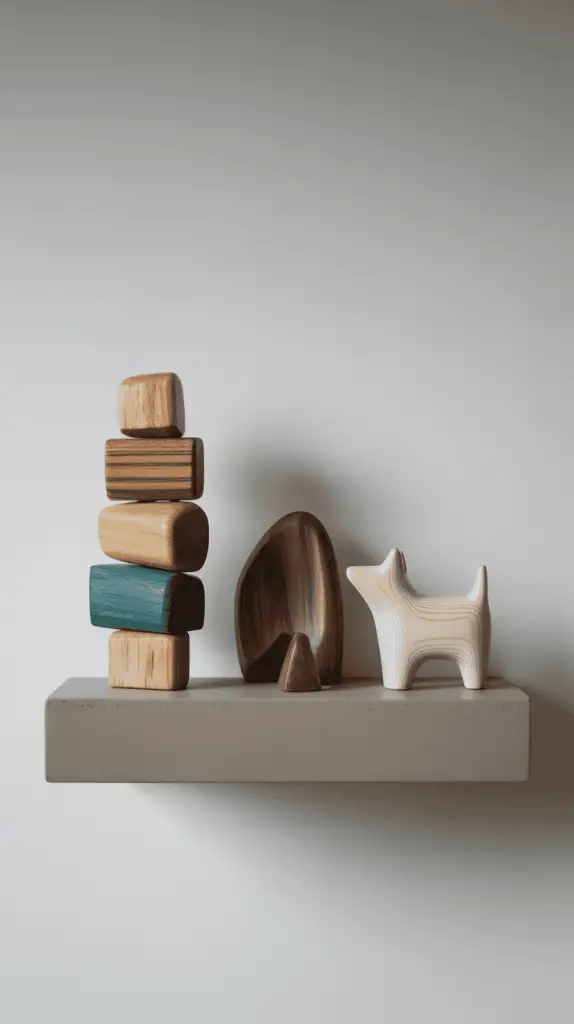
Sometimes the most delightful creations come from the smallest, most unassuming scraps – those little bits you can’t quite bear to throw away. These miniature sculptures are an open invitation to playful creativity and experimentation.
- The Scrap: Collect interesting small blocks, dowel pieces, uniquely shaped offcuts, or even remnants from other carvings or turnings. The more unusual the shape, the more potential for a unique creation
. - The Process & Style: The joy here is in the intuitive assembly and shaping. Create Stacked Wooden Sculptures by gluing together various small blocks of different wood types and finishes. You can leave some pieces natural to showcase their grain, stain others in contrasting shades, or paint a few with a pop of color to build up interesting miniature abstract forms or simple, whimsical figures. You might discover Whimsical Characters hidden in odd-shaped scraps, brought to life with a little imagination and perhaps a few simple carved or burned details. Alternatively, simply sanding a beautifully grained small offcut into a smooth, Organic Form that feels good in the hand, and finishing it with a natural oil like tung or hemp oil, can highlight its inherent beauty. These tiny treasures, born from what was leftover, offer a satisfying result and a charming, personal presence on any shelf, window sill, or desk.
Small Woodworking Projects: Practical & Rewarding Creations
This next set of projects focuses on crafting items that are not only enjoyable to make but also serve a very practical purpose in your home. They often involve slightly more structure but are still very achievable with basic skills and scrap materials, leading to lasting, useful results.
7. Simple Wooden Caddy/Tote (Versatile Organizer)
A handmade wooden caddy or tote offers a wonderfully practical solution for organizing and carrying a variety of everyday essentials, from art supplies in the studio to tools in the garden, or even cutlery for outdoor dining. This particular design is straightforward to build, making it an excellent project for efficiently using those leftover board offcuts.
- The Scrap: A single offcut from a 1×6 or 1×8 board is ideal for the main body. For the handle, a sturdy strip from similar material or even a thicker dowel can be used.
- The Process & Style: The caddy typically features an open-top box design with a comfortable central handle for easy carrying. The process involves cutting pieces for the bottom, four sides, and the handle. These are then joined with wood glue and reinforced with brad nails or small screws. The end pieces are often made slightly taller to allow the handle to be securely attached between them, running lengthwise across the caddy. This assembly is quite direct and quickly yields a satisfyingly solid and useful form. For a Rustic Utility feel, consider using slightly rougher wood, perhaps finished with a dark stain or a distressed paint technique. A Whimsical Organizer, painted in bright, cheerful non-toxic colors, could be perfect for a child’s art supplies or craft room essentials. For a Natural/Farmhouse aesthetic, finishing with milk paint, a clear coat, or a natural oil like tung or hemp oil allows the wood’s character to shine through, creating a trusty, handmade companion.
8. Simple Picture Ledge Shelf (Easy Display Solution)
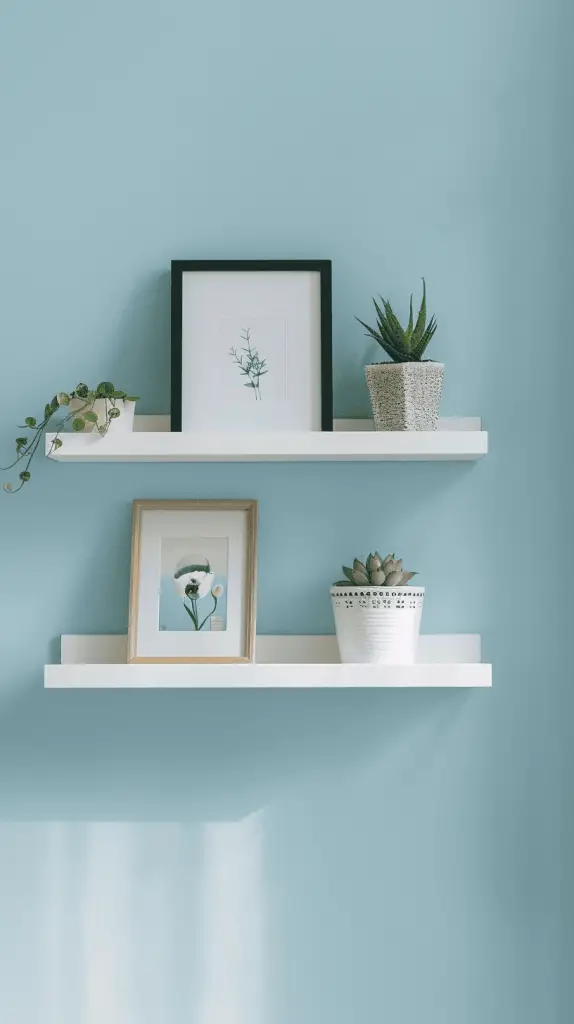
Displaying cherished photos, small art prints, or even a collection of little treasures can bring so much personality to a wall. This is where a picture ledge shelf shines; it’s a genuinely simple project for creating such displays and an ideal way to give purpose to those narrow scrap boards.
- The Scrap: You’ll typically need three pieces of scrap wood for each ledge: a wider piece for the backer (that attaches to the wall), a slightly narrower piece for the shelf base (where items sit), and a thinner, shorter piece for the front lip (to what keep items from sliding off). Offcuts from 1×2, 1×3, or 1×4 boards are often perfect for this.
- The Process & Style: The construction is very direct and satisfying. The shelf base piece is attached (using wood glue and brad nails or screws) to the face of the backer piece, usually positioned near its bottom edge. Then, the front lip piece is attached to the front edge of the shelf base, standing upright to create the “ledge.” All cuts are typically straight, making this very beginner-friendly. You can make a single long ledge or create a series of shorter ones to arrange on your wall. This simple structure is highly adaptable to your decor: for a Modern or Scandinavian look, keep the lines crisp and paint the ledge in a clean white, a soft grey, or leave it in a light natural wood sealed with a matte clear coat or a natural oil. A Farmhouse or Rustic style could use wood with more character, perhaps stained to a warm tone, or painted with milk paint and lightly distressed. For a Child’s Room, painting the ledges in bright, cheerful non-toxic colors makes them perfect for displaying picture books or small, beloved toys. The tangible result is a stylish and functional shelf that allows you to easily rotate your displayed items, created with a straightforward process and minimal materials.
9. Easy Wooden Bookends (L-Shape Style)
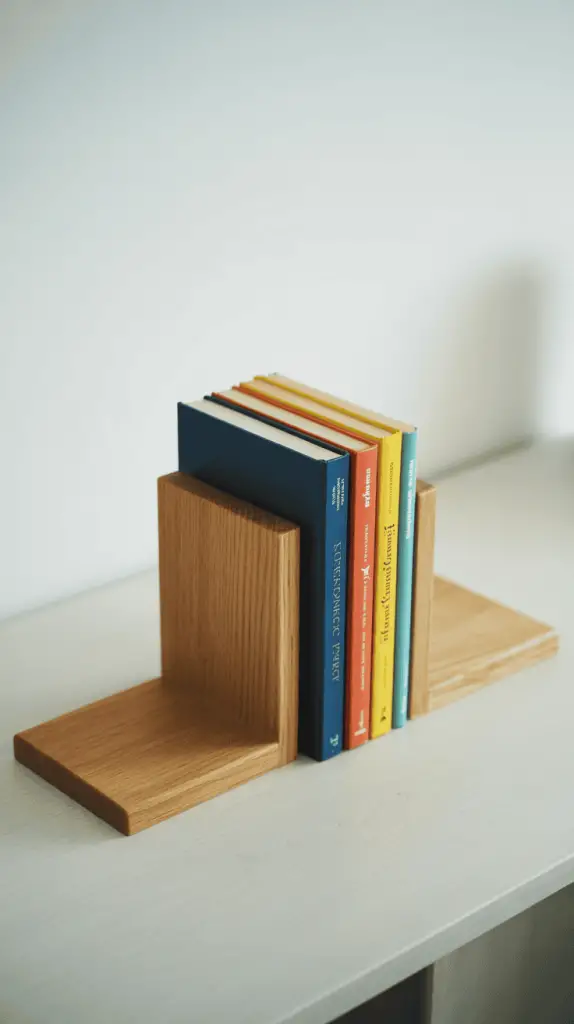
These simple L-shaped bookends offer a practical and charming way to organize your favorite books. Crafted from just a few pieces of scrap wood, they provide excellent stability and add a distinct handmade touch to your shelves or desk.
- The Scrap: You’ll need four identical rectangular pieces of scrap wood (e.g., cut from a 1×4 or 1×6 board, or even sturdy 1/2-inch plywood). Two pieces will form each L-shaped bookend.
- The Process & Style: The beauty of this project lies in its elemental simplicity. Once your four pieces are cut to the same size and their edges are sanded smooth, creating each bookend involves joining two pieces together to form a stable “L” shape. Apply a good quality wood glue along one of the edges. Then, carefully position another piece perpendicular to it, ensuring a true 90-degree angle with the help of a square. For added strength and a classic crafted look, you can secure this joint with a few small brad nails or discreetly placed screws once the glue is applied. Repeat this process for the second bookend. This simple structure can be finished to suit any decor: for a Modern/Minimalist look, sand the bookends impeccably smooth and paint them in solid neutrals like white, grey, or black, or even a single bold accent color. A Rustic/Farmhouse feel can be achieved by using wood with more character, perhaps applying a warm stain, or painting with milk paint and lightly distressing the edges before a final seal. Simply applying a clear coat or a hand-rubbed oil finish (like tung oil or hemp oil) will let the wood’s own beauty provide a calm, understated elegance. The tangible result is a pair of sturdy, custom-made bookends, created with just a few simple steps.
More Small Wood Projects: Adding Creative Touches
As you grow more comfortable, you might find yourself looking for projects that offer a chance to refine techniques or combine simple skills in new ways. These final ideas continue the theme of using scraps but might involve a touch more detail or a specific finishing technique.
10. The “Ultimate” Key Rack (With a Stylish Twist)
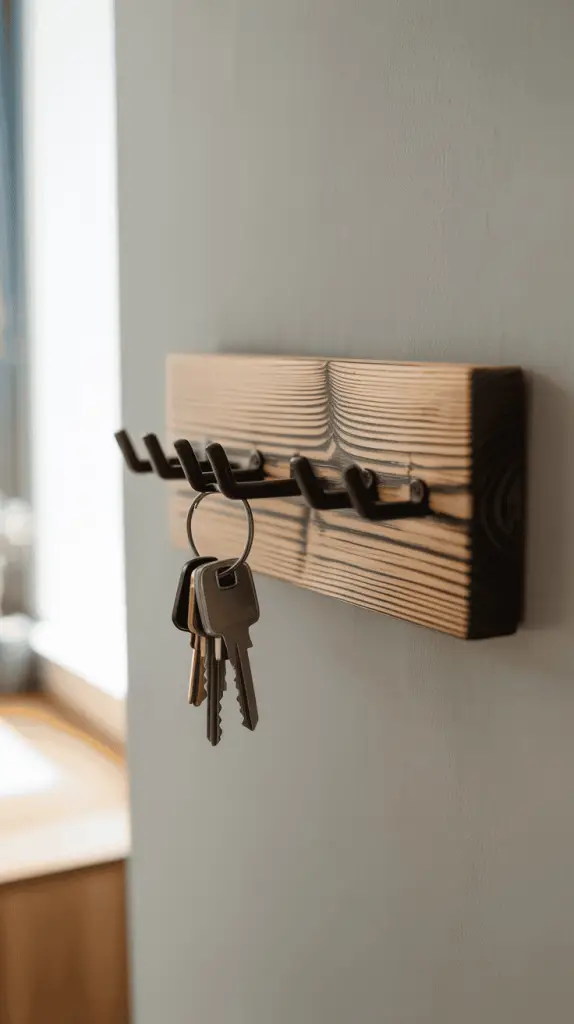
A key rack is a humble workhorse in most homes, but a handmade one, crafted with a bit of flair, can be a small point of daily pleasure right by your door.
- The Scrap: Look for a nice piece of 1×4, a chunky 2×4 offcut, or perhaps a scrap piece of wood with a natural, un-milled edge (often called a ‘live edge’) if you have one. Its organic shape can really make the character of the wood shine.
- The Process & Style: For a strikingly modern or rustic look with Shou Sugi Ban Sophistication, you can use the Japanese technique of surface charring. Carefully char the face of your chosen wood piece with a propane torch (following all safety precautions). Once charred, thoroughly brush away the loose soot with a wire brush to reveal the preserved grain and deep, rich color. This uniquely textured surface can then be sealed with a natural oil like pure tung oil or hemp oil (which is also food-safe in case hands that touch the rack then handle food). Finally, add sleek, modern black or brass hooks for a contemporary finish, or rustic iron hooks for an older-world charm.
- To add a Personalized & Practical touch: Consider using pyrography (decorative wood burning with a specialized heated tool) to etch a family name, a welcoming message, or a simple artistic design onto the wood before applying any oil or clear finish. This allows for fine detail and a truly custom feel.
- For added utility: You could also incorporate a simple, small shelf element. This might be a thin piece of wood, perhaps 2-3 inches deep, attached horizontally along the top edge of the key rack’s backer board, creating a narrow ledge just big enough for a piece of outgoing mail or a very small potted succulent. This shelf piece would typically be glued and screwed from the back or underside for a clean look before the whole unit is mounted.
- Alternatively, for a Rustic & Reclaimed style: You might use a piece of heavily weathered (but clean) barn wood and add antique-style hooks, letting the wood itself be the main feature.
11. Chic Plant Propagation Station (For Green Thumbs)
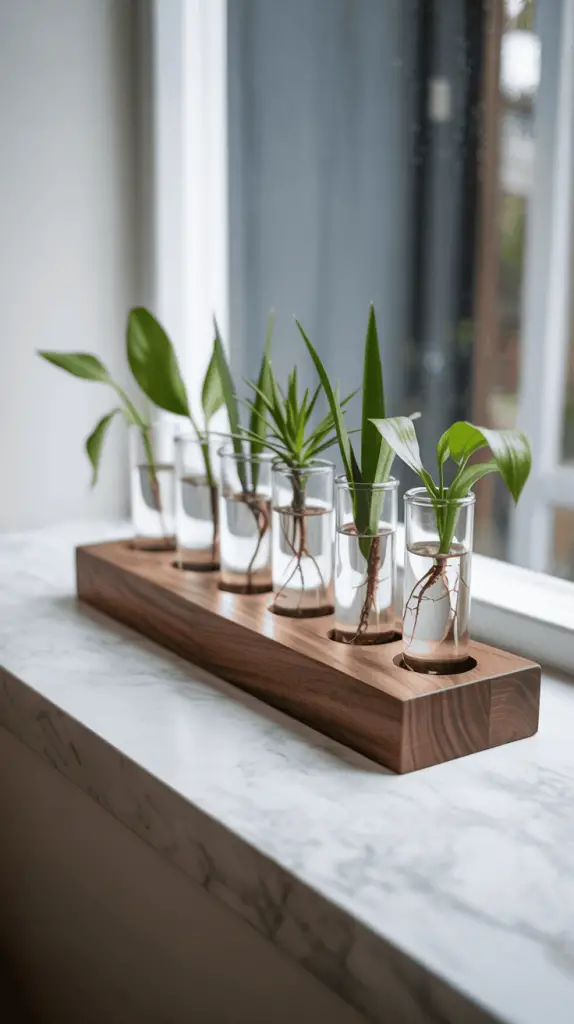
Bringing greenery indoors is a simple joy, and propagating plants – watching new roots emerge and new life begin – can be a wonderfully rewarding process.
- The Scrap: A chunky block of wood is ideal – a 4×4 post offcut works perfectly, or you can glue a few 2×4 scraps together (face-to-face or side-to-side) to achieve the desired thickness and stability.
- The Process & Style: The core of this project involves carefully drilling a series of clean, evenly spaced holes into the top surface of the wood block, sized to snugly hold small glass test tubes or tiny jars that will contain your plant cuttings and water.
- For Japandi Simplicity: Choose a light-colored wood like pine or a smooth hardwood. The act of sanding it incredibly smooth and finishing with a natural, food-safe oil like hemp or tung oil is quietly satisfying and results in an understated elegance.
- For a Rustic Greenhouse Aesthetic: Use a more rugged piece of wood, perhaps with a live edge visible, drilled to hold slightly larger jars and finished with a darker stain to enhance its earthy character.
- For a Color Pop: Consider painting the block a vibrant, non-toxic color before drilling the holes, adding a fun, modern twist to this piece.
12. “Scrap Stash” Challenge: Themed Gift Set (Creative Grouping)
Even the smallest pieces in your scrap stash hold potential. A particularly rewarding way to use them is to create a coordinated themed set, transforming these often-overlooked remnants into a thoughtful and unique handmade gift.
- The Scrap: This project is a true celebration of your smallest, most varied offcuts – those little remnants from other projects that you’ve saved, knowing they held potential
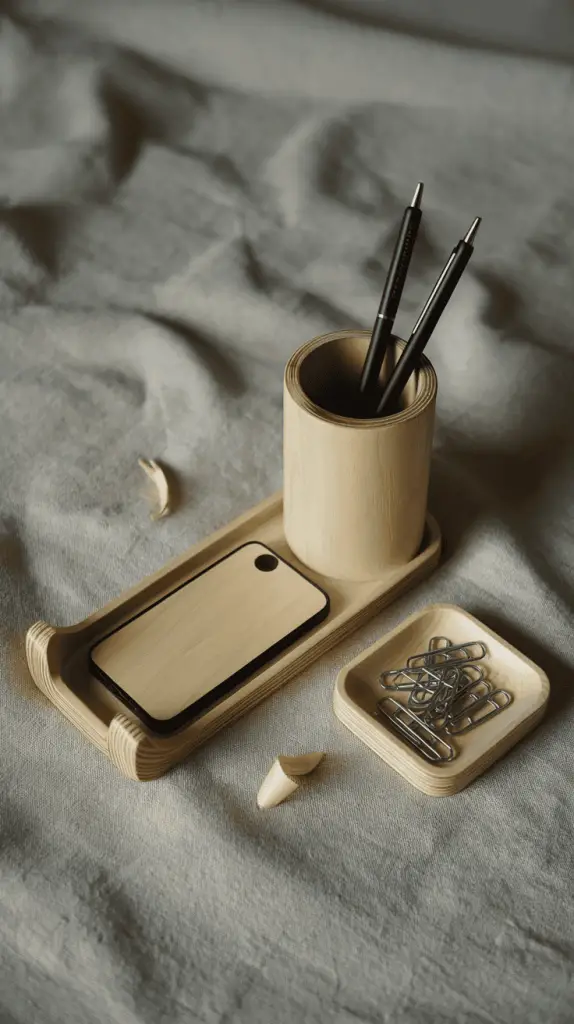
- The Process & Style: The creative spark for this project comes from looking at your collection of tiny scraps and imagining how they might be brought together by a common theme to form a delightful set. For instance, you could assemble a “Coffee Lover’s Set” – perhaps a small coaster cut from thin plywood, a hand-shaped coffee scoop with a short handle crafted from a little block of wood, and a neat stand or tray for a favorite mug or sugar packets. Another idea is a “Desk Organizer Set” which might include a tiny pen cup made from a drilled block, a minimalist phone stand (like the one we discussed earlier), and a small dish for paperclips.
- A Thoughtful Approach to their Finishing: What truly elevates these individual small items into a cohesive and charming “set” is a thoughtful approach to their finishing. By applying a similar finish to all pieces, you create a visual connection between them.
- A Shou Sugi Ban treatment (lightly charring and brushing): When applied to each item, this could give the set a rustic yet sophisticated unity.
- Milk Paint: Painting all pieces with milk paint using a complementary color palette can create a cheerful or serene coordinated look.
- Finish with a natural food-safe oil: Carefully finishing each item with the same natural, food-safe oil (like tung or hemp oil) will unify them by highlighting their natural wood tones and providing a consistent, tactile feel.
Conclusion – Small Wooden Projects
Working with scrap wood is more than just a practical way to use up leftovers; it’s an opportunity for focused creativity and hands-on engagement. Each knot, grain pattern, and odd shape offers a unique starting point, inviting you to consider its new potential. The process of transforming these remnants into something new and useful brings a genuine sense of accomplishment and a tangible connection to the materials in our hands. We hope these 12 ideas have sparked your imagination and provided clear, practical pathways to explore your own scrap wood wonders. Pick a project that speaks to you, gather your offcuts, and enjoy the calm, empowering journey of making. We’d love to see the results of your creative efforts.
Did you enjoy reading this article? If so, you might be interested in visiting my Pinterest profile. It contains pins related to DIY & Crafts, Woodworking, Tools, Projects, Décor Ideas, and related topics.