11 Easy Diy Christmas Ornaments That Look Absolutely Stunning

There’s a unique magic that fills the air when the holiday season arrives—a feeling of warmth, joy, and nostalgia. One of the best ways to capture that spirit is by adorning your Christmas tree with decorations that tell a story. While store-bought ornaments have their charm, nothing compares to the personal touch of a handmade treasure. This year, why not start a new tradition? We’ve gathered 11 easy and absolutely stunning DIY Christmas ornament ideas that are perfect for crafters of all skill levels. These projects are more than just decorations; they’re an opportunity to create lasting memories with family and infuse your holiday with a personal, heartfelt sparkle.
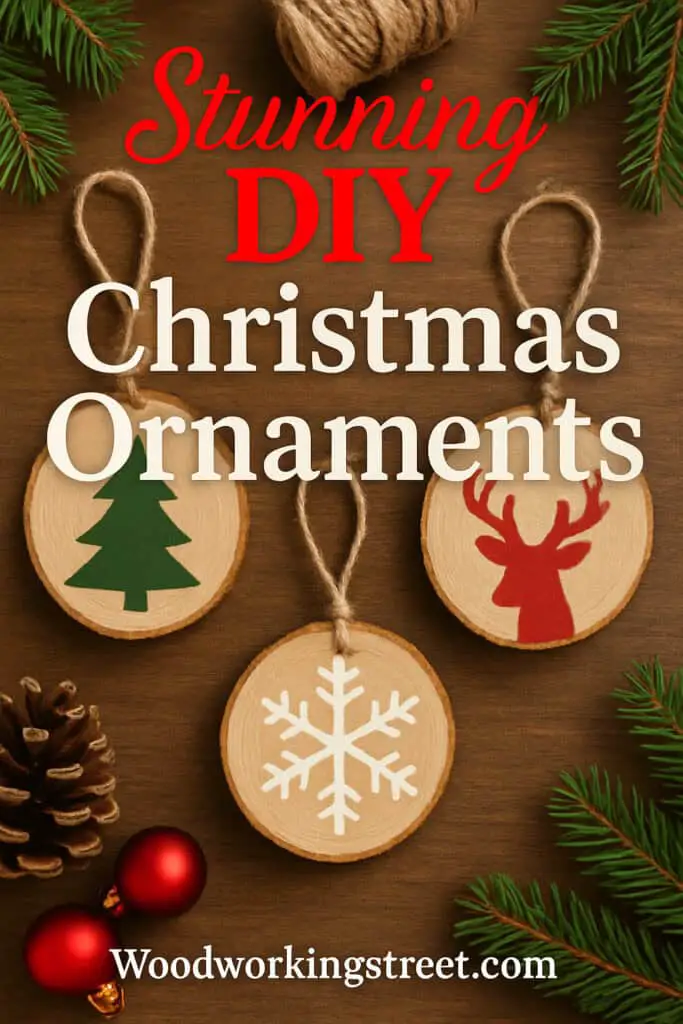
Table of Contents
- Rustic Wood Slice Ornaments
- Elegant Alcohol Ink Ornaments
- Charming Clay Keepsake Ornaments
- Creative Clear Ball Ornaments
- Cozy Felt And Fabric Ornaments
- Delicate Folded Paper Ornaments
- Sparkling Diy Glitter Ornaments
- Scandinavian-Inspired Salt Dough Ornaments
- Upcycled Mason Jar Lid Ornaments
- Whimsical Gnome Ornaments
- Personalized Picture Frame Ornaments
- Conclusion – DIY Christmas Ornaments
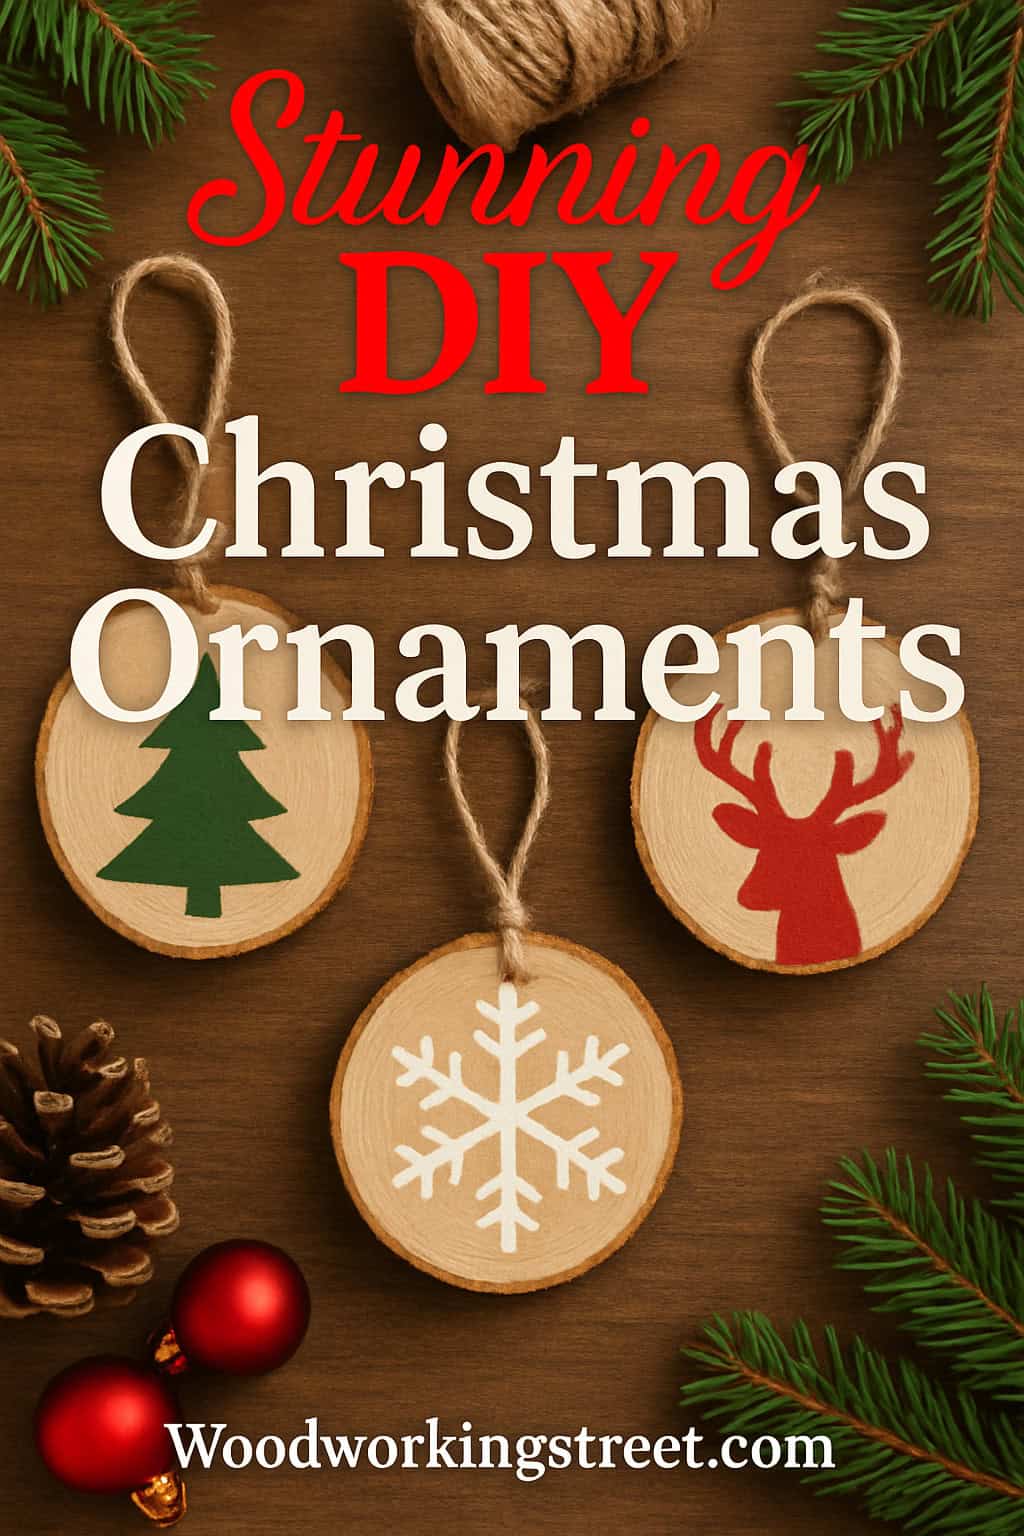
Rustic Wood Slice Ornaments
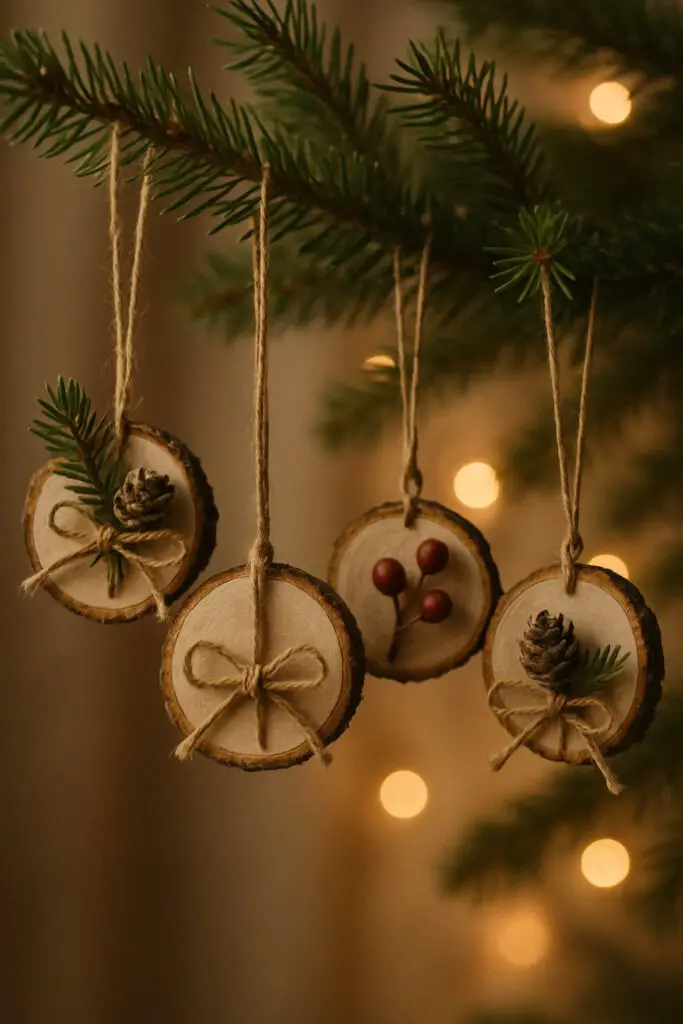
Rustic wood slice ornaments bring a cozy, natural touch to your Christmas tree. These ornaments are simple yet charming, perfect for adding a handmade feel to your holiday decor.
The image shows several wood slices hanging from a tree branch. Each slice features different decorations, like pinecones and sprigs of greenery, tied with twine. This combination of natural elements creates a warm and inviting look.
Making these ornaments is easy and fun. You can start by cutting wood slices from branches, then decorate them with paint, markers, or natural embellishments. A little creativity goes a long way!
These ornaments not only look great but also make wonderful gifts. Friends and family will appreciate the personal touch of a handmade ornament. Plus, they can be a fun project to do with kids, making memories while crafting together.
Charming Design Ideas
- Classic Snowflakes: Paint delicate white snowflakes for a timeless look.
- Personalized Initials: Use a paint pen to add a single, elegant monogram for each family member.
- Miniature Wreaths: Use a fine brush to paint a green wreath and add red dots for berries.
- Wood Burning: If you have a wood-burning tool, you can etch names or intricate patterns for a truly professional finish.
Elegant Alcohol Ink Ornaments
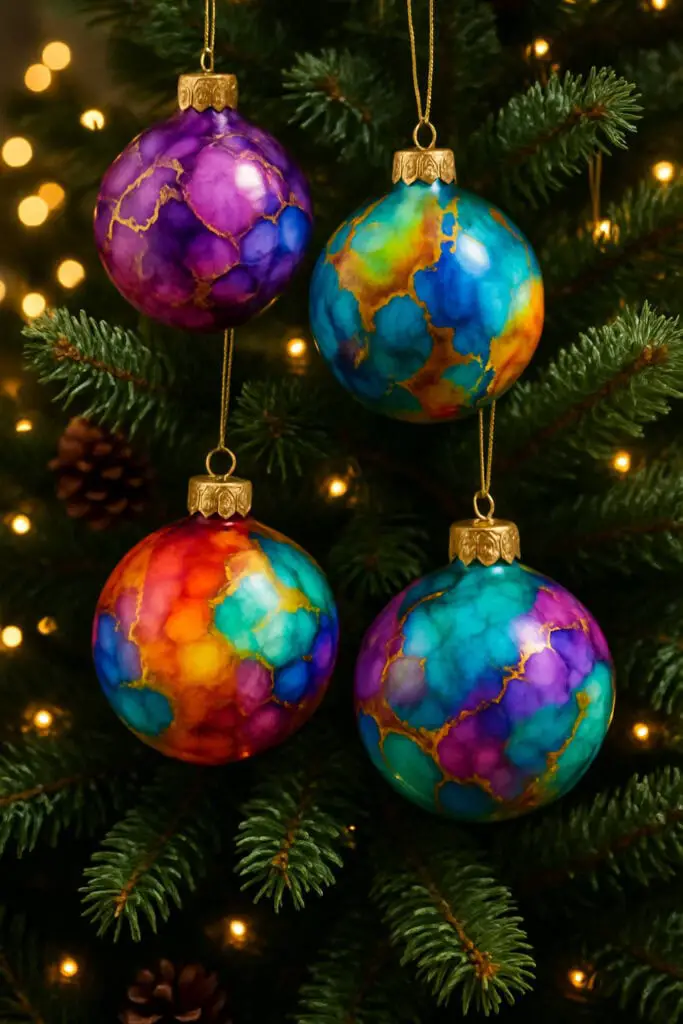
These alcohol ink ornaments are a feast for the eyes. Each one features a stunning blend of colors that swirl together beautifully. The vibrant hues of purple, blue, green, and orange create a captivating look that will brighten up any Christmas tree.
What makes these ornaments stand out is the delicate gold detailing that runs through the colors. It adds a touch of sophistication and makes each ornament feel special. Hanging on the tree, they catch the light perfectly, creating a warm glow that enhances the holiday spirit.
Making these ornaments is a fun and creative project. You just need clear glass ornaments, alcohol inks, and a bit of patience. The process allows for personal expression, so you can create unique pieces that reflect your style. Plus, they make great gifts for friends and family!
Creating Your Masterpiece
- Prepare Your Ornament: Start with clear glass or plastic ornaments and remove the metal cap.
- Apply the Ink: Squeeze a few drops of 2-3 different colors of alcohol ink inside the ornament. Add a drop of a gold or silver metallic mixative for shimmer.
- Swirl, Don’t Shake: Gently swirl the ornament to let the inks blend and flow across the entire inner surface.
- Drain and Dry: Once the inside is coated, turn the ornament upside down in a small cup to let any excess ink drip out. Let it dry completely before replacing the cap.
Charming Clay Keepsake Ornaments

These charming clay keepsake ornaments are a delightful way to add a personal touch to your holiday decor. Each ornament is uniquely shaped, featuring festive designs like stars, hearts, and Christmas trees. The warm colors bring a cozy vibe to any setting.
Making these ornaments is simple and fun. You can use air-dry clay or polymer clay, which is easy to mold and shape. Once you’ve created your designs, let them dry completely. You can even paint them for an extra pop of color!
Hang these ornaments on your tree, or use them as gift tags for a special touch. They also make great keepsakes to remember the holiday season for years to come. Gather your family and friends for a crafting session, and enjoy the creativity that comes with making these lovely decorations.
Ideas for Personalization
- Baby’s First Christmas: Gently press a baby’s hand or foot into the flattened clay for a priceless memento.
- Pet Paw Prints: Don’t forget your furry family members! A paw print ornament is a sweet tribute.
- Textured Impressions: Before the clay dries, press a piece of lace, an evergreen sprig, or even a piece of a cozy sweater into the surface to create beautiful textures.
- Stamped with Love: Use letter stamps to press names, dates, or festive words like “Joy” or “Noel” into the clay.
Creative Clear Ball Ornaments
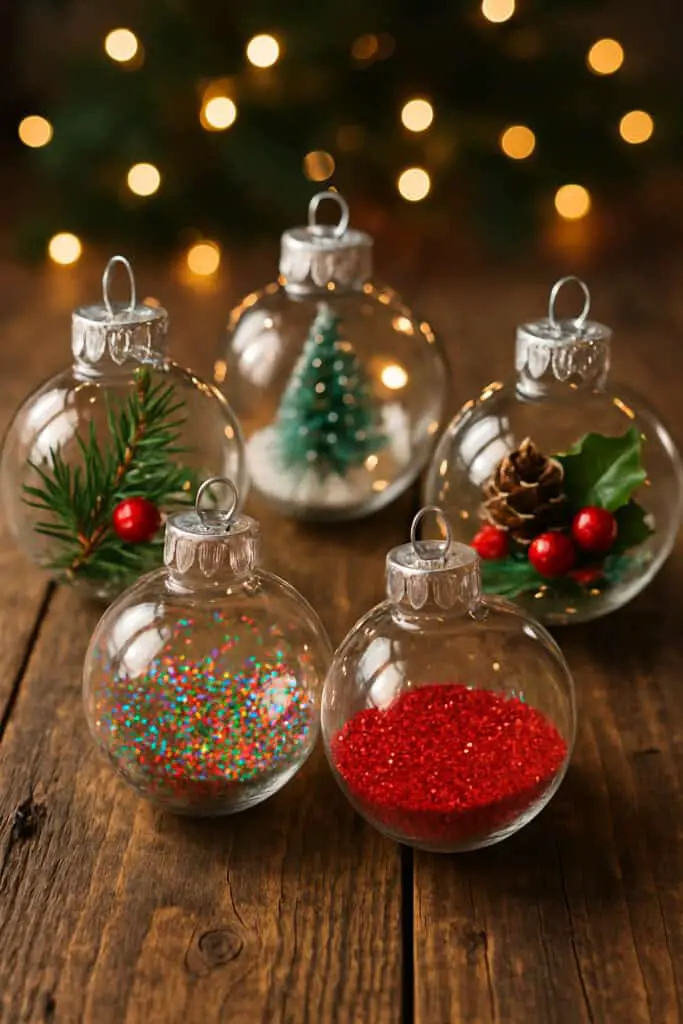
Clear ball ornaments are a fun way to add a personal touch to your Christmas tree. These ornaments are versatile and can be filled with various materials to match your holiday theme.
In the image, you can see several clear ornaments filled with colorful decorations. One features a tiny green tree, while another has shiny red glitter. There’s also a festive mix of pine branches and berries, giving a cozy feel.
Making these ornaments is simple. Start with clear plastic or glass balls, then choose your fillings. You can use glitter, faux snow, or even small ornaments. Just open the top, fill it up, and close it back. Hang them on your tree for a unique look!
Creative Filler Ideas
- Natural & Rustic: Tiny pinecones, dried flower petals, birch bark strips, or moss.
- Sparkly & Festive: Coarse glitter, colorful sequins, faux snow, or shredded tinsel.
- Sweet & Sentimental: Rolled-up strips from a wedding invitation or sheet music, sand from a vacation, or a baby’s hospital bracelet.
Cozy Felt And Fabric Ornaments
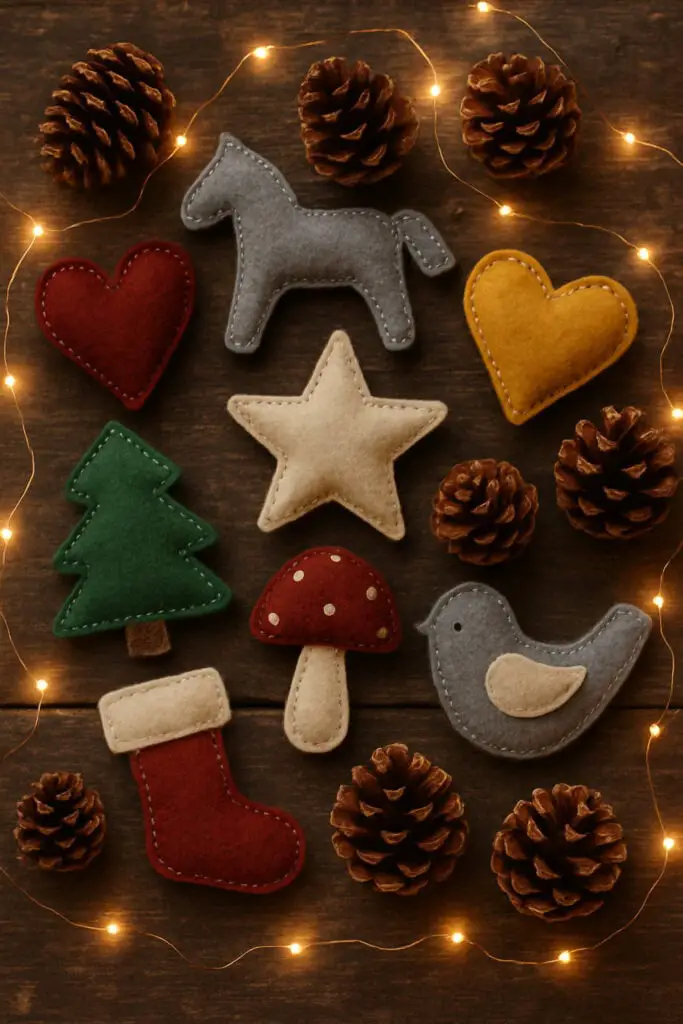
Felt and fabric ornaments bring a warm, handmade touch to your Christmas tree. The image showcases a delightful assortment of ornaments, including a horse, heart, tree, star, mushroom, bird, and a festive stocking. Each piece is crafted from soft felt, making them both charming and inviting.
The colors are rich and varied, with deep greens, reds, and yellows that pop against the wooden background. Pinecones and twinkling lights add to the cozy feel, creating a perfect holiday scene. These ornaments are easy to make and can be personalized to fit your style.
Gather some felt, scissors, and a needle and thread to start your own creations. You can even involve the kids for a fun family activity. Hang these ornaments on your tree, or use them as gift toppers for a personal touch. They’re sure to bring smiles and warmth to your holiday celebrations!
Simple Steps to Your First Felt Ornament
- Cut Your Shapes: Find a simple template (like a star or heart), trace it onto felt twice, and cut out the two identical pieces.
- Add Details: Before sewing, stitch on button eyes, embroider a smile, or add other small felt decorations.
- Stitch and Stuff: Stitch around the edge with embroidery floss, leaving a small gap. Gently push a small amount of stuffing into the ornament.
- Finish and Hang: Stitch the gap closed and create a loop with your thread at the top to hang it.
Delicate Folded Paper Ornaments
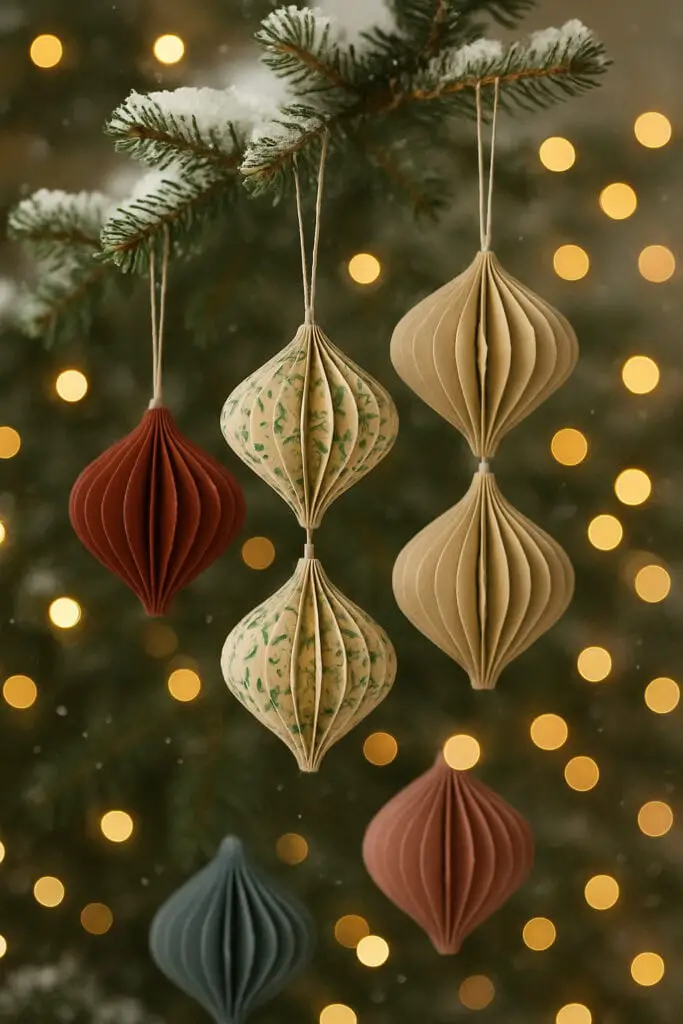
These delicate folded paper ornaments are a charming addition to any Christmas tree. Their unique shapes and soft colors create a warm and inviting look. Each ornament hangs gracefully from the branches, catching the light beautifully.
The ornaments feature a variety of designs, including rich reds, soft greens, and subtle patterns. This mix of colors adds depth and character to your holiday decor. The layered folds give them a three-dimensional feel, making them stand out among traditional ornaments.
Making these ornaments is a fun and easy project. All you need is some colorful paper, scissors, and a bit of string. Simply cut the paper into strips, fold them in a concertina style, and then glue the ends together. Hang them up and watch as they bring a festive spirit to your home!
Types of Paper to Use
- Scrapbooking Paper: Comes in endless colors and patterns, and is the perfect weight.
- Metallic Cardstock: Adds a beautiful, festive shimmer.
- Sheet Music or Old Book Pages: Lends a wonderful vintage, nostalgic feel.
- Origami Paper: Thin, easy to fold, and comes in beautiful, traditional patterns.
Sparkling Diy Glitter Ornaments
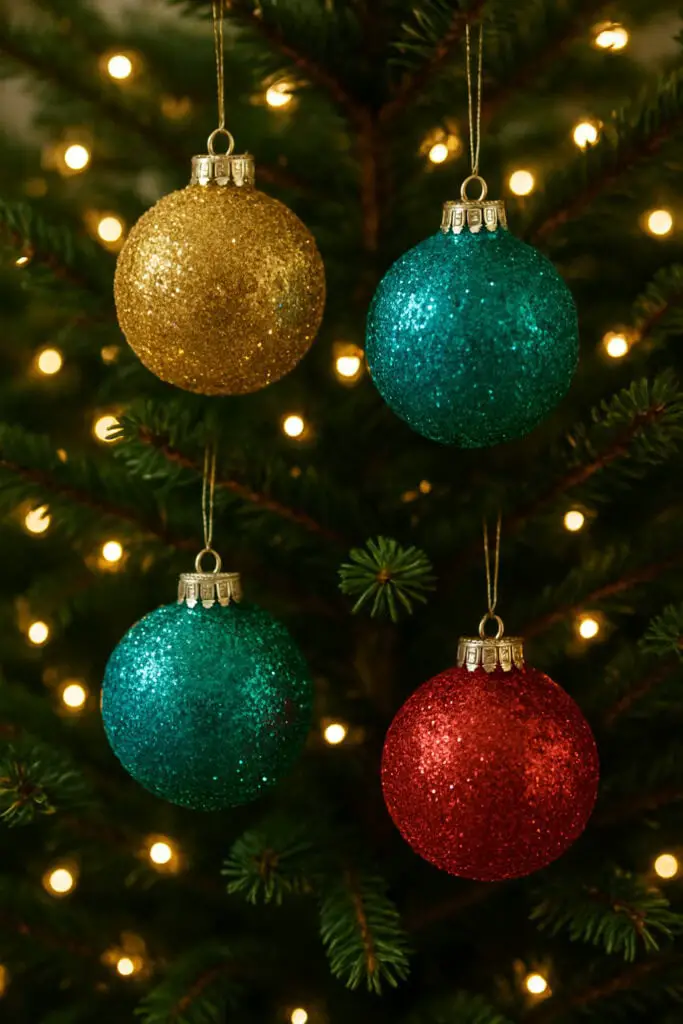
Glitter ornaments bring a festive sparkle to your Christmas tree. The image shows a delightful arrangement of four glittery ornaments hanging from a lush green tree. Each ornament shines brightly, showcasing vibrant colors like gold, teal, and red. The twinkling lights in the background add to the cheerful atmosphere.
Making these ornaments is simple and fun! Start with clear plastic or glass baubles. Fill them with glitter in your favorite colors. You can use a funnel to make this easier. Once filled, shake the bauble to distribute the glitter evenly. Seal the top and hang them on your tree.
These ornaments not only look stunning, but they also make great gifts. You can personalize them by adding names or dates. This way, each ornament tells a story and adds a special touch to your holiday decor.
The Secret to Making Glitter Stick
- Choose Your Adhesive: Use a clear liquid floor polish or a water-based polyurethane like Polycrylic.
- Coat the Inside: Pour a small amount of the liquid into your clear ornament and swirl it around to completely coat the inner surface.
- Drain the Excess: Turn the ornament upside down over a cup and let all the extra liquid drain out.
- Add Glitter & Shake: Use a funnel to pour in fine glitter, then cover the opening and shake until the inside is fully coated. Let it dry completely before capping.
Scandinavian-Inspired Salt Dough Ornaments
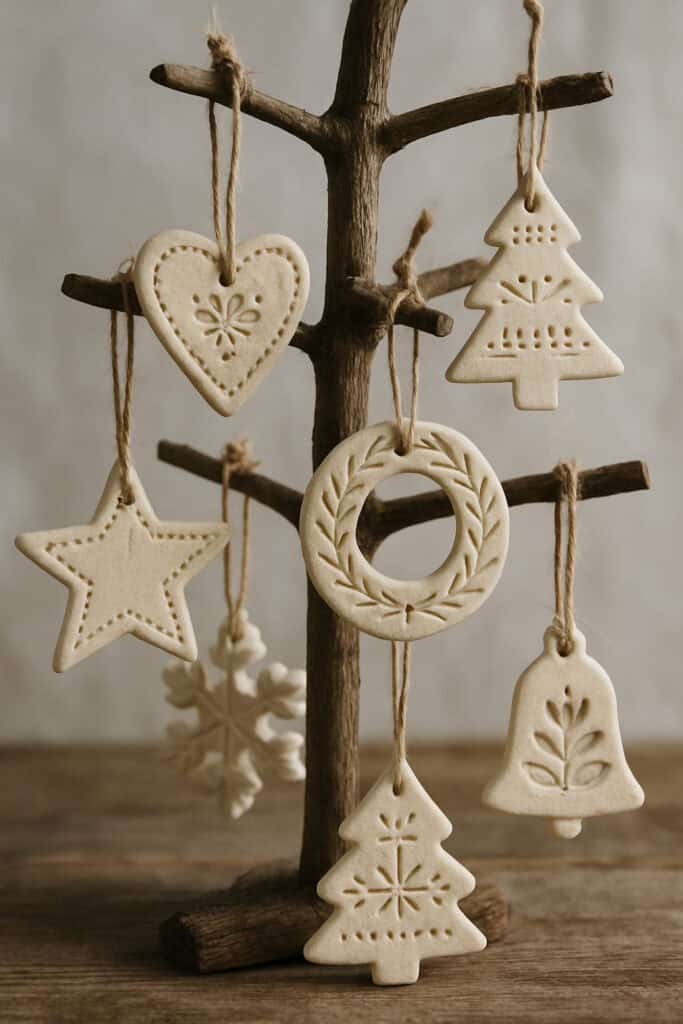
These Scandinavian-inspired salt dough ornaments are a charming addition to your holiday decor. The image showcases a delightful assortment of ornaments hanging from a simple wooden tree. Each piece features unique shapes like hearts, stars, and Christmas trees, all adorned with lovely patterns.
Making these ornaments is a fun and easy project. To create your own, you’ll need flour, salt, and water. Mix the ingredients to form a dough, roll it out, and use cookie cutters to shape your ornaments. After baking them until hard, you can leave them plain or paint them for a pop of color.
These ornaments not only look beautiful but also carry a personal touch. Hang them on your tree or use them as gift tags for a special touch. They’re a wonderful way to bring a bit of Scandinavian charm into your home this holiday season!
Tips for a Perfect Finish
- The Classic Recipe: Mix 4 cups of all-purpose flour, 1 cup of table salt, and 1 ½ cups of warm water. Knead until smooth.
- Poke Before You Bake: Use a straw or a skewer to poke a hole for the hanging string before you put the ornaments in the oven.
- Bake Low and Slow: Bake at around 200°F / 95°C for 2-3 hours until completely hard. This prevents them from puffing up.
- Seal Your Creation: After cooling, apply a coat of clear varnish or Mod Podge to protect them from moisture.
Upcycled Mason Jar Lid Ornaments
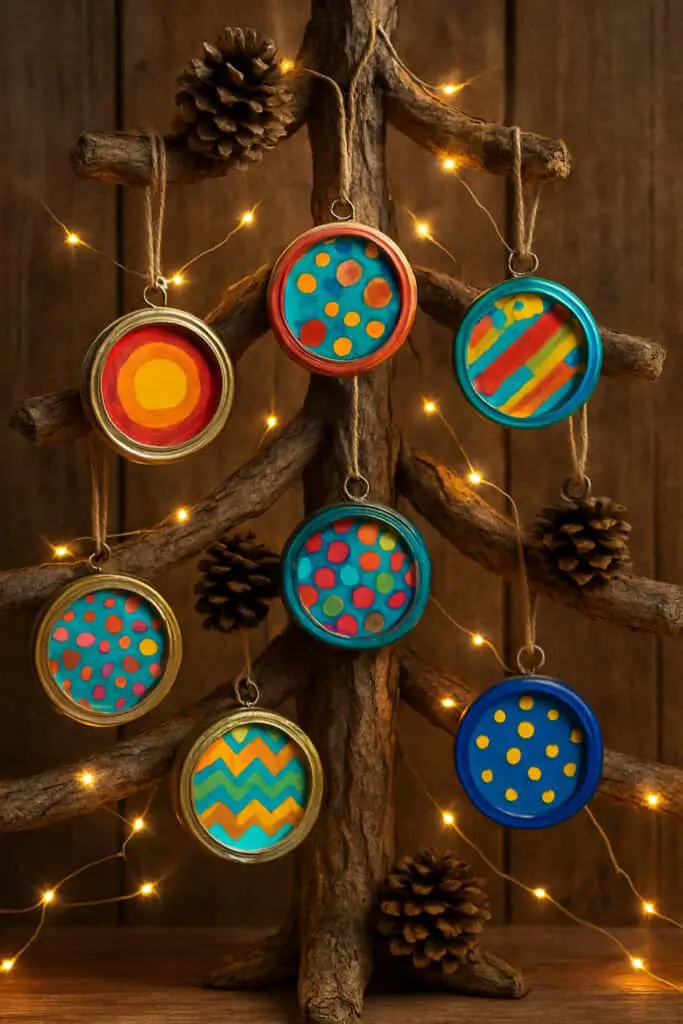
These upcycled mason jar lid ornaments are a fun and creative way to add a personal touch to your holiday decor. Each lid is transformed into a colorful ornament, showcasing vibrant patterns and designs. The bright colors and playful shapes make them stand out on any tree.
To make these ornaments, gather some old mason jar lids, paint, and twine. Start by painting the inside of the lids with your favorite colors. You can use dots, stripes, or any design that inspires you. Once dry, attach a piece of twine to hang them up. It’s a simple project that brings joy and creativity to your holiday season.
These ornaments not only look great, but they also promote sustainability by reusing materials you already have at home. Hang them on your tree or give them as gifts to friends and family. Everyone will appreciate the thought and effort you put into making these unique decorations.
Creative Ideas Beyond Paint
- Miniature Shadow Box: Glue the flat disk to the back of the ring and create a tiny scene inside with bottle brush trees and faux snow.
- Fabric-Lined Coziness: Trace the disk onto a piece of festive plaid fabric and glue it inside for an instant pop of texture.
- Chalkboard Tags: Paint the disk with chalkboard paint and use a chalk marker to write names or the year.
Whimsical Gnome Ornaments
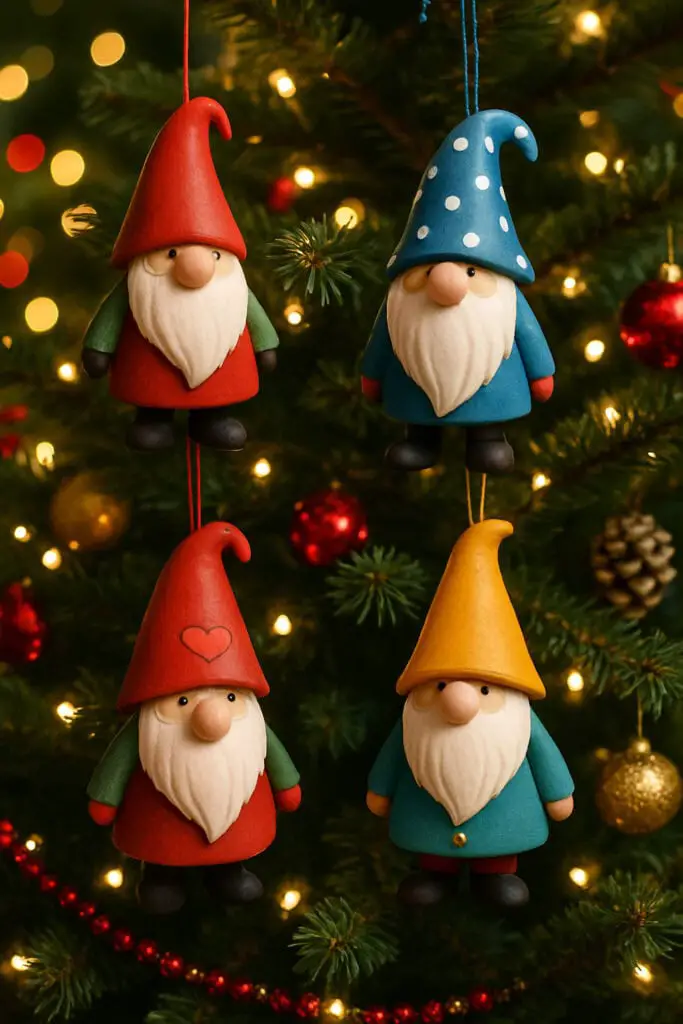
These charming gnome ornaments add a playful touch to your holiday decor. Each gnome sports a colorful hat and a fluffy beard, making them a delightful addition to any Christmas tree.
The gnomes come in various colors, like red, blue, and yellow, with cute details like polka dots and hearts. Their cheerful expressions bring a sense of joy and whimsy to your festive setup.
Making these ornaments is a fun DIY project. You can use simple materials like felt, paint, and glue. Gather your supplies, and let your creativity shine as you design your own unique gnomes!
Hang these gnome ornaments on your tree or gift them to friends and family. They’re sure to bring smiles and warmth to your holiday celebrations.
Anatomy of a No-Sew Gnome
- The Hat: A cone shape made from a piece of felt, secured with a hot glue gun.
- The Beard: A small piece of white faux fur or unraveled thick yarn.
- The Nose: A single wooden bead or a flesh-toned pom-pom.
- Assembly: Simply hot glue the beard to your base (like a wine cork or wood bead), then glue the hat over the top of the beard, and finally, glue the nose so it peeks out from under the hat’s brim.
Personalized Picture Frame Ornaments
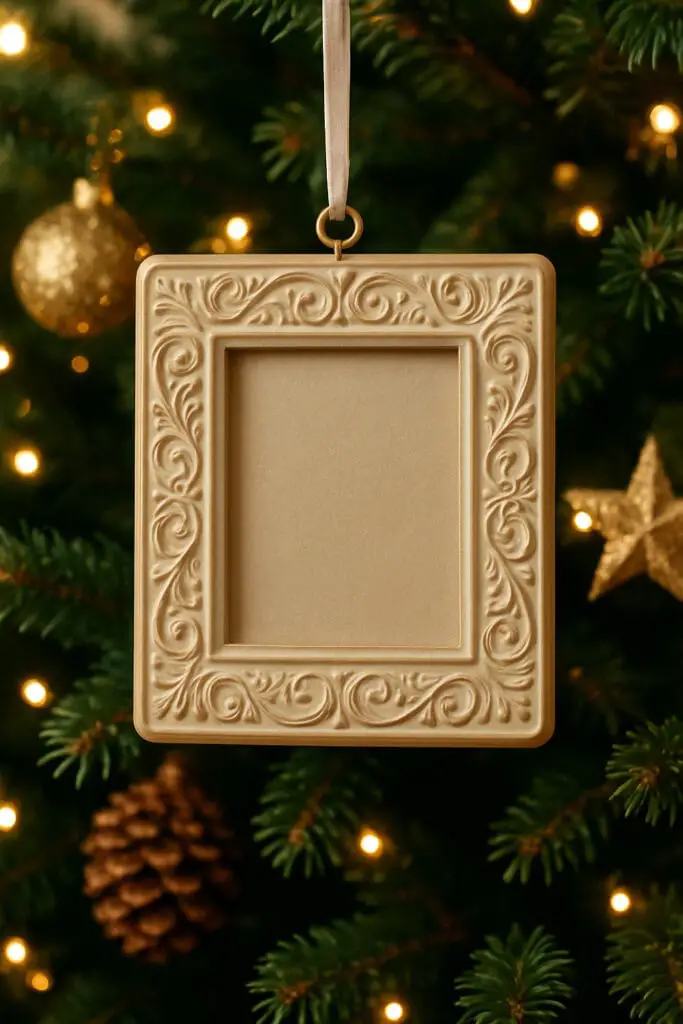
Personalized picture frame ornaments are a fantastic way to add a personal touch to your Christmas tree. The image shows a beautifully designed frame, ready to hold a cherished memory. This ornament not only looks great but also tells a story.
Making these ornaments is simple and fun. Start by selecting a frame that matches your style. You can find them in various colors and designs, like the elegant gold one in the image. Once you have your frame, choose a favorite photo to insert. It could be a family portrait, a snapshot from a holiday gathering, or even a picture of your pet!
After placing the photo inside, hang the frame on your tree using a ribbon or string. This adds a special touch to your decorations and makes your tree feel more like home. Plus, every time you see the ornament, it will bring back warm memories.
These personalized ornaments also make great gifts. Consider creating one for friends or family members. They’ll appreciate the thoughtfulness and the chance to display their favorite moments during the holiday season.
Ideas for What to Frame
- Yearly School Photos: Create a new ornament each year to watch your children grow up on the tree.
- Ultrasound Pictures: A perfect way to celebrate a new arrival for their very first Christmas.
- Ticket Stubs: Commemorate a special concert, movie, or trip you took together during the year.
- A Snippet of Handwriting: Frame a piece of a loved one’s handwriting, like “Love, Grandma,” from an old card.
Conclusion – DIY Christmas Ornaments
Creating something with your own hands is one of the most rewarding parts of the holiday season. Each of these DIY ornament ideas offers a chance to slow down, get creative, and fill your home with decorations that are infused with love and personality. Whether you craft a few rustic wood slices or a whole family of whimsical gnomes, we hope you feel inspired to make your tree a beautiful reflection of your unique story this year. For a constant stream of holiday craft ideas and DIY home decor inspiration, be sure to follow my creative journey over on Pinterest! You can find me at: https://www.pinterest.com/woodworkingstreet/